Homemade Tallow

I was lucky enough to buy some grass-fed beef fat from a local farmer.  I blogged about meeting her here.

GFST5

I decided that I was going to render this fat down so that I had some homemade tallow to use in cooking.

Tallow is the fat rendered from grazing animals (ruminants) like sheep or cows.

When the fat comes from grass-fed animals it has a very healthy fat profile with almost a perfect omega-3 to omega-6 ratio (between 1:1 and 1:3).  It also contains conjugated linoleic acid (CLA) which helps to reduce inflammation and promotes healing.  It is also a rich source of the important fat-soluble vitamins A, D, E and K.

All these healthy fats and vitamins mean that despite what we have been told in the past, grass-fed tallow is actually a heart-healthy cooking fat.  In addition, the main monounsaturated fat that is present in beef tallow is palmitoleic acid, which is highly antiviral and antibacterial.

Beef tallow is approximately 55% saturated fat and 40% monunsaturated fats, both of which are very heat stable and highly resistant to oxidation.  They do not easily produce harmful free radicals in the way that liquid vegetable oils do when heated.  This means that it is ideal for high heat cooking such as roasting or frying, and it can be stored at room temperature for long periods of time.

See this article for a run down of the fatty acid profile of grass-fed beef tallow.

Tallow is solid at room temperature, and has a melting point around 110F.

The flavour of tallow will vary depending on which animal the fat comes from.  If the fat comes from cows (as my fat did), it will have a beefy taste.  When the fat comes from sheep, it will have a more lamby taste that some people may find unpleasant unless they love the flavour of lamb (as I happen to).

It can take a while to get used to the flavour of tallow in your food, especially if you are used to using a neutral flavoured fat or oil.  My housemates found this a little difficult at first.  I love the flavour however, and I barely notice it now.

Of course tallow is most suited to cooking the meat of the animal that it comes from (beef for beef, lamb for lamb), but there is no reason why you cannot use it for cooking almost everything – I have even used it for making pastry dough in the past!  I also use it for roasting and sauteeing veggies, and even for deep frying.  Years back, before the “war on fat” and animal fats in general becoming demonized, most English Fish and Chip shops used beef tallow to fry their fish.  People who remember those days will tell you that the texture and flavour of the fish and chips has suffered with the switch to vegetable oils (and fish and chips has become much more unhealthy as a result too!)  And certainly tallow makes some of the best fries and roasted root vegetables…

While there are places where you can buy grass-fed beef or lamb tallow (butchers that stock grass-fed beef are a good source), it is very easy to make at home, and it costs substantially less to do so.

The first thing you need to do when making your own tallow is to find a source of grass-fed beef or lamb fat.  As I said, I purchased mine from Rachel at Trails End Beef.  Try asking at butchers who stock grass-fed meats.  Ask at farmers markets.   Google “Grass-fed beef” and find a supplier in your area.  Any beef or lamb fat can be rendered down, but the suet or “leaf fat” that surrounds the kidneys is best.  You can also trim off any fat that is on your grass-fed beef and save it to render down, or drain off and save the fat naturally drains off your grass-fed meat.

When I purchased my beef fat (mine was suet – the fat that surrounds the kidneys but you can use fat from anywhere in the animal), mine was chopped up into tiny pieces.  If your fat is in one solid lump however, you need to chop it up.

GFST1

You can do this using a knife (takes time), you could put it in your food processor, or if you have a meat grinder, run it through that.  And if you are purchasing it from a butcher, why not ask them to grind it up for you…  most are more than happy to do so.

The smaller you chop your fat, the greater the yield of tallow…  so get that as small as you can.

You also need to heat the fat as slowly and evenly as possible.  This also increases the yield.

My preference is to use a slow cooker, set on low, to do this as it warms it very gently.  This takes a long time – another reason why I prefer to use my slow cooker – I don’t have to stand over a pot on the stove, and I can just let the slow cooker take care of it.

The tallow is ready once all the fat has melted.  There will be some small floating bits which can be filtered out.

I strain my tallow through paper towel set in a sieve.

And then I store it in mason jars.  Typically, I have one jar in use kept at room temperature, and I store any extra jars in the fridge until I am ready to use them.

As far as yield goes, I find that 1lb of suet will make 1 pint of tallow.

How to render beef tallow

  • Grass fed beef fat.

If your fat is in one large piece, you will need to chop it up and trim off any bits of meat, blood and cartillage including the membrane that surrounds it.

Once trimmed, chop the fat into tiny pieces.  You can use a knife or run it through a meat grinder.  You can also use a food processor.  This is much easier if your fat is very cold.

GFST2

Place the fat into a large stockpot or slow cooker and use a very low heat to melt the fat.  This will take several hours.  Check the fat occasionally, and give it a stir.

GFST3

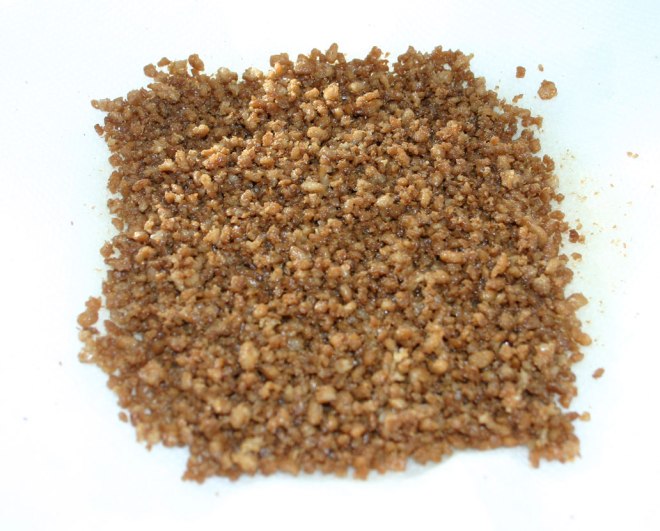
The fat is ready when it is clear, and there are small crispy bits floating at the top.

GFST4

Strain the fat through cheesecloth or paper towel to remove all the floating bits.

GFST6

Pour into jars and allow to cool and harden.

GFST7

Tallow can be stored at room temperature for a long time, but for long-term storage it is best to keep it in the fridge.

GFST5

Use your tallow for roasting, frying or in any recipes that call for shortening or lard.

More information on beef tallow can be found here.

Shared at: Wildcrafting Wednesday, Waste Not Want Not Wednesday, Homestead Bloghop, Fat Tuesday, The Homeacre Hop, Real Food Friday, Old Fashioned Friday, Simple Life Sunday, Simply Natural Saturday, The Art of Homemaking Mondays

How to thaw a frozen chicken quickly and safely

I am sure we have all been there – it gets to mid-afternoon and we suddenly realize that the whole chicken we were planning on roasting for dinner is still in the freezer.

So what are you going to do?

You could plan on cooking something else for dinner (assuming that you have some other protein that is not frozen), or you could decide to go out to eat, or you could run to the grocery store for a rotisserie chicken.

Or you could use the one safe way of quickly thawing a frozen chicken.

That is what I am going to show you today.  Simply because last Sunday I forgot to get the chicken out of the freezer….

chixdef1

All you do is take that bird and remove it from any packaging.

Then you place it in a large bowl (a large pan/stockpot would work too), and place that in the sink.

Turn on the cold tap and let the bowl fill with water.  Then turn the flow down until it is just a dribble.  Let the water constantly run into the bowl and overflow.  Make sure the drain is not plugged or you will get a flood!

The constantly running cold water keeps the chicken at a safe temperature.  It may not be the most environmentally friendly (the constant running water), but it is the safest if you need to do it quickly.  And by turning the flow down to the lowest you can without actually turning it off, you are minimizing how much water will be used.  This method works better than some other recommended ones where you don’t have the tap running and you change the entire bowl of water every hour as the constant flow stops the frozen meat from chilling the cold water too much.

Leave the chicken in that cold water until it is totally thawed.  It will take around 30 minutes per lb, but may take longer.   A 4lb chicken could take anything up to 2 hours to defrost, but that is better than it taking 10-12 hours in the refrigerator!  Just keep checking it.

This method does mean that the meat absorbs some water, so if that is a concern, simply leave it in the packaging and place it in the water.  I find that it takes longer to defrost in the packaging though – presumably because the cold water cannot get inside the chicken to defrost it from the inside.  Also, removing the packaging means that you can check inside the chicken for ice.

NEVER try to use warm or hot water to speed up the thawing process, it can lead to bacterial growth and potential food-poisoning.  And NEVER attempt to defrost a chicken at room temperature either.

This method is safe because it keeps the chicken at a cool enough temperature that there will be little to no bacterial growth.

Please note, this is only a safe way to defrost a chicken that will be cooked immediately after thawing.  Please do not try to put the chicken back in the fridge (or freezer!) if you use this method!

This method will work with all forms of poultry (even turkeys although they will take ages to thaw!  Estimate 30-40 minutes per lb as per the chicken).  If you are using frozen chicken portions, I would recommend that you place them in a sealed ziplock bag as they will absorb far more water than a whole chicken will and that can lead to them getting soggy.

This method also works for fish, shrimp and other meats including burgers and steaks.  Just make sure that the small items are sealed in a ziplock bag so that they do not absorb too much water.  Fish and shrimp will defrost especially fast using this method.  I often just dump frozen shrimp in a colander and let the cold water run over them while I am removing any shells…  they defrost in minutes this way.

Yes you could use a microwave, but I personally do not like thawing anything in a microwave.  It has nothing to do with the safety, and everything to to with the risk of partially cooking the foods as microwaves do not heat evenly.  Any hots spots will cause the chicken to be cooked in that area, which will result in overcooking (and dryness) when I put it in the oven.

Shared at Full Plate Thursday 5-8-14

Shared at Thrifty Thursday week 59


How to cook spaghetti squash

Spaghetti squash is almost a staple of the paleo diet and the AIP protocol…  it forms a low-carb, gluten-free, tasty substitute for pasta, and we eat it frequently.  This is a hard-shelled winter squash who’s flesh separates into strands once cooked.

This is how I cook my spaghetti squash:

Take your squash and cut them  in half length-wise.  Scoop out all the seeds (save them to roast as a pumpkin seed substitute if you are not strict AIP – they are a stage 2 reintroduction).  Place the squash, cut-side up on a baking sheet.  I find that 2 large squash will feed the 6 of us, but if they are on the smaller side I need 3 of them…  in this case, these were quite large so I only used 2.

spagsquash2

Some recipes will tell you to put them cut-side down – I prefer to put them cut-side up as I find they stay drier and are less soggy that way.  The cut flesh also tends to caramelize slightly this way as well, which adds more flavour.

Season well with salt and rub with a little coconut oil (or any other fat you prefer) and slide into a pre-heated 190°C/375°F oven and roast for aprox. 1 hour until the flesh is tender and will shred easily with a fork.

Allow the squash to rest for a few minutes until it is a little cooler – this makes it easier to handle.  If you cannot wait, you can hold the squash with a cloth or some oven-mitts however.

spagsquash3

Use the fork to pull the squash flesh into shreds

Place the squash in a bowl and add some extra fat – melted bacon fat or lard tastes wonderful, but you can also use olive oil as it is not being cooked any further.  And if you eat butter, it makes the squash taste wonderful – use it liberally! (Grass-fed butter is an AIP stage 2 reintroduction)

spagsquash1

Season well with salt and serve with the spaghetti sauce of your choice.  If you don’t want to use a sauce, you could simply serve it “as-is” with the fat/butter and seasonings as a side.  Me?  I like to serve it with a sauce….

spagsquashbolog3

In the example above, I served it with a ragu sauce.  Hubby chose to put parmesan over his before taking the picture .

In the picture below, I used 3 small spaghetti squash and I served each of us one half with paleo meatballs in a tomato sauce.  I did not pull the strands of squash out in this case and let everyone shred their own squash as they ate it…  this made life MUCH easier for me as it removed one food-prep stage.

spagball2

It made for a very tasty and pretty meal and because it was all contained in the squash shell there was almost no cleanup needed.  EASY PEASY!

Now remember those squash seeds I told you to keep?  What are you going to do with them?

All winter (hard-shell) squash seeds are edible when roasted, so you are going to treat them exactly like you would treat pumpkin seeds.  Roast them in the oven using and you have a tasty, healthy snack.  Just bear in mind that seeds are an AIP stage 2 reintroduction.

squashseed3

Then again, the ragu sauce and the meatballs in tomato sauce are not 100% AIP either…  Tomatoes and other nightshades are a stage 4 reintroduction.

How to prepare herrings and sardines

Oily fish is very good for you, there is no getting away from that.  Rich in heart and brain-healthy omega3 fatty acids, they can also be a cheap source of protein.

I can buy enough herrings to feed my family for just $5.99.  It would cost me 3 times that amount to buy salmon fillets

The only downside is that the fish need cleaning and preparing, and that can be a little daunting if you don’t know how to do it.

This is how I prepare these small fish.  I will warn you now, this is a very picture-dense post as Hubby was taking pictures as I was actually gutting and preparing the fish.

This exact same method can be used for any of the smaller oily fish – I prepare sardines, sprats, pilchard, herring and mackerel this way amongst others.  Even small trout can be prepared this way and it is much easier than the traditional method of filleting.  But in this post I am using herring.

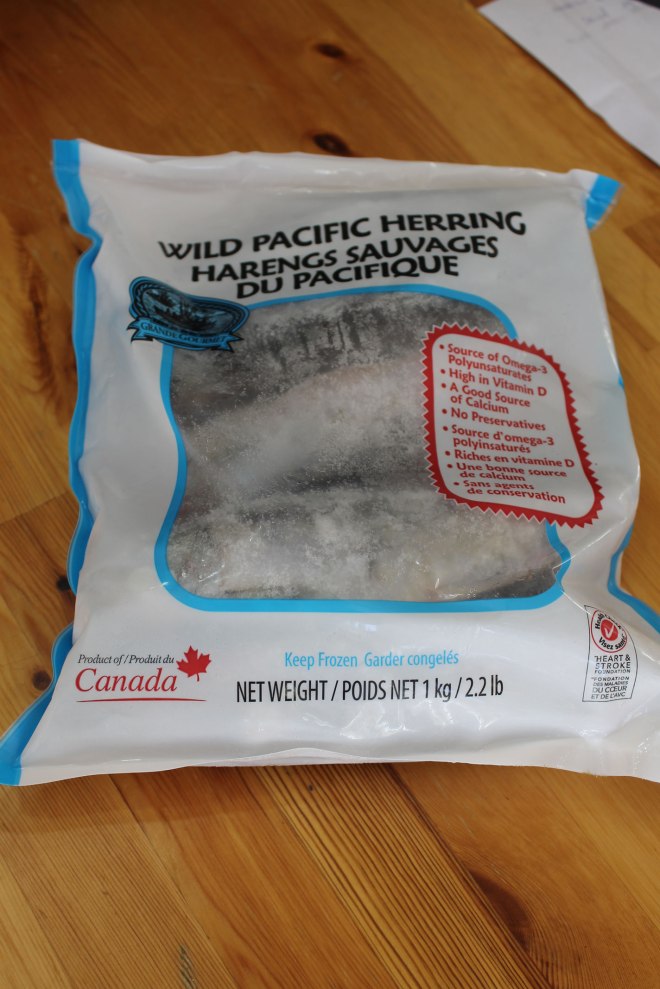
The fish were frozen when I bought them – living in land-locked Alberta, it is very hard to buy unfrozen fresh sea-fish.  And these small oily fish go bad very quickly, so it is best for me to buy them frozen.   A 1kg (2.2lb) bag costs me $5.99, and usually contains around 12 fish…  2 per person, which makes for a very satisfying meal.

herr32

So I thawed the bag of fish out by leaving it in the refrigerator overnight (never thaw fish on the counter-top at room temperature!).  If you need to do a fast thaw, you can submerge the bag into cold running water, but don’t use warm/hot water either.  I also do not recommend that you attempt to thaw fish in the microwave – it tends to cook them as it is thawing them.

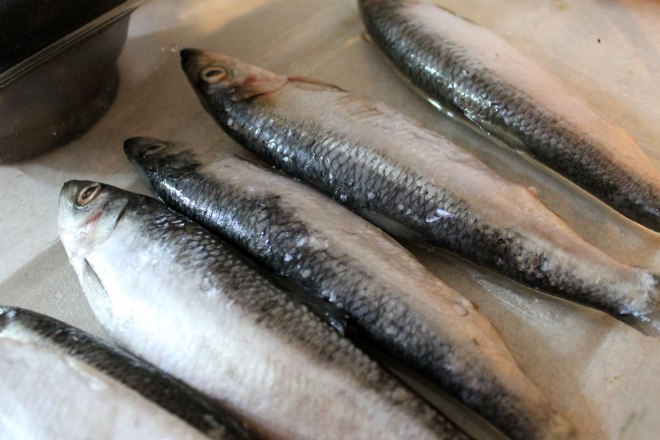
Once they are fully defrosted, take them out of the bag, discarding any liquid that is in the bag (there is nearly always some!).

herr7

Obviously, if you are using fresh fish, there is no need to go through the above 2 steps, you can jump right in to cleaning them.

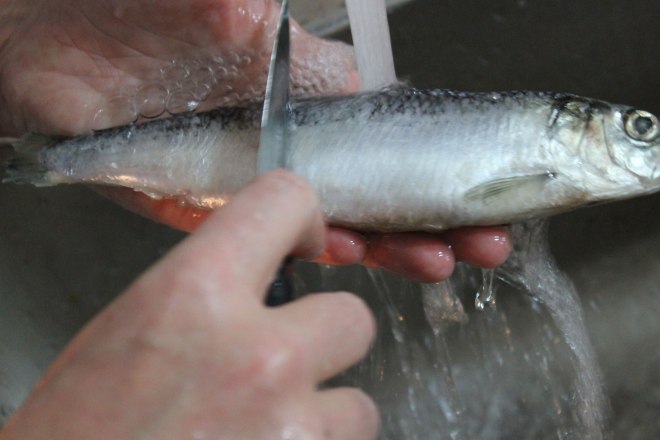
The first step is to descale them.  To do this, I use the back of a paring knife under a running tap (the non-sharp edge).  I just run the knife from tail to head (Against the grain of the scales) while the water is flowing over the fish.  Not all fish need descaling.  Herring almost always do, but mackerel don’t.

herr25

Make sure you get all the scales off – scales are not pleasant to eat!

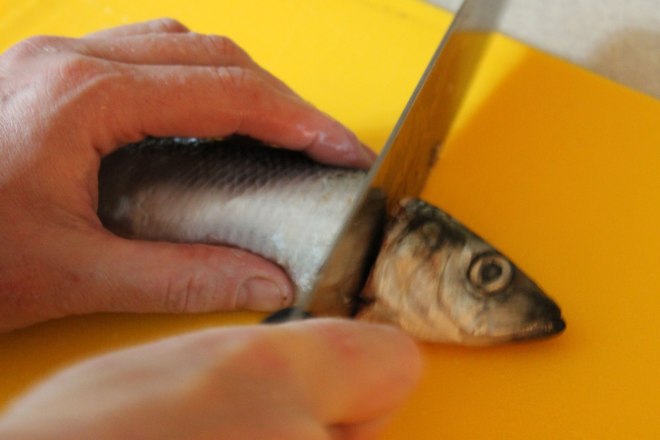
Next you need to cut the heads and tails off.  Some people like to do this after gutting the fish, I prefer to do it before as most often, a lot of the guts will come out along with the head.  Simply cut with a knife right behind the gills as close as you can because you don’t want to waste any of the flesh.

herr22

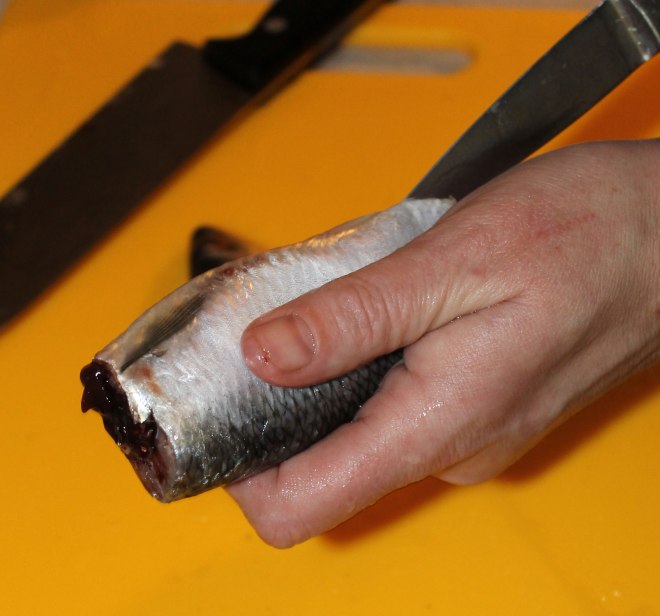
At the tail end, you simply cut close to the tail….  not so much flesh down that end to waste!  I like to use a french cooks knife for cutting heads and tails off, but I use a paring knife to actually gut the fish.

herr31

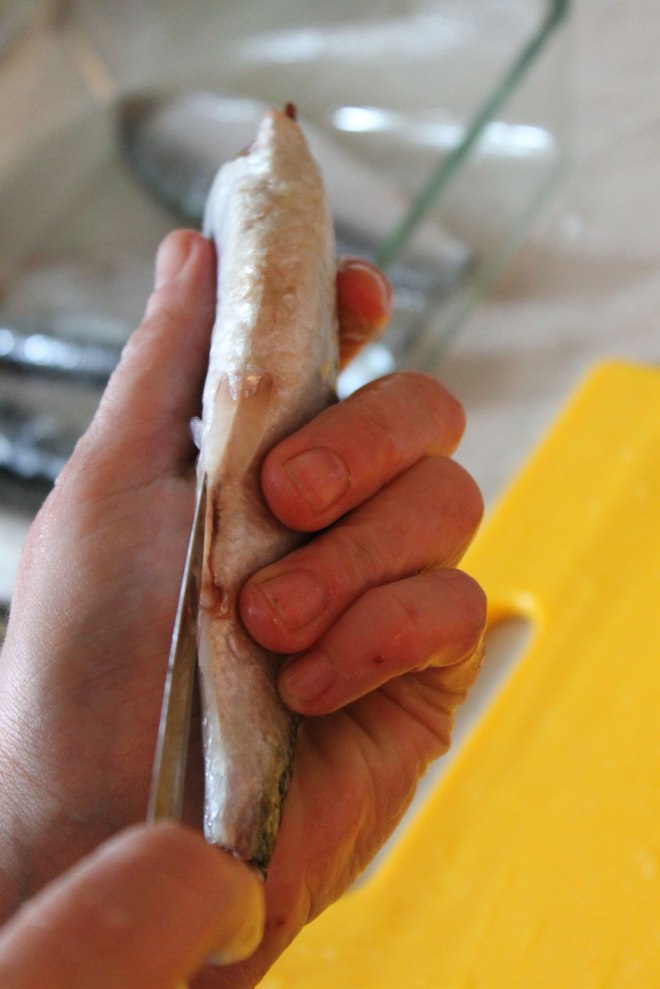
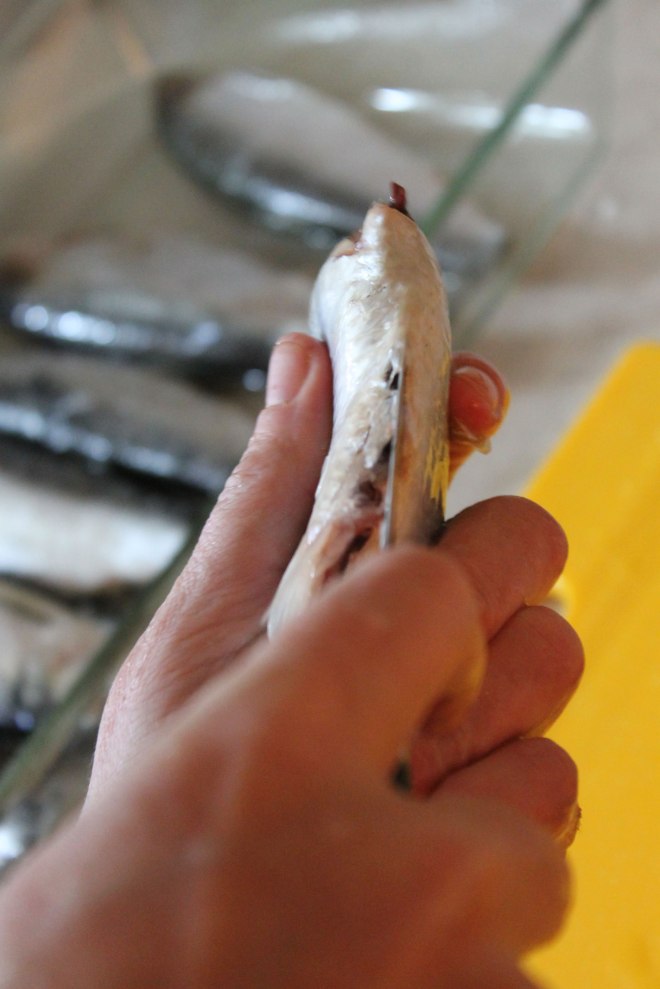
To remove the guts and open up the belly, you simply insert the point of your paring knife into the small opening on the fish’s belly and then run the knife up the underside of the fish towards the head end:

herr21

All the way up to where you cut the head off:

herr20

At this point you can remove the innards of the fish:

herr17

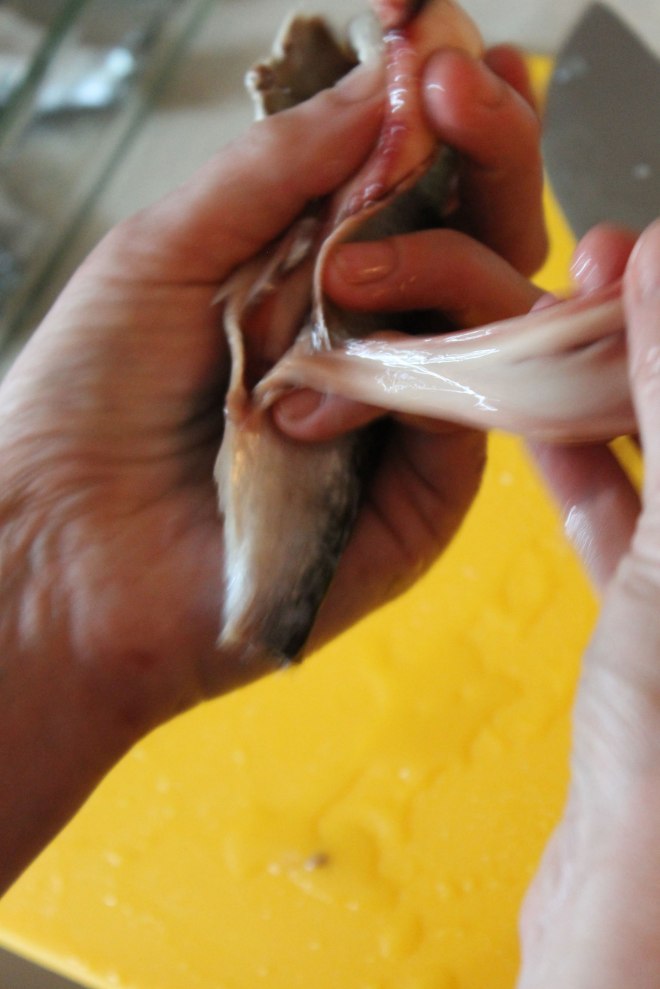
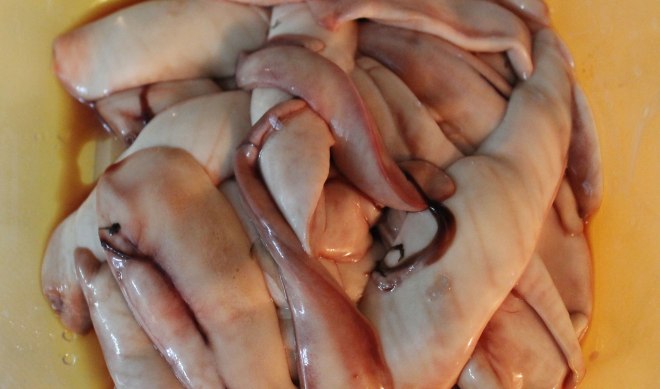
If you find any long creamy coloured sacs that look like what I am removing in the above photograph, these are the soft-roes (more properly called Milt) that are found in male fish.

herr5

Put them to one side as they are delicious when fried in a little bacon fat.

You might also find some hard roes if you have female fish (sadly all of mine were male).  Female herring tend to be larger than the males.

Hard roes look like this:

herringroe

These are the true fish roes and are again contained in long sacs.  But unlike the soft roes, they have a grainy texture as they contain the fish-eggs.  In herring, they are an orangy-red colour.  The colour can vary depending on what species of fish you are cleaning however.  Like the soft-roes, you should also set these aside as they are not only delicious, they are very good for you.

I most often find roes in herring…. but sometimes you find them in other fish as well…  no matter what species of fish you are using, the roes are all edible and should not be wasted.  If you are going to get roes in your fish it really depends on the season in which they were caught.  With frozen fish this can be a bit hit or miss as you can never be sure how long the fish has been frozen for.  But with really fresh (never frozen) fish, you will only find the soft and hard roes during the times when they are spawning.

Rinse the roe under cold running water but be gentle with them – they are very delicate!

The remaining guts should be thrown away (although I did feed a fish-head and some of the guts to my raw-food fed cat!  He enjoyed them immensely.  I tried giving the dog a fish head and he just got confused and licked it a little then wagged his tail to show willing….  It goes to show that cats are smarter than dogs!  They know when food is good for them….

By the time your fish has been gutted, you should end up with something that looks like this:

herr16

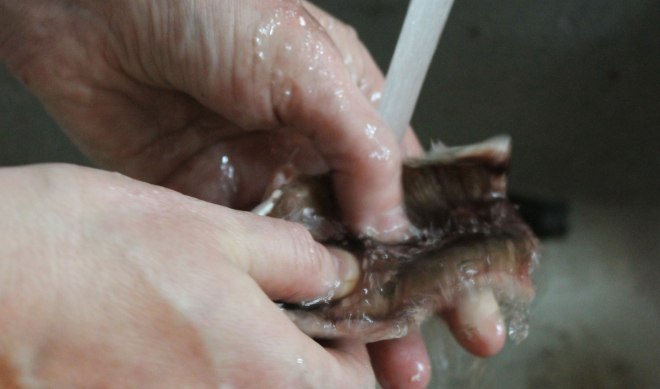
Now it is back to the sink to wash out the innards.  Make sure you rub inside well as there is a dark film lining the internal cavity.  Using a little salt on your fingers can help remove this.  Also make sure you scrape down towards the backbone to remove the blood-line (the main arteries in the fish) as these can taste bitter.  The running water will wash all this away.

herr27

If you are wanting to serve your fish whole, that is all you need to do (Actually, you don’t even need to remove the head in this case…..  I do because I am not fond of my food looking at me when it is on the plate!).  In this case, you will simply move on to how you have decided to cook your fish…..

But in the case of the meal I was making, I wanted boneless  (or as nearly boneless as I can) split fish fillets.

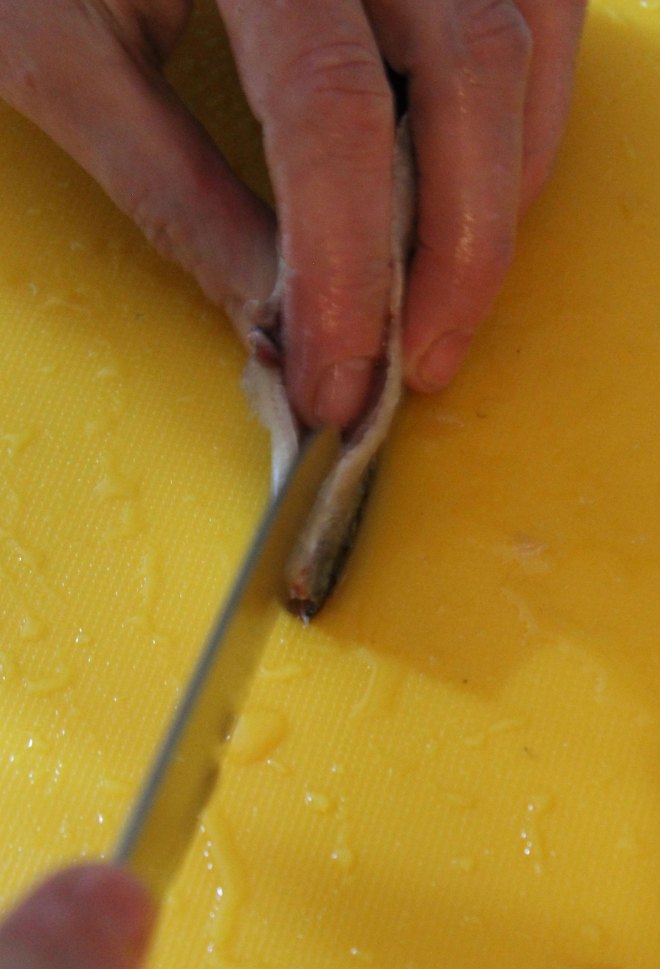
So I took my fish and I used my paring knife to slit it down from the open cavity towards the tail, cutting right down to the backbone:

herr15

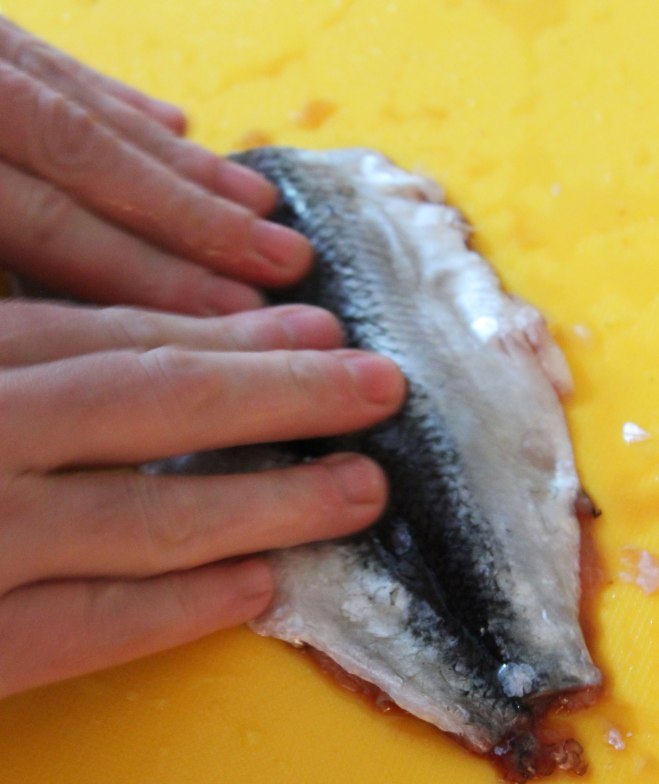
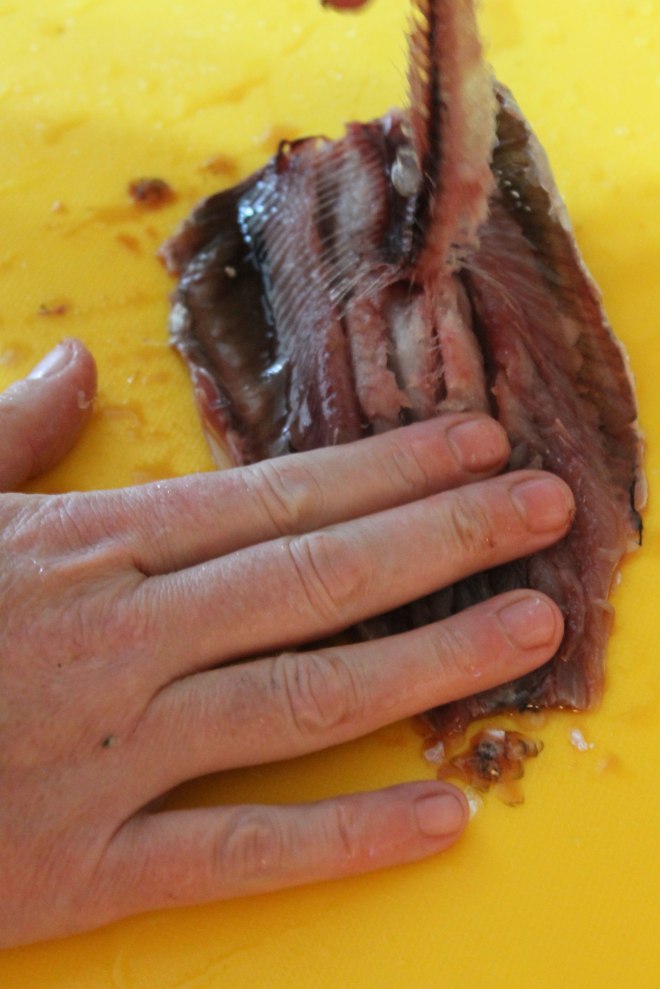
Then I inverted the fish so that it was belly-down on the cutting board and it’s stomach flaps were spread out.  Press down hard along the backbone of your fish, squashing it flat:

herr13

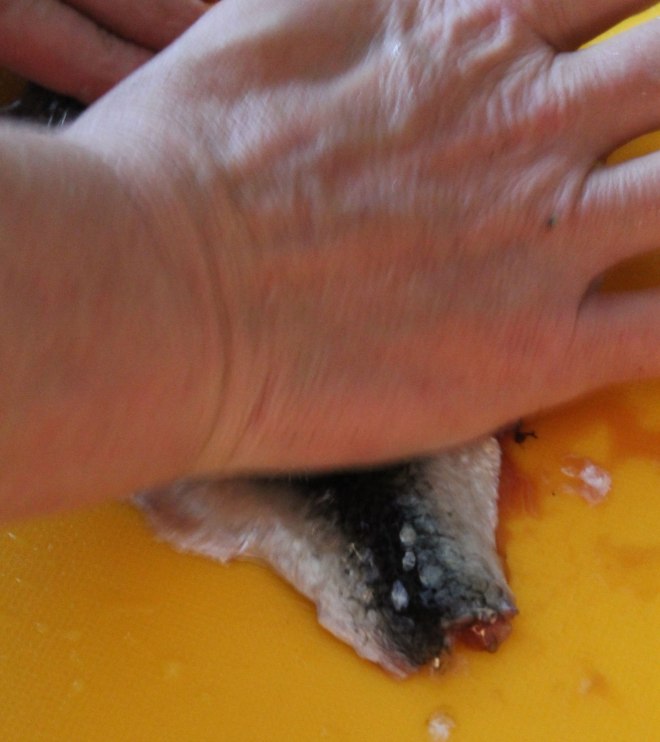
You might need to use the heel of your hand to do this:

herr14

The flatter you get your fish, the easier it will be to remove the backbone:  Get it as flat as you can! Do you see those scales on the cutting board?  I obviously didn’t de-scale this fish well enough!

herr12

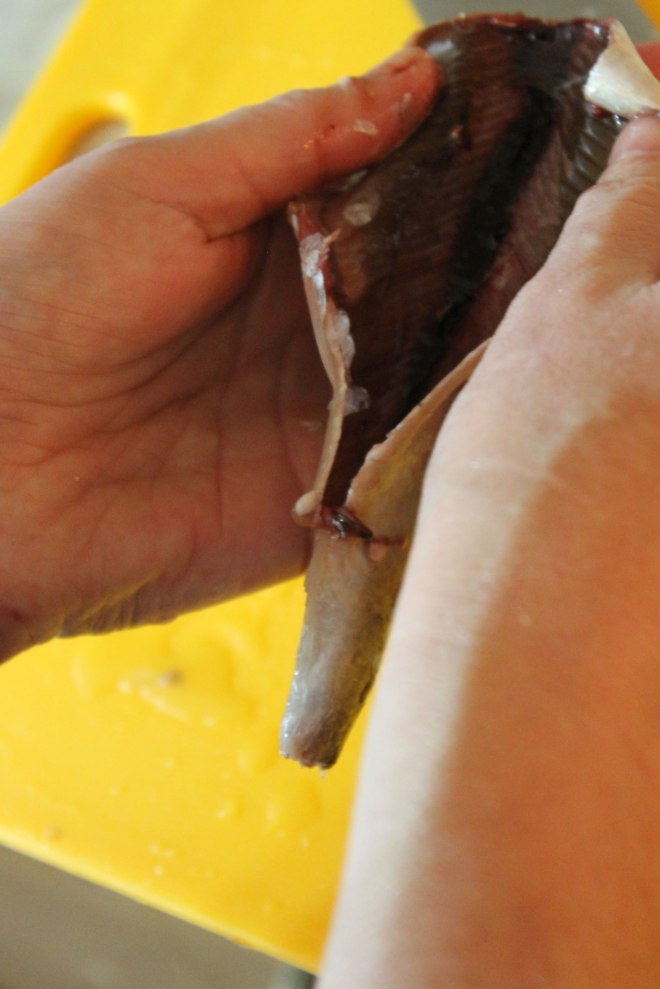
Now turn the fish over so the open side is uppermost.  Take hold of the tail end of the backbone and peel it out…  most of the ribs should come away with it.

herr11

If it does not come away easily, you didn’t squash the fish enough, so turn it back over and squish it some more!

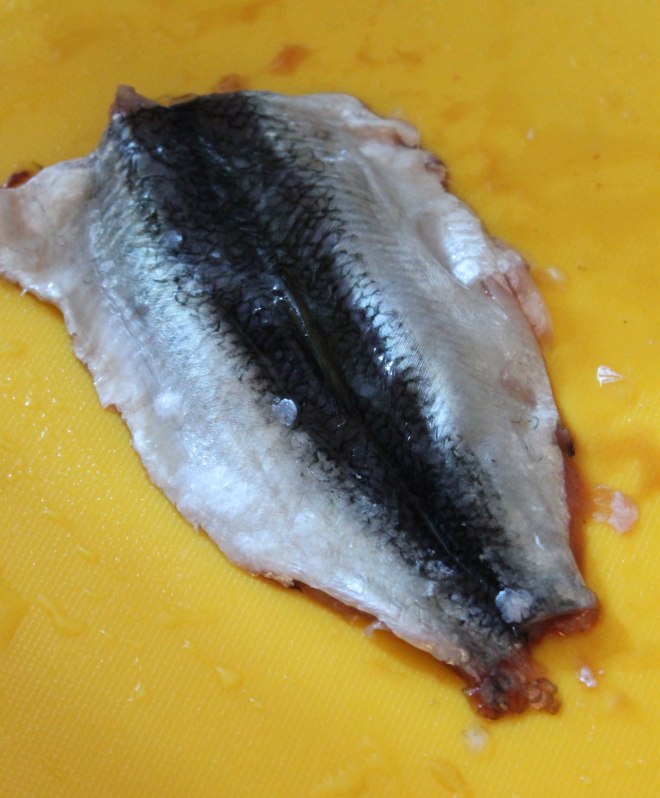
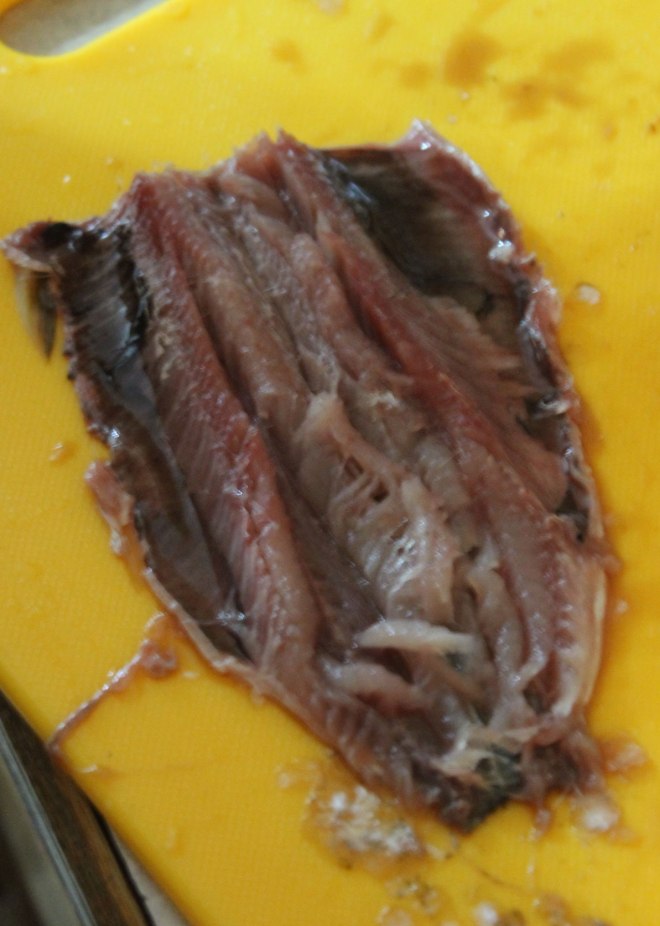
What you will end up with is something that looks a bit like this:

herr26

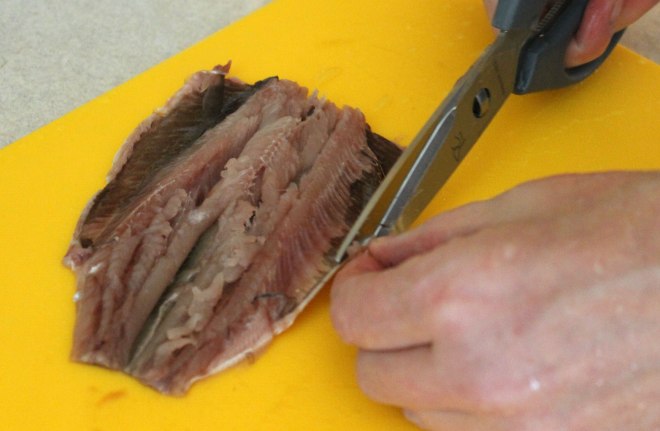
Now you just need to trim off any fins.  A pair of scissors is easiest for this.

herr6

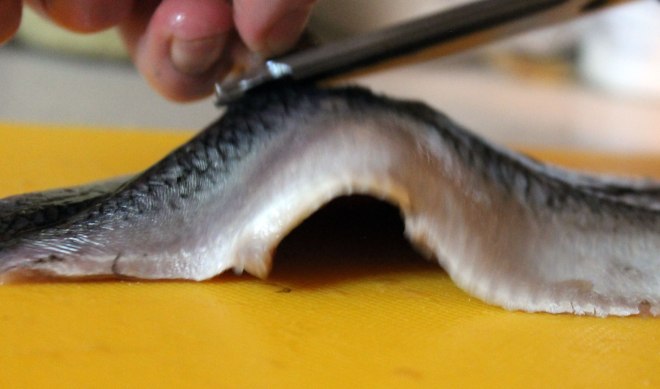
On herring, there are usually 2 sets left after you cut off the head – one set along the edges of the belly which I am removing in the picture above, and one set along the back, which I am removing in the picture below:

herr1

Give the entire fish a quick wash to make sure that there are no stray scales hanging around, and you are done!

If your fish is small, just leave it with the 2 halves attached, but if it is on the larger side, you can divide it into 2 fillets…  your choice….

Congratulations!  you have just prepared your first whole fish…..

Now cook and eat and enjoy!

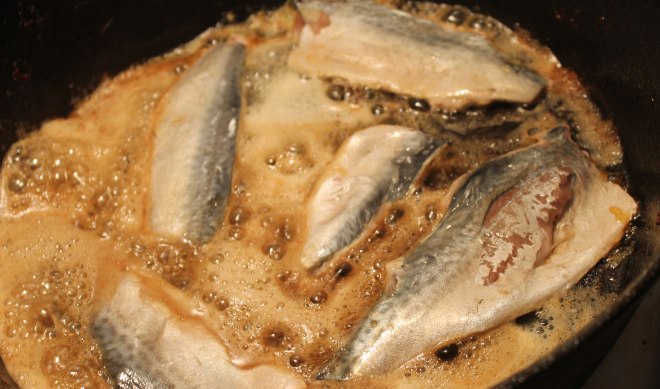
I like my fish cooked very simply.  Most often I just fry them in a little coconut oil:

mack9

The fish in the picture above are actually mackerel.  I didn’t think to take a picture of the herring that I was cooking.

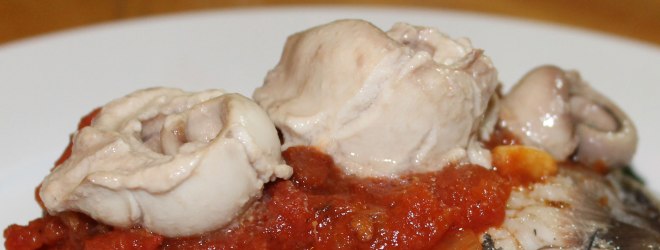
As far as the roe goes, soft roes (milt) I just briefly pan-fry in a little coconut oil.  They will curl up into a cute spiral shape and have a very creamy texture.  I serve these on top of the fish:

herr33

You could also save them and mix them into your scrambled eggs at breakfast.  That would be delicious!  But I am just not that organized.  I have considered blending them into a sauce as well…  I bet that would work well!

As far as the hard roes (or true roe) goes, I remove the membrane that surrounds the sac, and I just use them in anything that I would normally use fish eggs for (sushi, sashimi, stirred into scrambled egg).  I don’t tend to cook these, they are better raw so that you can appreciate that little “pop” and burst of fishy salty goodness as you bite into them.

I hope this post will give you the confidence to start gutting and prepping whole fish as it is really very easy if a little time-consuming.

And if your hands smell “fishy” afterwards, there is a really simple tip for getting rid of that….  just wash your hands in your stainless-steel sink and rub the surface of your hands all over the metal…  I don’t know why it works, but it does!   Sadly this will not work if you have a non-stainless-steel sink….