Kids can cook!

Today, I am not sharing a recipe, instead I am showing you some pictures of my 11 year old daughter (J) cooking her own breakfast.

JCB5

Who said kids can’t cook?

JCB11

If J can cook this, totally unsupervised at 11 yrs old, any kid can…

bacon:

JCB9

And a fried egg  – J likes hers crispy around the edges but with a set white and a runny yolk:

JCB8

OK so bacon and an egg, not the most complicated meal, but a very tasty one.

JCB2

I just love this pic of her 🙂

jcb10


Homemade Paleo/Clean-Eating Marshmallows

Who doesn’t love marshmallows?  Melted into hot chocolate, in smores or even just eaten by themselves, they are delicious.

But have you read the ingredients in the ones you buy in the grocery store?

A simple Google search revealed the following ingredients for Kraft Jet-Puffed Marshmallows:

Corn syrup, sugar, dextrose, modified corn starch, water, gelatin, tetrasodium pyrophosphate, artificial flavours, artificial colours (blue 1).

So nothing really natural about them apart from the gelatin, and you can bet that even that is over-refined and produced from cows reared on GMO grains and soy in a CAFO.

The first ingredient is Corn syrup – AKA High fructose corn syrup, known to be one of the worst sweeteners for your health.  Not only is it almost exclusively made from GMO corn, it is notoriously bad for us.  HFCS is one of the most dangerous food additives there is, contributing to fatty liver disease, weight gain and obesity, increased risk of type 2 diabetes, metabolic syndrome and elevated levels of triglycerides and “bad” (LDL) cholesterol.  And the only reason they use it is because it is cheap.

Sugar – most definitely not paleo and is known to cause blood sugar issues, dental caries, spike insulin levels and can lead to type 2 diabetes and metabolic syndrome.  And unless it specifies cane sugar (which is GMO free) it is almost certainly made from GMO sugar beets.

Dextrose (aka glucose) is a simple sugar that can spike blood glucose levels leading to an insulin surge.  This insulin surge can cause insulin resistance, metabolic syndrome and is a factor in type 2 diabetes.  In addition, it is simply empty calories that can lead to weight gain.  The other concern with dextrose is that most of it is made from GMO corn….

Modified cornstarch is literally what the name says – cornstarch that had been modified chemically to partially degrade the starch molecules.  Because the vast majority of corn grown in the US is genetically modified, this is almost certainly a GMO product.

So in the first 4 ingredients in Kraft Jet-puffed Marshmallows you have 4 GMO ingredients!  No wonder Kraft are fighting so hard to prevent GMO labeling on foods!

Water and gelatin are by themselves not much of a problem, but you can almost certainly guarantee that the gelatin comes from cattle that are reared in a CAFO and fed a diet of GMO corn and soy.  So now we have 5 ingredients out of the total of 9 that are tainted by GMO products….. It is not looking good!

Then we get to tetrasodium pyrophosphate.  I didn’t even know what this was until I typed it into Google.  According to Wikipedia, tetrasodium pyrophosphate is a colourless, transparent crystalline chemical compound with the formula Na4P2O7.  The toxicity of this chemical is twice that of table salt.  Niiiiiice!  They are putting something that is twice as toxic as salt, which they tell us to avoid at all costs, in our candy!

Then we have the artificial flavours (who knows what they are but the vast majority are made from petroleum products).

And the artificial colour (blue 1 ) is another petroleum product.  I don’t know about you, but I prefer to eat foods that do not contain any artificial additives, both flavours or colours, and I certainly don’t like to find refined petroleum (AKA crude oil) products in my food!

Reading the above, there is no way I would want to put any of those ingredients in my body (or into my kids bodies for that matter!)  Out of the total of 9 ingredients, 5 are either genetically modified or reared using genetically modified food-stuffs.  3 are petrochemical products and only 1 (the water) is a truly natural product!

So what are you to do when the kids are begging you for  marshmallows in their hot chocolate or to make smores?

Easy, you make your own using grass-fed gelatin and honey.  This recipe is not only paleo/primal, but it is also AIP friendly as long as you tolerate honey well.  And it will give you (or the kids) some gut-healing gelatin to boot!

These marshmallows do still contain sugars in the form of honey (mostly fructose with some glucose), so if you are wanting to loose weight I advise caution.  And they can still increase weight gain if you were to over-indulge.  But one or two squares a day???  a delicious treat that is actually good for you!  It should be noted that these are much less sweet than store-purchased marshmallows and do not contain the same carb-load.

I should add that this recipe was originally made and devised by my 15 yr old daughter A, who is one of the most talented young cooks that I know!

Aface1

Homemade Paleo Friendly Marshmallow

the quantity that this makes depends on how big you cut them.  It will fill a 9″ square silicone baking pan

mallow5

  • 1 cup water (split into 2 halves)
  • 3 tbsp gelatin – preferably grass-fed
  • 1 cup honey (no need to use raw honey here as you are boiling it.  But go for local honey – support local bee-keepers and businesses!)
  • ¼ tsp sea salt
  • ¼ cup tapioca flour to coat

Necessary cooking items:

  • Stand mixer (Believe me you do NOT want to whisk these by hand!)
  • candy thermometer
  • 9″ square baking pan

Grease your baking pan – I like to make these in a 9″ silicone baking pan as it makes turning the finished marshmallows out so much easier.  If you don’t have a silicone tray you will need to grease your pan and line it on the base and sides with parchment paper or you will never get these babies out.

Place ½ cup of water in your stand-mixer bowl along with the gelatin and leave to bloom for a while.

While the gelatin is softening, put the remaining ½ cup of water in a pan with the honey, vanilla and salt.  Bring the mixture to the boil over a medium heat, stirring to make sure it does not boil over.  Place your sugar thermometer in the boiling honey mixture taking care that it does not touch the base of the pan but is immersed in the boiling honey.  Continue to boil the mixture until it reaches the soft ball stage ( 115°C/240°F).  Immediately remove the pan from the heat.

Turn the stand mixer on to a low speed and slowly pour the honey mixture into the bowl.  Once all the honey is incorporated, turn the speed up to high and continue to mix until the mixture is thick, smooth and creamy and resembles marshmallow fluff.  This will take approximately 10 minutes but may take longer.   Don’t rush it!

mallow2

Turn the marshmallow mixture out into your prepared pan and smooth out the mixture as best as you can.  If you add a little oil to your hands it will stop the mixture sticking to them as you smooth it out.

Allow to chill until firmly set, then cut into cubes.

Toss each cube in tapioca flour to stop it sticking to other cubes.  And that is it…  Homemade marshmallows.

mallow7

If you prefer, you can coat your marshmallows in something other than tapioca flour to add variations to the flavour.

Suggested coatings are:

Shredded coconut – toasted or untoasted

crushed nuts – toasted or untoasted (not AIP friendly)

cocoa (not AIP friendly)

If using a coating,  you will not need the tapioca flour in the above recipe.  Place some of the coating of your choice in the pan before pouring in the marshmallow mixture, then top with more of the coating, pressing it lightly into the surface of the marshmallow.  This will make it easier to turn the set marshmallows out.

Cmall6

Once you have cut the marshmallows into cubes, toss them in yet more of your chosen coating to ensure that all sides are covered.

These ones are tossed in untoasted shredded coconut.

Cmall3

Not only are these beauties paleo, they are also AIP friendly as honey is allowed on the AIP diet in moderation (so you should be OK as long as you don’t eat the entire pan!).  They are free from all the nasty additives in commercially made marshmallows, and the gelatin

And they are delicious!

Shared at Tuesdays With a Twist #55

Shared at Tasty Tuesday

Shared at the Paleo AIP Recipe Roundtable #14

Shared at Gluten-Free Wednesday 4-30-14

Shared at Fat Tuesday April 29 2014

Shared at Mostly Homemade Monday #79

Shared at All Things Thursday, Freedom Fridays

How to make salad rolls

The other day, I posted about how I had packed salad rolls in our packed lunches – traditional rice-noodle filled ones for the kids

salad13

and veggie filled ones for A, Hubby and me.

salad2

Before anyone points it out, I know that salad rolls are not Paleo because they contain rice noodles and rice paper, they are not even particually low carb (although the veggie filled ones that Hubby and I ate were lower in carbs than the kids ones)…  but sometimes you just want a little “treat” and rice is considered the best of all the grains if you want extra carbs in your paleo diet…  Besides, I calculated that one portion of 3 of the veggie filled salad rolls only contained 35g of carbs… not bad all things considering!  Obviously the ones with the rice noodles inside them contained far more.

These salad rolls were actually made by A the day before we ate them for lunch, and they were individually wrapped in clingwrap to stop them sticking together or drying out.

These are a little fiddly to make, but well within the skill level of an older teen.  A learned to make these in her foods class at school.

And this is how she made them:

Shrimp Salad Rolls

I apologize for the ingredients being a little vague –  quantities all depends on how many rolls you want to make.  A made 18, 3 for each person.

  • Rice Paper
  • Rice vermicelli noodles
  • shrimp (cooked and peeled).  You need 3 per salad roll that you want to make
  • shredded lettuce
  • julienned vegetables (we used cucumber, carrot, green onions and red pepper)

The first step is to prepare all your ingredients…  you need to soak the rice noodles in some boiling water until they have softened.  This will take around 10 minutes.

A used this brand of noodles which I bought for less than $2 a packet from an Asian supermarket.  They contain nothing but rice flour and water.

salad29

This 1lb packet has made 2 batches of rice noodles so far and is still more than 3/4 full…

Then you need to shred the lettuce and julienne any vegetables that you are planning on using.  We used green onions, red pepper, carrots  and cucumber.  Don’t worry about exact quantities – if you don’t prepare enough veggies you can always do some more part way through.

Make sure the shrimp are thawed (if using frozen shrimp) and peeled.

Now you take your rice paper….

You want rice paper that contains no nasty ingredients.  Ours was this brand:

salad27

which I purchased from the same Asian supermarket as the rice noodles.  This brand contains only rice, water and salt.

Like the rice noodles, this 1lb pack cost less than $2 and we have used approximately half of it to make 2 batches of salad rolls.

You take your rice paper, which is a round, semi-opaque textured circle:

salad28

and you dip it into cold water until it becomes translucent and starts to soften.

salad26

Don’t let it become totally soft or it will be difficult to work with.  Remove it from the water before this happens:

salad24

and lay it out on a cutting board (a plastic one works better than a wooden/bamboo one as the rice paper tends to stick to these)

salad23

For traditional Vietnamese rice-noodle filled salad rolls, you now take your softened rice noodles and drain them from the hot water.  They should be soft but not sticky.

Place a small bundle of rice noodles towards one side of the rice paper.  Don’t be too generous, you don’t want to overfill your salad rolls.  A placed a mound no more than 1″ thick and 4″ long.

salad21

Add a small amount of shredded lettuce and some of the julienned vegetables:

salad20

And then top the rice noodles with 3 of the shrimp:

salad18

The next step is to roll the rice paper around the filling.

First you need to fold in the 2 sides:

salad16

salad17

Then starting at the end nearest the filling you begin to roll it up:

salad15

Roll it nice and firmly, but be careful not to tear the rice paper – it is very delicate!

salad4

Continue rolling until you reach the end of the rice paper and you have a nice neat roll:

salad14

Repeat with the remaining ingredients.

If planning on serving these immediately, they are now ready to be served with the dipping sauce of your choice.  If wanting them for packed lunches or to serve later in the day, I recommend that you wrap them in cling-wrap and store in the fridge.  The rice paper wrappers have a tendency to stick to each other, so I recommend that you wrap each one individually…  this is what we did for the packed lunches.

salad30

The lower-carb veggie filled versions are made in exactly the same way, but in place of the rice noodles you use shredded lettuce:

salad12

You add the julienned veggies (you might want to add more veggies to this version):

salad10

Then you top them with the shrimp:

salad11

Then you roll them up in exactly the same way:

salad7making sure that you roll them nice and firmly without tearing the delicate rice paper:

salad5

And once they are all made, you either serve them right away with a dipping sauce, or you individually wrap them in cling wrap and store them in the fridge in exactly the same way as the rice-noodle filled rolls.

These rolls make a fantastic snack, would be great as an appetizer, and are a really economical lunchbox filler…

salad30

Pack an icepack in with the lunchbox to help keep these cool as they contain shrimp!

Serve them with an Asian inspired dipping sauce – we like the almond-butter sate sauce that we used in this recipe, but you could use whatever you like best.  And if you are not bothered about non-paleo ingredients, use a jarred sauce – Hoisin or sweet chilli sauce would work really well with these

Shared at Tasty Tuesday

Quick Shrimp & Avocado Salad

This is a fantastic dish to use for a quick lunch, a snack  or even for dinner.  Stuff this in tomatoes or hollowed out peppers.  Use it to fill lettuce leaves.  Just eat it with a fork…  no matter what you do with this, it is tasty.

And shrimp are a very economical source of seafood protein.

For this recipe I bought small ready-cooked peeled shrimp which saved a bunch of time.  I couldn’t see the point in buying shell-on, raw shrimp and then having to shell them and cook them.  Smaller shrimp are usually cheaper, and they work better in this recipe as well as you want everything bite-size.  The shrimp I used in this recipe were 70/100, so nicely bite-size.  If you only have bigger shrimp you are going to have to cut them up…  and that makes extra work.  The shrimp can be either fresh or frozen – your choice.  I use frozen because I am wary of fresh shrimp living in land-locked Alberta….  I worry about food poisoning!  Besides, freezing may change the texture of the shrimp a little, but it won’t affect the nutritional content.

This was a quick “throw it together” after-a-long-day-at-work dinner.  C helped me make the salad and mayo, and I served the shrimp piled on lettuce leaves with carrot and beet fries (C also helped me peel the carrots and beets).

This recipe contains red bell peppers which are an AIP stage 4 reintroduction.  When reintroducing foods on the AIP, I recommend this guide.

Shrimp & Avocado Salad

serves 6 with leftovers

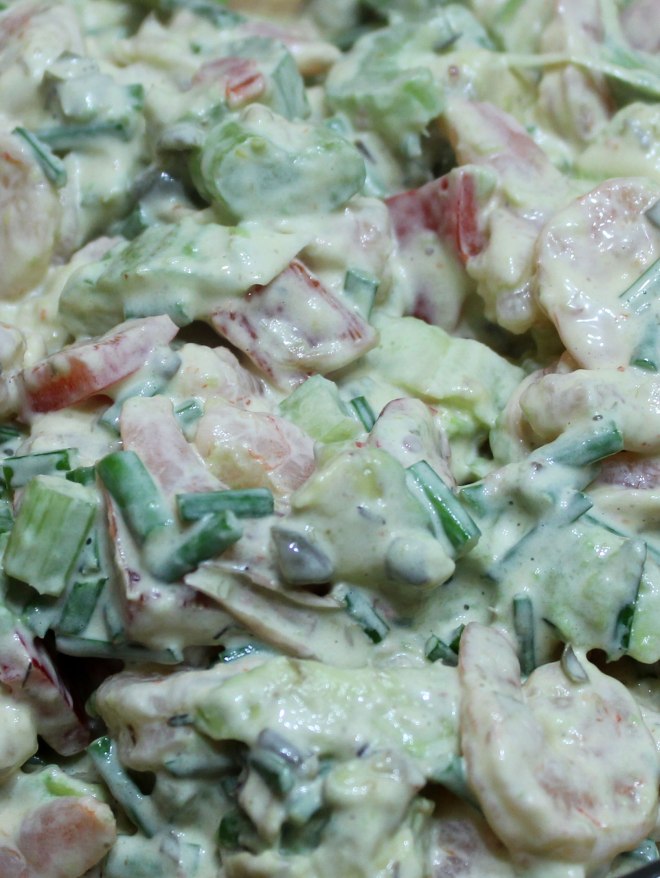
shrimpavo1

  • 900g (2lb) small peeled, cooked shrimp (thawed and drained if previously frozen)
  • 2 avocados – peeled and diced
  • 1 bunch chives – chopped
  • 1 red pepper – diced
  • 2 sticks celery – diced
  • 2 tbsp capers – drained and chopped
  • 1-2 cups home-made mayo (just use as much as is needed to bind the salad together)
  • salt and freshly ground black pepper
  • a generous squeeze of lemon juice

Really all you are doing here is mixing all the ingredients together and tasting to work out if it needs more salt and pepper….  Add the lemon juice to taste.

shrimpavo2

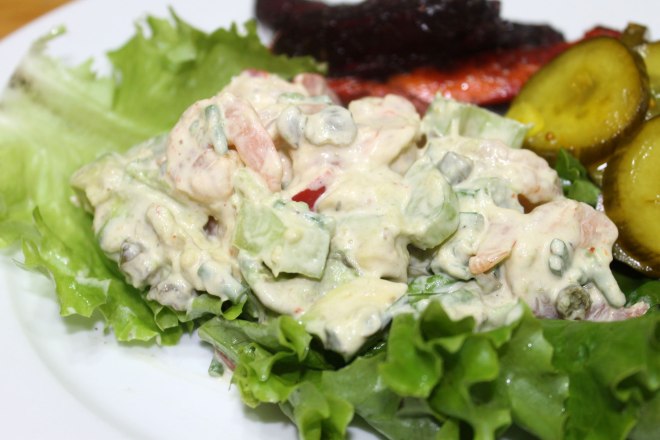
I served this piled on lettuce leaves

shrimpavo3

with a side of oven-roasted carrot and beet fries

shrimpavo4

and some homemade pickles that a very kind person at work gave me…

pickles2

A nommy and very quick dinner!

Sweet Caremelized Plantains

Don’t just keep plantains for savory dishes – this sometimes hard to peel cousin of the banana can also be used in a desert dish as well.

This is what A made for her sisters last night….  This made a wonderful snack for the girls, but it could also be used as a breakfast dish.

This recipe calls for ripe plantains, not the green under-ripe ones.

Baked Caramelized Plantains

serves 4

sweetplantain1

  • 4 ripe, yellow/black plantains
  • 2 tbsp honey
  • 1 tbsp coconut oil
  • 1/2 tsp cinnamon
  • 1/2 tsp ginger
  • coconut cream to serve (optional)

Preheat the oven to 200°C/400°F.

Line a baking pan with either parchment paper or a silpat (we used a silpat as we prefer to use something that is reusable)

Cut the plantains into 1/2-3/4 inch chunks and place the in a small bowl.

In a small pan, melt the honey and coconut oil together and add the cinnamon and ginger.  Pour over the plantain and toss to coat.

sweetplantain3

Place the plantains on the lined baking sheet and bake in the oven for 10 minutes.  Turn and bake for another 10 minutes until the plantain is golden and tender.

sweetplantain2

Serve warm with coconut cream if using.

Shared at Allergy Free Wednesdays

Kids Cooking – B makes Burgers, Salad and Guacamole

My youngest daughter B has been bugging me to help her cook.  So last night she made her first ever meal.

B_cooking1

Yes her hair is wet…  she was fresh out of the shower!

At the grand old age of 9 she grilled burgers (yes on the BBQ!), she made a salad and she made some guacamole to top the burgers off with.

burgersaladguac14

It was DELICIOUS!

First up we made the guacamole…  I wanted to get that out of the way as it can sit in the fridge for a while while we made the rest.

Guacamole

serves 4-6

burgersaladguac9

3 avocados

juice from 1 lime

3 cloves garlic -crushed

salt and freshly ground black pepper

2 tbsp olive oil

We made this in the food processor, but you could just as easily mash it all up in a bowl with a fork.

You peel your avocados and remove the stone.  The easiest way to do this is to stick a knife in them and twist.

burgersaladguac3

Yes my 9 year old was really using that knife!  She is very proud of her knife skills and has never cut herself!

Then you remove the avocado flesh – use a spoon, it makes the job so much easier.

burgersaladguac2

Put the flesh in the food processor and add all the remaining ingredients – salt, pepper, garlic, olive oil and lime juice.  If you are not using a food processor, put all the ingredients into a bowl and mash like mad with a fork….

Pulse until you have a coarse puree.  You do want some chunks of avocado flesh in there – don’t puree it until it is smooth!

burgersaladguac4

Taste for seasoning and adjust as necessary and chill until required.

Next we made the salad.  We made a fairly basic mixed salad.

Mixed Salad

serves 4-6

1/2 head of romaine lettuce – chopped

1/2 head of green leaf lettuce – chopped

1 kohlrabi – peeled and grated (C refers to this as an “alien vegetable from Mars”)

3 carrots – peeled and grated

4 green onions – chopped

1/2 cucumber – chopped

Balsamic dressing (we used 1 part balsamic vinegar to 3 parts olive oil)

This is simple to make.  Prep all the veggies and put them in a big bowl.

Toss to mix.

burgersaladguac8

Yes her hands were clean – she washed them before she started cooking, and had actually washed them several times before she got to this point…  Hands are the best tool to toss salads because you don’t damage the delicate greens.

Add the balsamic vinegar to a jar along with the olive oil (1 part balsamic to 3 parts oil)

burgersaladguac7

and shake to mix.

burgersaladguac5

Set aside until ready to serve.

Just before serving pour over the dressing and toss it all together.

The burgers were ones that I bought – Range fed, heritage Angus beef….

burgers

OK so range fed implies that they are grass fed – I am not so gullible that I am going to think that that means they are 100% grass fed.  The cows these burgers came from may have eaten some grass (most do tbh!), but they will have been grain finished, most probably in a CAFO.  But  these burgers, (which came from Costco btw) are some of the tastiest, juiciest ones we have ever eaten…  They seriously are the best ready-made burgers I have ever found, which is why I am happy to use them occasionally.

These burgers need to be cooked from frozen…

So we followed the instructions on the box, and put 6 of them on the BBQ…

5 minutes later, B turned them over.  She was incredibly brave!

burgersaladguac6

She was scared, but after she had done it, she said that it was not so bad and that she would not be afraid to do it again…  This was the first time she had ever used a BBQ….

Another 5 minutes of cooking and they were done…

burgersaladguac12

Can’t you just see the pride in her face?

And they looked delicious.

Then B served them.

She put a bed of the dressed salad on a plate, topped it with a burger and followed that with a big dollop of guacamole.

burgersaladguac13

This was a delicious meal and very healthy.

burgersaladguac14

And very impressive seeing that it was cooked by a 9 year old girl (with supervision/help from me).

Just to set your minds at rest, and so that you don’t feel that you need to report me to the authorities, even though B was using the knife and the BBQ, I was hovering by her side the whole time just in case she hurt herself.  As far as the knife goes, she has been using knives like that for quite a while and has been shown the safe way to do it.  She was not in any danger at any point.

Apricot Lassi – A Primal Beverage To Cool Your Mouth When Eating Spicy Food

Lassi is a beverage from the Indian subcontinent, designed to minimize the fire in your mouth after eating very hot curries.  Traditionally a savory, salted lassi is served, but occasionally, a sweetened, fruit based version, more suited to the Western palate is made.

This is a very nutritious drink for growing kids, but is also very cooling if you are eating a spicy curry.  The fat in the yoghurt and milk help remove the effects of the capsiacin, which is fat soluble.  As a result, it will do a much better job of cooling your mouth than plain water.

If you are dairy free or strict Paleo, you could probably sub in coconut yoghurt and coconut milk for the dairy…  I haven’t tried it because hubby and I happily eat really spicy food and don’t need the cooling effect of the fats (the kids do).  Just be sure that whatever you sub in contains a fair amount of fat as it s that which dissolves  the capsaicin from the chillies and causes the cooling effect.

The fermented dairy in this recipe makes this a stage 3 AIP reintroduction.  When reintroducing foods on the AIP, I recommend this guide.

This is what J and I made to go with our spicy Goat Curry…..  This is the first time you have encountered J cooking in the kitchen.

mangolassi10

Apricot Lassi

serves 4

mangolassi2

4 apricots (ours were a little over-ripe, but any stage of ripeness would work fine).  You could also sub in peaches or nectarines or any fruit that takes your fancy.

1 cup full-fat yoghurt – live-cultures are preferred, and if you live in an area where you can obtain raw dairy use that.  If you keep your own milk producing animals even better still…

2 cups full-fat milk – preferably raw and non-homogenized (in Canada this is not available unless you keep your own goats or cows)…  use the best you can

1 small (child sized) hand full of mint leaves

1 tbsp raw, unpasteurized honey

1 pinch of salt

Instructions

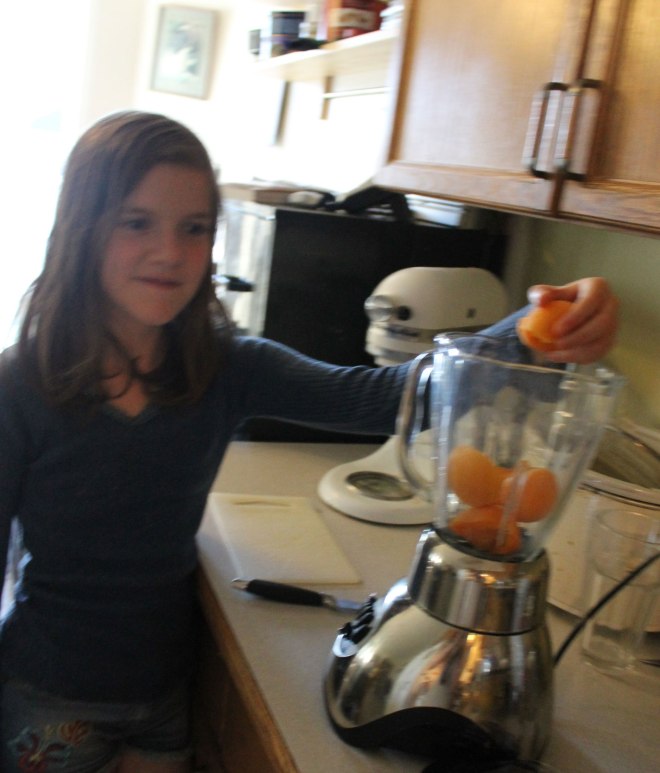
Halve your apricots and put them in your blender (ours were a little over-ripe – no problem in this recipe!)

mangolassi9

Add 1 cup of full-fat yoghurt (live cultures preferred).

mangolassi8

then add the mint, milk and honey.

mangolassi6

Blend at a high speed until smooth

mangolassi5

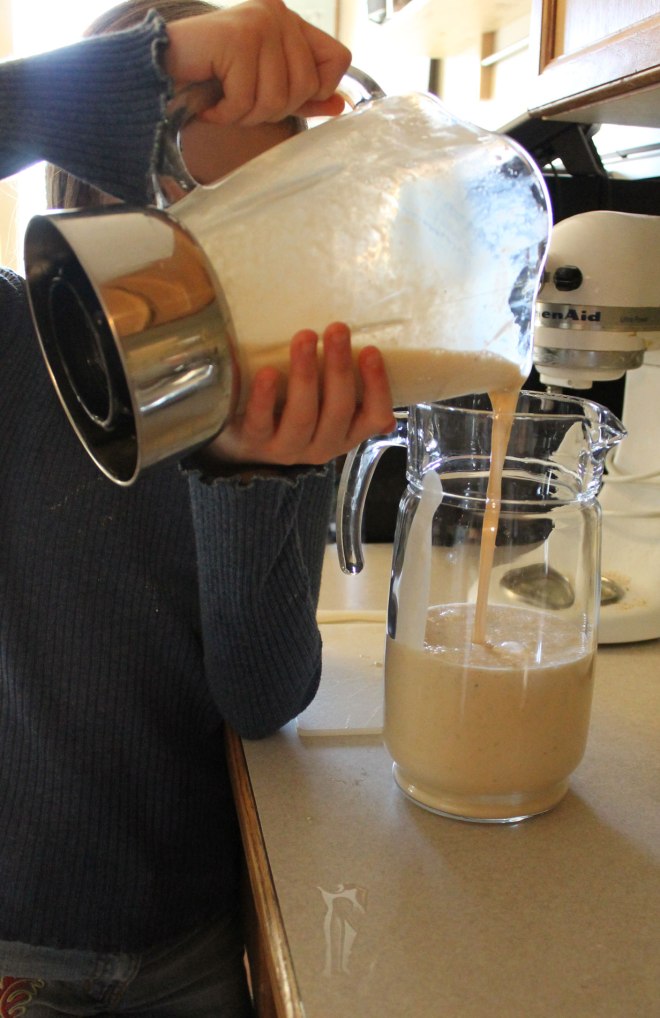
Pour into a jug

mangolassi3

Chill until ready to serve.

mangolassi4

mangolassi2

Raspberry Green Tea Lemonade

When you have a glut of raspberries what are you to do with them before they all go squishy and mouldy?

Easy…  make a refreshing raspberry drink!

We bought a big box of wonderful raspberries from Souto Farms at the Calgary Farmers Market.  They were on special offer, and we just could not resist!

berries1

But there was no way we could eat them all before they went bad.  So I got A to make this tasty beverage…

Green Tea is allowed on the AIP protocol, but should be consumed in moderation.

rasplemon5

Raspberry Green Tea Lemonade

makes 1 large jug

rasplemon3

5 green tea-bags – use whatever is your favourite

1 sprig of peppermint (fresh from the garden!)

1 punnet (1/2 pint) of raspberries

1/2 cup lemon juice

honey to taste.

First up, you need to boil your kettle, and let the water cool just a little.  If it is boiling, there is the risk it will crack your jug.

rasplemon11

Put the teabags, lemon juice, mint and berries in the jug and pour over the hot water – just add enough hot water to cover the berries and tea bags

rasplemon12

Stir well and allow to brew for 10-15 minutes.

rasplemon9

Squeeze out the tea bags to remove as much flavour as possible and then top up with cold water.  Chill.

rasplemon6

Strain once cold to remove any raspberry bits if you like.

rasplemon8

Sweeten with honey if desired.

rasplemon2

Serve chilled

rasplemon1

Shared at: Mouthwatering Monday, Inspire me Monday, Thank Goodness It’s Monday

Pork Vindaloo, Coconut “Rice” and Raita

Vindaloo, Vindaloo, Vindaloo, Vindaloo, na na

Anyone remember the Vindaloo song from back in the 80’s?  It was written and sung by a British band called Fat Les and was adopted as the unofficial anthem for the England World Cup team in 1998.

Why am I talking about this song?  Because I made pork vindaloo for dinner, and I found myself humming it while cooking it…

Vindaloo is a spicy curry from the Indian city of Goa.  The name Vindaloo is thought to derive from the Portuguese Vin d’ alho.  Vin means wine, alho means garlic.  And this is a curry that contains vinegar and garlic in large quantities….

In it’s Anglicized form, it is regarded as an incredibly hot dish, often eaten by “Real Men” after a night on the town – as in “are you man enough to drink 15 pints and eat a vindaloo”…

But it doesn’t have to be fiery hot – by making it yourself at home you can control the heat simply by reducing (or increasing!) the amount of chilli peppers that you add.

The main reason for making this was because I had taken 2 packs of pork butt steak out of the freezer and  I decided that I fancied a hot curry – besides we haven’t had vindaloo in a very long time!

I based my recipe on one from Easy Indian Cooking by Suneeta Vaswani. It isn’t a specifically paleo cookbook, but a lot of the recipes are adaptable.  This particular one is on page 102.

vindaloo1

I had to make some adaptations to make it paleo – Vindaloo usually contains potatoes – and indeed this one does call for 1 cup of grated potato.  I replaced that with diced rutabaga (I like the chunks). It also calls for 1/2 tsp of granulated sugar which I simply eft out, and I used coconut oil in place of the vegetable oil.  I also left out the vodka.  Other than that, I pretty much made it as it was.

I was a little disappointed with the heat level of this curry – it was barely hot at all.  Not sure if it was my dried chillies or if I just need to add more of them.

This is an AIP stage 4 reintroduction recipe because it contains chilli peppers.

The presence of the chilli, pepper and cumin in this recipe mean that it cannot be altered to make it 100% AIP compliant.  Black pepper and cumin are stage 1 reintroduction ingredients,

The raita contains yoghurt, which is a stage 3 reintroduction as this is a fermented dairy product.

When reintroducing foods on the AIP, I recommend this guide.

Pork Vindaloo

(based on a recipe on page 102 in Easy Indian Cooking by Suneeta Vaswani)

serves 6

vindaloo6

2lb boneless pork (I used 4 boston butt pork steaks – mine had bones in so I simply cut them out)

1.5 tsp salt

10 dried red chillies (use more or less depending on how spicy you want it to be)

10 black peppercorns

10 whole cloves

1 cinnamon stick

1 tsp cumin seeds

1 tsp mustard seeds

10 cloves of garlic – peeled

1 piece of peeled ginger root – 1″ square

1 tsp apple cider vinegar

2 tbsp coconut oil

2 sliced onions (I actually added 2.5 as I had half a red onion kicking around so I used that too)

1/4 cup apple cider vinegar

1 small rutabaga – peeled and diced

1.5 cups bone broth or water

Instructions

This is the awesome pork I was using:

porkbuttsteak

Take your pork, remove any bones and dice the meat into bite size pieces.  Rub with the salt and set aside.

Take a blender and make a spice paste for the meat – add the chillies (you can remove the seeds to make it less spicy if you want – this curry wasn’t particularly spicy as far as I am concerned), the peppercorns, cloves, cinnamon, cumin seeds and mustard seeds.  Grind to a powder.  Add the garlic, ginger and 1 tsp vinegar.  Blend to a paste.  Rub into the pork, cover and set aside in the fridge for a couple of hours.

One you are ready to cook your meat, heat the oil in a pan over a medium heat.  Add the onions and cook to a golden brown colour

vindaloo3

Add the pork and brown it well for around 5 minutes.  Then add the diced rutabaga.

vindaloo5

Stir in the vinegar and 1.5 cups of water or bone broth (I used bone broth).

vindaloo4 - Copy

Mix well, cover and bring to a boil.  Reduce heat to a simmer and cook until the pork is cooked and the rutabaga is tender – around 30 minutes.

I served this with Coconut Kale “Rice” and a raita.

vindaloo7

Coconut Kale “Rice”

serves 6

1 small head of cauliflower

1 cup unsweetened coconut

1 bunch kale – chopped

3 green onions – chopped

2 tbsp coconut oil

1/2 can coconut milk

salt and pepper to taste

Trim your cauli and then blitz it in the food processor until it is tiny pieces that resemble grains of rice.

Mix in the coconut, kale and green onions.

Stir in the coconut milk and season to taste with salt and pepper.

And serve at once.

Heat the coconut oil in a wok or large skillet and add the cauliflower mixture.  Toss and cook over a medium-high heat until it is all heated through, the kale is wilted and the cauliflower is tender.

Raita

serves 6

(based on a recipe on page 126 of An Indian Housewife’s Recipe Book)

raita4

The purpose of a raita is to cool the mouth down.  The yoghurt it contains has fat in it, and it is the fat that helps cool your mouth down.  This curry didn’t really need it as I was a bit disappointed with the heat level.  It isn’t paleo becuse of the yoghurt.  This is more a primal condiment.

I based this recipe on one in a very tatty cookbook I have owned since the early 90’s – An Indian Housewife’s Recipe Book by Laxmi Khurana.  But again I made some changes.  I didn’t add the chilli powder that was called for, and I added plenty of chopped mint for it’s cooling effect.

raita1

Ingredients

500ml (16oz) Greek yoghurt

90ml (3floz) milk

110g (4oz) cucumber – peeled and sliced

1 onion – chopped finely

1/2 tsp whole cumin seeds

1/2 tsp salt

1/2 tsp freshly ground black pepper

2 tbsp mint leaves – finely chopped

This particular recipe was cooked by C

Peeling the cucumbers

Yes C really does wear that hat in the house all the time!

Peel the cucumber, remove the seeds and grate it.

Place in a dish and add all the remaining ingredients.  Mix well and chill until needed.

raita3

Serve dolloped on top of hot curries.

After we were done making the raita, while we were waiting for the curry to cook, I took a photo of the hat that C had made using a knitting loom…

c_hat

Stuffed Pork Chops and Roasted Onions

This particular recipe was cooked by A….

Proof that teens can cook....

Proof that teens can cook….

It is another one from the book I mentioned in a previous post – BBQ Food For Friends.

When we ordered our pig from Sprags Meat Shop, I requested that the pork chops be packed in packages of 6.  And this seemed like a good recipe to use them, especially as I had managed to buy some wonderful HUGE green onions at the Calgary Farmers Market a couple of days before.
Like most of our recipes, we tweaked it – I didn’t use the sherry the original recipe called for, and I didn’t have a fresh apple so I used dried and soaked them in a little water.  I also left the green part on the onions whereas the original recipe calls for them to be removed (I didn’t want to waste them!)  and I only used 6 onions because that was all I had.

This recipe is 100% AIP compliant.

Stuffed Pork Chops with Roasted Onions

chopgreensonion

serves 6

(Based on a recipe on page 33 of BBQ food for friends by Jane Lawson and Vanessa Broadfoot)

4 tbsp hot water (the original recipe called for 2 tbsp sherry)

4 dried figs

8 slices of dried apple

1 tbsp coconut oil

2 tbsp olive oil

1 onion –  finely chopped

2 cloves of garlic – crushed

1 tbsp finely chopped sage leaves

6 large, bone in pork chops

Salt to taste

6 very large green onions – trimmed but with the green parts still on (the original recipe calls for 16 large green onions, green parts trimmed off and the bulbs cut in half).

Instructions

Put the figs and dried apple in a small bowl and pour the hot water over them.  Leave them to soak for 20 minutes to rehydrate them.  Drain, keeping the soaking liquid.

Chop roughly in a food processor.  Heat the coconut oil and add the onion and garlic – cook over a low heat for 5 minutes until softened.  Add the figs and apples and the soaking liquid and cook until most of the liquid has evaporated.  Remove the pan from the heat, add the sage and mix well.  Allow to cool.

Take the pork chops and make a cut into the middle of the pork chop from the side.  You are basically making a pocket in which you can stuff the filling you have just made.  Don’t cut right through – you don’t want a hole.  Fill the pocket with the stuffing packing it in well.  Brush the chops with 1 tbsp olive oil and season well with salt.

Use the remaining tbsp of oil to toss with the onions.

The original recipe calls for the onions and chops to be cooked on a chargrill plate, either flat or ridged.  But I don’t have one so I pulled out the faithful roasting pan again….

Heat the pan to medium and place the chops and onions on it.  Cook the chops for 10 minutes per side until the outside is charred and the meat is cooked through.  The onions will take about 10 minutes and will need turning halfway.  Cook them until they are a little caremelized and softened.

grilledporkchops

stuffedporkchop1

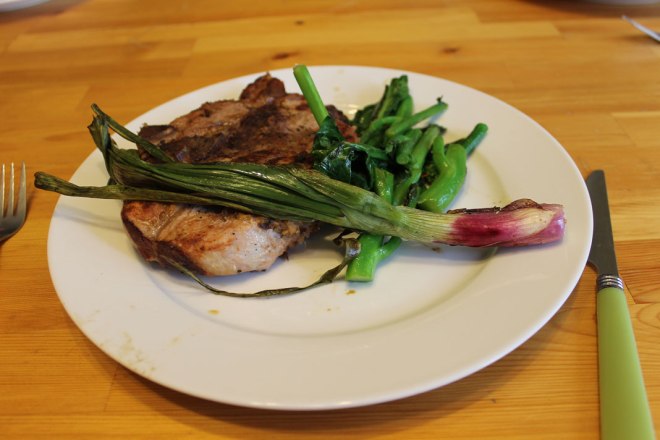
We served the whole thing with some stirfried greens.  I used chinese broccoli that was stirfried in a little coconut oil with some garlic.

J likes the look of her dinner!

J likes the look of her dinner!