Taking a break

Due to some mental health issues that I am struggling with, I have reluctantly decided that I need to take a break from blogging.  I do not have the time to sort out my issues and blog at the same time, and my mental health has to come first right now.

I am not abandoning you, the blog will still remain up and I will respond to your comments, questions and emails.

I just won’t be posting for the next month.  Think of it as me taking a vacation – although I will be staying at home and working under the care of my mental health team rather than going to have some fun in the sun – more is the pity!.

I am going to miss you guys!

See you all at the end of August!

Simple Small Batch Sauerkraut

I don’t own a large fermentation crock, so I make my sauerkraut in small batches in mason jars.

It does take a bit more work to do it this way because you have to make and fill several small jars rather than just packing it into one large fermentation crock or jar.

But I have a large number of wide-mouthed mason jars, so this method works well for me.

I posted about my vegetable ferments that I made a while ago, and sauerkraut was part of this batch.

I made a batch with red cabbage and another batch with green/white cabbage.  You could use either or even mix the two.

I don’t add any spices to my kraut, but if you are not AIP and like the flavour, you could add some caraway or fennel seeds to provide a slight aniseed flavour.

Sauerkraut is very good for you – it has been shown that a small amount of sauerkraut will provide you with far more healthy probiotic bacteria than even some of the very high quality probiotic supplements.

This makes it a very valued addition to any diet as far as I am concerned.

But in addition to it’s probiotic content, sauerkraut is a good source of vitamins A and C, and has all the health benefits of the other cruciferous vegetables.

It is also very tasty – tangy and slightly salty.

Simple Small Batch Sauerkraut

makes 1 quart sized mason jar

kraut1

  • ½ head of cabbage (you could double up the recipe and use the entire head if you prefer).  Either red cabbage or white, or a mixture of the two – it really does not matter.
  • 2 tbsp sea salt

Take your cabbage and remove the core and some of the outside leaves.  Reserve one or two leaves.

Now shred the cabbage finely – I like to do this in my food processor to save time, but you could use a knife.

Place the shredded cabbage in a large bowl and sprinkle the salt evenly over the surface.

Now you need to pound the heck out of the cabbage – I use the end of my rolling pin, but you could use a meat pounder or even your fists.  What you need to do is to break down some of the structure of the cabbage and make it release it’s liquid as this forms the brine that will preserve your kraut.

Pounding the cabbage can take upwards of 10 minutes, and you want it to be really juicy when you squeeze it.

After this, transfer the cabbage to a wide mouthed mason jar, packing it down well with your fists.

If you have pounded it enough, you should see the brine starting to rise up over the surface to cover the cabbage.  If not enough brine rises up, no worries, just mix up a little more brine (2 tbsp salt in 1 quart of water) and pour that over the surface.

Now take the reserved cabbage leaves and lay them on the surface of the cabbage, pushing them underneath the brine.  These will stop lots of little bits of cabbage from rising to the surface, which will help prevent mold forming.

After this, I like to weight the cabbage leaves down – I use the very small jelly-sized mason jars as they fit perfectly inside a wide-mouthed mason jar.  I fill them up with a little brine to help hold them down and prevent them from floating.

And finally, screw the lid on the mason jar.

Leave your sauerkraut to ferment for 2-3 weeks, opening the jar to release any gas every day.  I like to taste it towards the end of the fermentation period at this point as well.

The sauerkraut is ready when it tastes good to you.  In cold weather it may take longer to ferment than it will in the summer.

If you don’t think it is ready, reseal and leave it for a few more days.  Some people like to ferment their kraut for several weeks (6-8), but I prefer it “younger”.

Once you think it is ready, transfer it to the fridge as this will slow down the fermentation process.  Now it will keep for months.

If you make sure that your cabbage is well submerged under the brine, you should have very few problems with spoilage or mold formation – but in the unlikely event that it does mold, throw the whole lot out.  Mold produces toxins that can spread rapidly throughout the entire jar of sauerkraut, and you cannot just scrape it off the surface.

When I make red cabbage sauerkraut, it looks like this:

RK1

And the green cabbage sauerkraut looks like this:

GK1

Because this is a live culture, I don’t really recommend that you cook your sauerkraut – it will be tasty if cooked, but it won’t contain any of the probiotic bacteria as they are killed by high temperatures.

I most often eat my sauerkraut raw – either with sausage patties for breakfast:

AIPbfast1

Or with other meats/fish/eggs (this is pulled pork)

AIPbfast3

I also sometimes add it to coleslaw to make a lacto-fermented slaw.

Creamy Turmeric Chicken – Paleo/AIP

This delicious recipe consists of chicken breasts cooked in a creamy sauce that is made from a mixture of coconut milk, onion and some AIP-friendly spices.

The creamy sauce prevents the boneless, skinless chicken from drying out in the oven.

I bought some fresh turmeric roots from the farmers market, and decided to use some in this dish.

Turm1

Turmeric is the spice that gives curry it’s yellow colour, and it has been used in India as both a spice and a medicinal herb for thousands of years.

Turmeric contains curcumin, which is a powerful anti-inflammatory and it is also an antioxidant, meaning that it is something worth considering including in your diet.

The blend of spices that I used in this recipe give the sauce a comforting warmth, but it is not a spicy sauce.

This recipe is 100% AIP, and suitable for the elimination phase.

I served this over cauliflower kale rice.

Creamy Turmeric Chicken

serves 6

TC6

  • 2 cups coconut milk
  • 1 onion – chopped
  • 4 cloves of garlic – crushed
  • 4 tbsp grated root ginger
  • 15g (½ oz) fresh turmeric root – peeled and chopped.  Use 1 tsp dried turmeric if this is not available
  • sea salt to taste
  • 6 skinless, boneless chicken breasts

Preheat the oven to 190°/375°F.

Place the onion, garlic, ginger and turmeric in a blender and blend until smooth.

Season well with salt.

Arrange the chicken in a single layer in an ovenproof baking dish.

Pour the coconut milk mixture over the chicken.

Bake in the preheated oven for 30 minutes until the chicken is cooked through.

TC7

Serve over cauliflower rice, spooning the sauce over the chicken.

TC5

Shared at Paleo AIP Recipe Roundtable #35

Grilled Pork Chops With Apple, Bacon And Onion

This was such a delicious dinner that A cooked the other night – it was hot, Hot, HOT, and we were dreading turning on the stove to make dinner.

Using the outdoor grill to cook the chops and then serving them with a salad was a no-brainer.

And it worked perfectly.

This recipe is both Paleo and AIP-friendly if you omit the black pepper.

Don’t be put off by the fact that this recipe serves 6 people.  If you need to feed fewer, just use fewer pork chops – one per person is ideal.  The apple bacon and onion mixture is also easy to scale down, but I would not bother – it tastes delicious with all sorts of other meats, or even on its own, and is just as good cold from the fridge as it is hot.

Grilled Pork Chops With Apple, Bacon And Onion

serves 6

GPC2

  • 6 pork loin chops (about 6oz each)
  • sea salt to taste
  • a small amount of melted coconut oil to brush the meat
  • 2 large onions – sliced
  • 6 rashers of bacon – sliced
  • 2 large apples – cored and sliced
  • leaves from 1 sprig of fresh rosemary – chopped
  • leaves from 1 sprig of fresh sage – chopped
  • leaves from 1-2 sprigs of fresh thyme – chopped
  • 2 cloves of garlic – crushed

Preheat your grill to a medium high temperature.

While the grill is heating, take the chops and brush them with a little coconut oil.  Season well with salt.

Place the chops on the grill, and cook for 5-7 minutes on each side until the chops have an internal temperature of 77°C/170°F.  If you have got the temperature of the grill just right, you should have some lovely sear marks on the meat.

Remove the chops from the grill and keep warm.

Now you need to place your cast iron skillet directly on the grill and turn the heat up a bit.

Add the bacon to the pan and allow to cook down and release it’s fat.  Add the onions to the bacon fat and saute until starting to brown a little.  Add in the apples, the herbs and the garlic and cook until everything is soft, and gently caramelized.  This should take no more than 5-10 minutes, by which time the chops will have rested.

Serve the apple, onion and bacon mixture along with the grilled pork chops.

GPC3

I like to serve this with a brightly coloured salad such as my Lacto-Fermented Beet And Carrot Salad.

GPC1

If you do not have an outside grill, you could easily cook these chops on the stove on a grill-pan.

Lacto-Fermented Beet And Carrot Salad

I made this vibrantly coloured salad to use up some of the lacto-fermented beets that I had leftover from making Beet Kvass.

I don’t like to waste anything (It is the thrifty Yorkshire Woman in me!), and I did not want to throw the beets away after I had made the kvass, but I also did not want to just eat the chunks of beet.

This salad was a perfect compromise, and went very well with some pork chops that I had cooked for dinner.

This recipe is both Paleo and AIP Friendly.  And thanks to the lacto-fermented beets, it is full of healthy, gut-friendly probiotics.

And it is so pretty!

Lact0-Fermented Beet And Carrot Salad

serves 4-6

FBCS3

  • Lacto-fermented beets – I used about 2 cups of chunks in total
  • 3-4 large carrots
  • 1 bunch green onions
  • 2 tbsp apple cider vinegar
  • ¼ cup extra virgin olive oil
  • 1-2 cloves of garlic from the jar of lacto-fermented beets (optional)

Grate the beets and place them in a large bowl – I recommend using a food processor for this or you will end up with red stained hands.

Peel and grate the carrots and add to the beets in the bowl.

Trim the green onions and chop them.  Add to the beets and carrot in the bowl

If you like, you can now take 1-2 cloves of garlic that was fermented with the beets and crush them.  This step is entirely optional.

Place the apple cider vinegar and olive oil in a small mason jar along with the crushed garlic if using it.

Shake the jar well to mix the contents, then pour over the salad and mix until it is all incorporated.

Serve at once.

FBCS1

I like to pile this on top of shredded green lettuce leaves – the green of the lettuce provides an attractive colour contrast with the purple/red and orange of the carrots and beets.

FBCS2

This particular salad was also served with some pork chops that I had cooked on the grill and served with apples, onions and bacon.

Shared at Paleo AIP Recipe Roundtable #35

Shared at Thrifty Thursday week 69

Tostones – Green Plantain Fritters

Tostones are essentially a fritter made from green plantains.

They are a popular side dish and snack in many Latin-American countries, and may sometimes be called Patacones.

Essentially, they are twice-fried green plantains, and they can provide both a tasty starchy side and an appetizing crunch to many dishes.

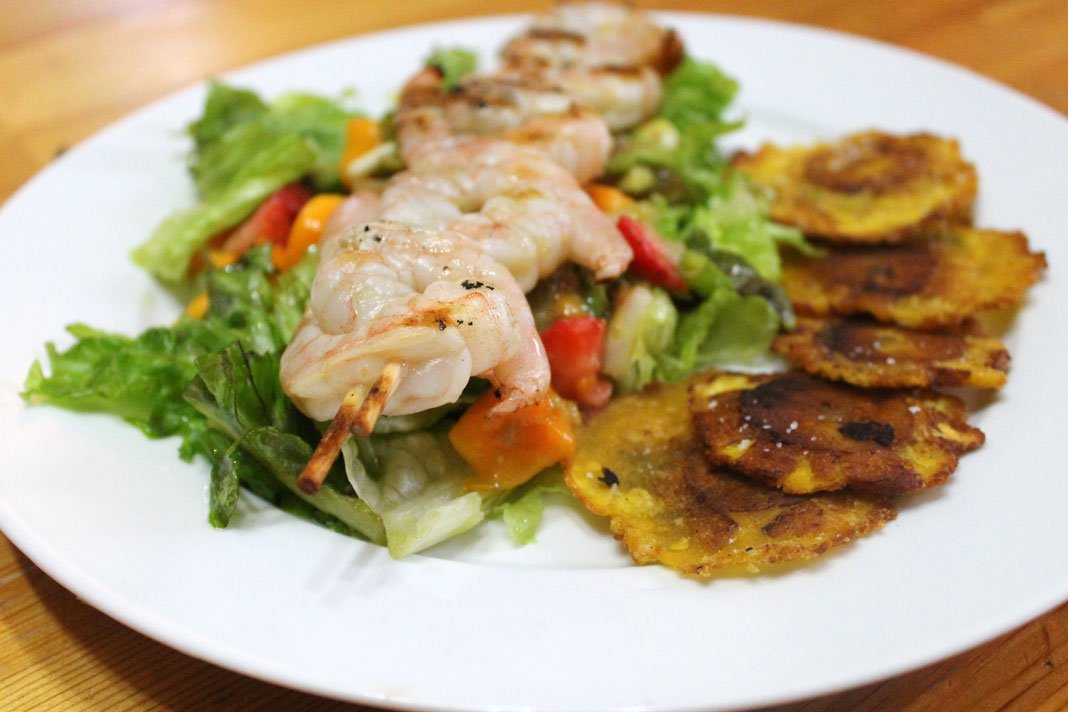
I love to serve them as a starchy side, but I also serve them as a snack in their own right, sometimes with a dipping sauce, in much the same way as chips would be served.  They are also very good with soup.

To make these, you do need the plantains to be fairly green – if they are turning yellow, they will not be starchy enough, and your tostones would turn out mushy rather than crisp and crunchy.  If you have plantains that are more yellow than green, try making my caramelized sweet plantains instead!

I like The Paleo Mom’s video on green plantains, although I do not peel and cut them in the same way as she does if I am making tostones.

But if you can get your hands on some green plantains (and the greener the better really for these!) consider giving these a go!

In most Latin American countries, they use a special tool called a tostonera to flatten the plantains after their first frying – I have found that 2 cutting boards does the job perfectly well…  all you need is something with a smooth flat surface so that you can press the chunks of plantain into flat discs.

These are both paleo and AIP-friendly.

These Tostones were made by A while I took the photographs of her cooking them.

Don’t be afraid of this recipe serving 4-6, it is easy to make less by simply using fewer plantains.  But I suspect that once yo try these, you will want to make the full amount and keep the leftovers for snacks or other meals as they are so versatile.

Tostones – Green Plantain Fritters

Serves 4-6

Tost2

  • 3-4 green plantains (get the greenest ones you can)
  • coconut oil or lard for frying
  • sea salt to season

The first thing you need to do is to peel the plantains – this can be a little tricky sometimes, especially when they are very green.  You do need them to stay in the round, so you cannot peel them in the same way that The Paleo Mom did in the above video.

What I tend to do is to cut the bottom and top off each plantain.  I then cut them in half.

Next I cut a long slit along the entire length of the plantain, and I pries as much of the peel off as I can using my thumb.  This can be tricky, but be patient and eventually you will get most of it off.  If any bits of peel remain, just use a knife to cut them off.

Once all your plantains are peeled, you need to cut them in chunks – We tend to go for somewhere between ½ and ¾ of an inch – the thicker you cut them at this stage, the bigger your tostones will be  when done, so if you want small thin tostones (more like a chip), cut them smaller, if you want thicker, bigger tostones (more like a fritter), cut them bigger.

Heat the coconut oil or lard in a large skillet over a medium high heat.

Once it is hot, working in batches, cook the plantains until golden brown on both sides.  They don’t have to be completely cooked through at this stage -you are just aiming for an attractive brown colour.

tost7

Remove the plantains from the pan and cook the remaining chunks in batches.

Once all the plantain chunks are cooked you need to start reheating the oil back to medium-high.

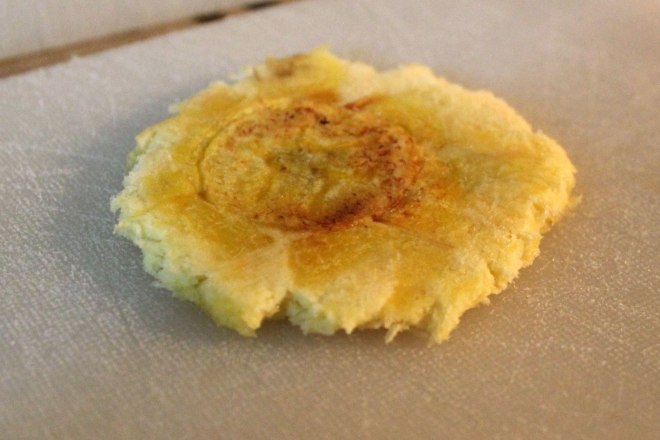
Place one plantain chunk on a cutting board and put a second cutting board on top.

tost6

Apply pressure to the top board to squish it flat – how much pressure you use is up to you.

tost8

Light pressure results in a thicker tostone that is more like a fritter (better for serving with soups or as a side), more pressure results in a thinner, crisper tostone that will more resemble a chip.

Tost4

Of course if you could get your hands on a tostonera you would use that in place of the 2 cutting boards.  I have never tried this with a tortilla press, but I wonder if that might work as well – if you have one and try it, please let me know!

Once all your plantains are flatened you can start cooking the tostones.

Place a few in the heated fat in the skillet, being careful not to over-crowd it – these need to be cooked in batches to achive crispness.

tost5

Cook over a medium-high heat for a few minutes each side until golden brown and crispy.

Tost3

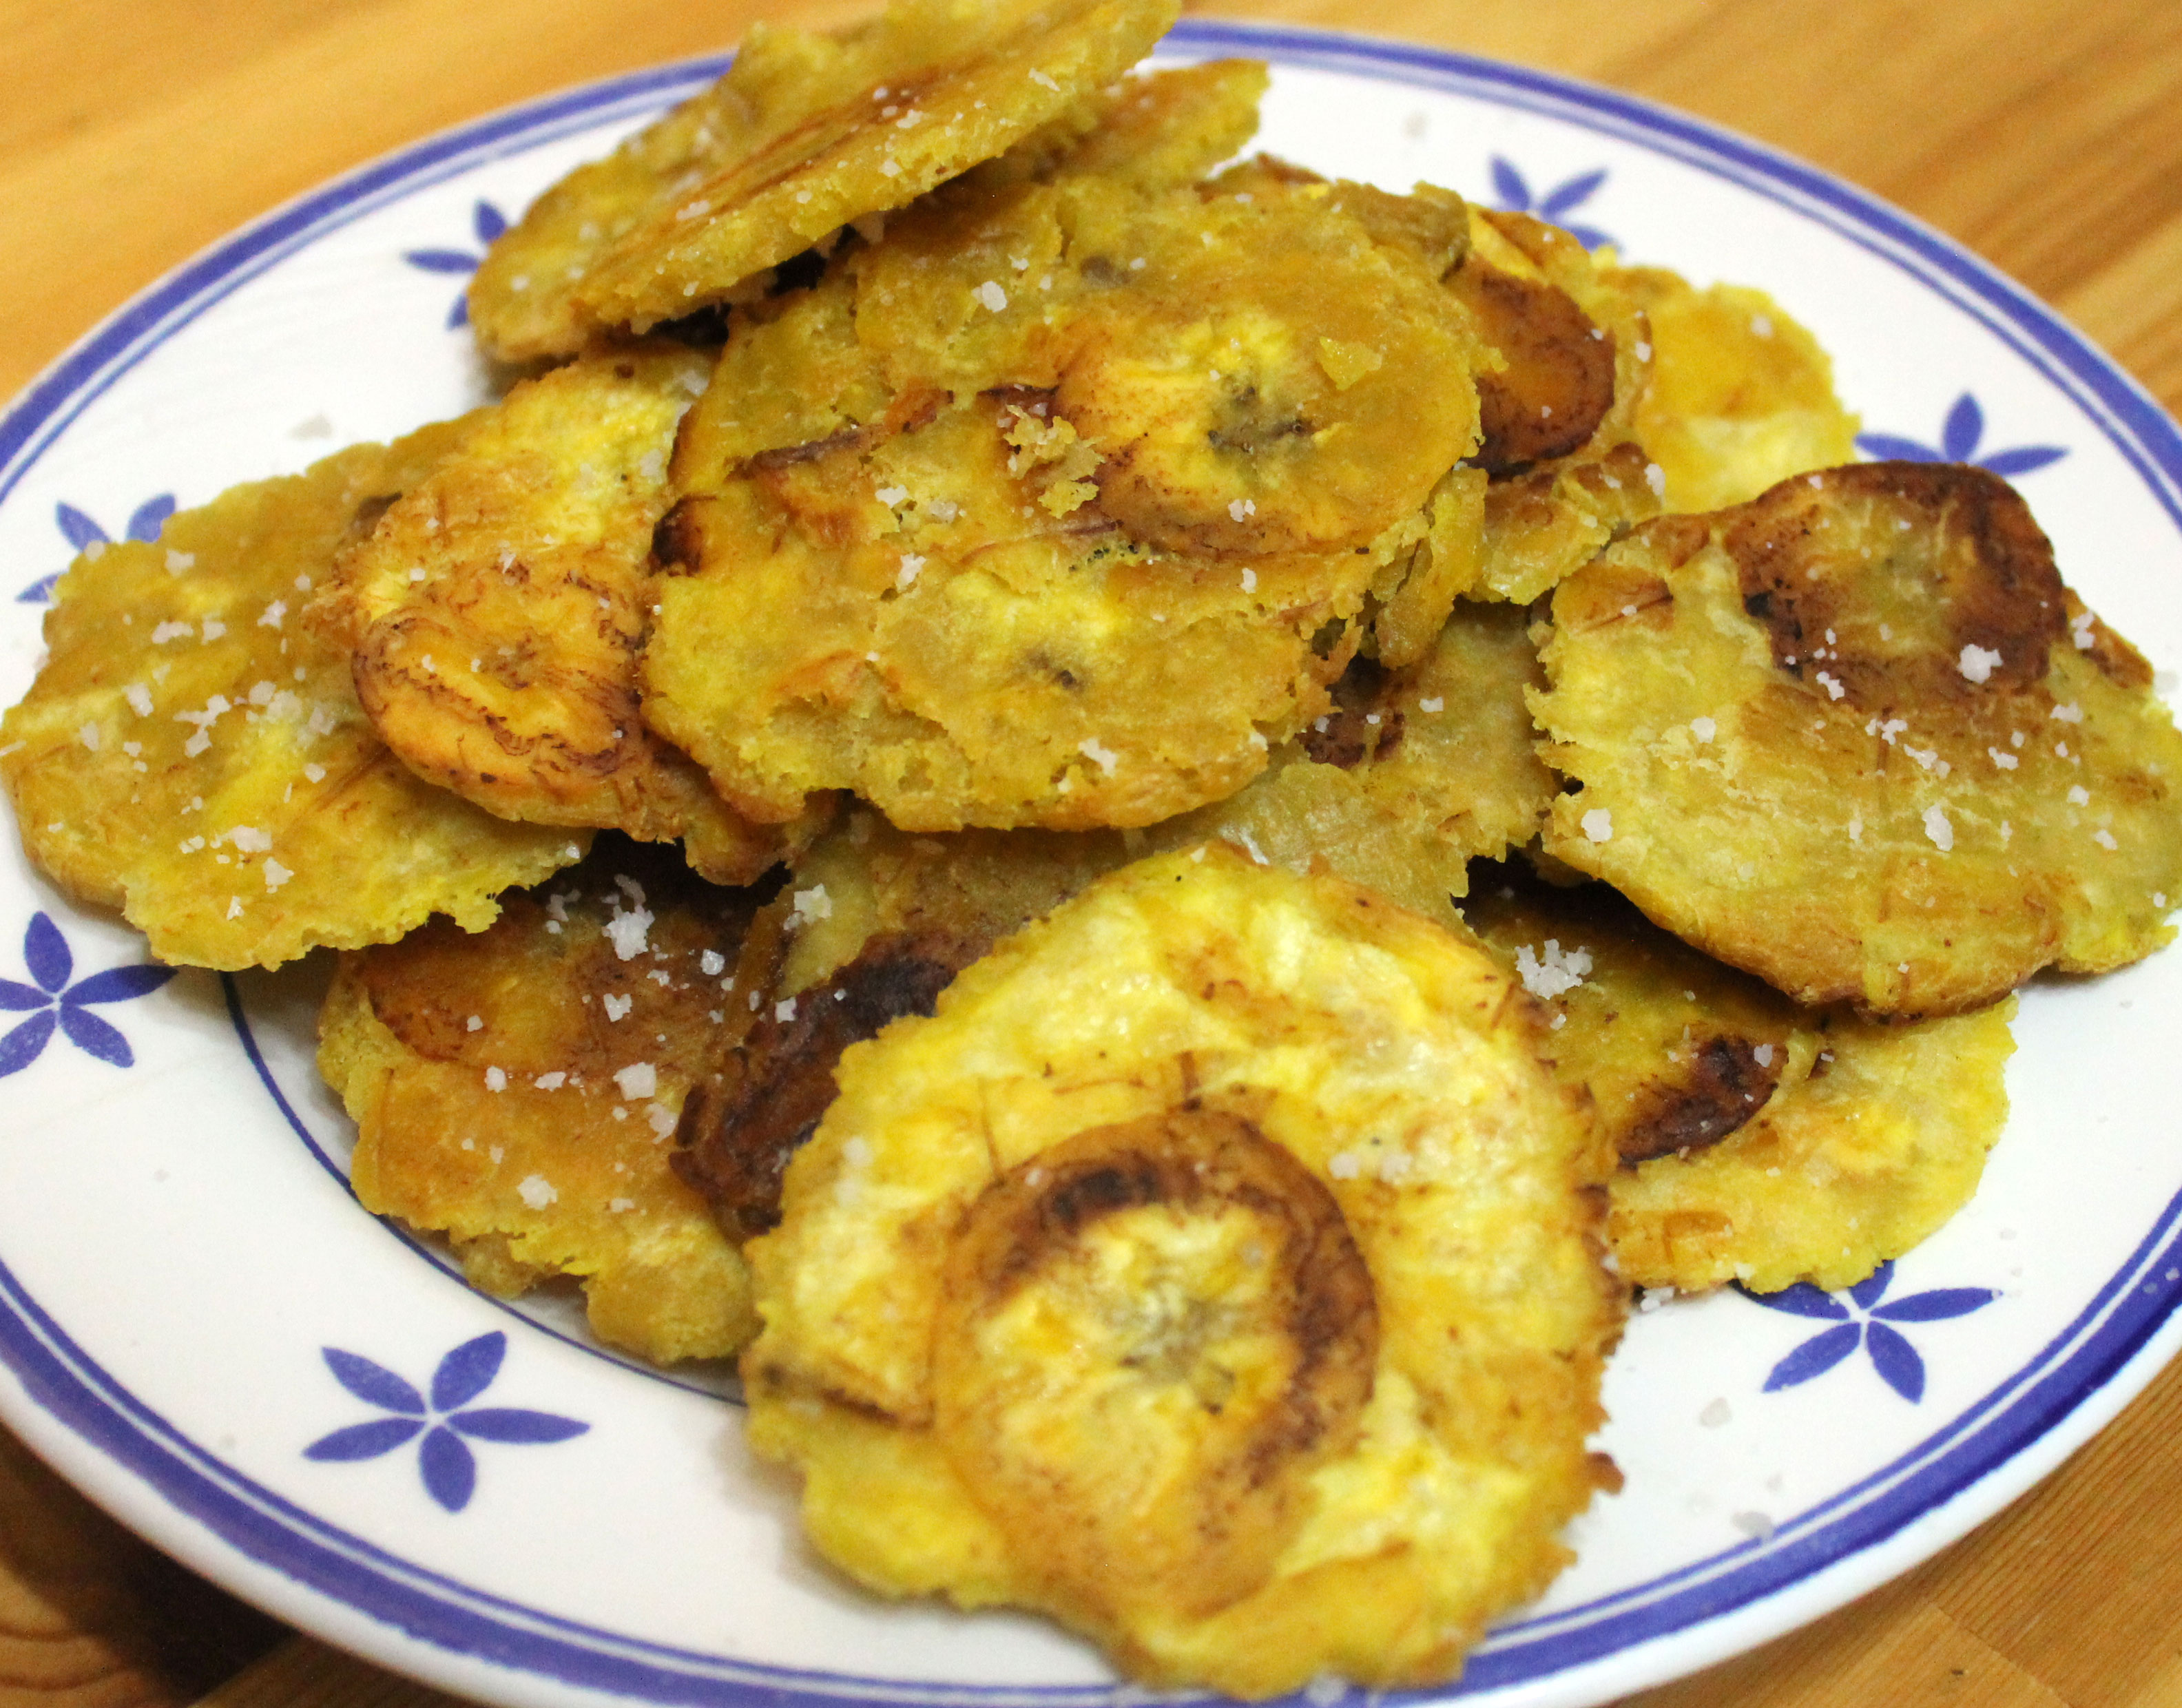
Remove, transfer to a plate and sprinkle with a little sea salt.  Continue until all the tostones are cooked.

Tost9

These can be served hot or cold as a starchy side, as a snack or even as a chip with some dips.

Shared at Gluten Free Fridays #99

Shared at Real Food Fridays #46

Grilled Shrimp With Mango, Strawberry, Avocado Salsa

It has been so hot here lately that I am not going to apologize for the large number of recipes that I am posting that use an outdoor grill – there is no way I am wanting to turn the stove on right now!

If you don’t have a grill, all the recipes I have been posting  could certainly be cooked in a skillet or under the broiler.  I am sure they would taste just as good.

One of my favourite things to cook on a grill is shrimp.  And shrimp also happens to be a very economical seafood, which is why we eat it quite a lot.

These grilled shrimp were just delicious.  I marinated them for a short time in a mixture of lime juice, honey and garlic which gave them a wonderful flavour, and the honey contributed to the caremelization on the surface.

I served these on top of a mango and strawberry salsa, meaning that the entire recipe is AIP friendly and suitable for the elimination phase of AIP.

If you are not AIP and can handle some chili, a chopped jalapeno chili would be wonderful in the salsa!

Grilled Shrimp with Mang0-Strawberry-Avocado Salsa

Serves 6

HGGS4

For the grilled shrimp:

  • 2lb large shrimp – peeled and deveined
  • ¼ cup lime juice
  • ¼ cup honey
  • 2 tbsp fish sauce
  • 2 tbsp avocado oil
  • 2 cloves garlic – crushed
  • 1 tbsp freshly grated root ginger
  • sea salt to taste

For the mango, strawberry, avocado salsa:

  • 1 cup strawberries – hulled and chopped
  • 1 large ripe mango – peeled, stoned and chopped
  • 1 ripe avocado – peeled, stoned and chopped
  • 2 tbsp chopped cilantro
  • 2 green onions – chopped
  • 2 cloves garlic – crushed
  • 1 tbsp freshly grated root ginger
  • sea salt to taste
  • 2 tbsp extra virgin olive oil
  • Zest and juice of 1 lime

The first thing you need to do is to take some wooden or bamboo skewers and soak them in cold water for a couple of hours – this will stop them from burning on the grill.

Place the lime juice, honey, fish sauce, olive oil, garlic, ginger and salt in a pan and bring to a simmer.  Cook for 5 minutes then leave to cool.

Divide the marinade in half, and pour one half over the shrimp.  Cover and refrigerate for half to one hour.  Keep the remaining half of the marinade to one side to use as a glaze.

While the shrimp is marinading, make the salsa.

Chop the mango, strawberries and avocado into evenly sized pieces and place them in a bowl.  Add the cilantro, green onions, lime zest, ginger and garlic, and season well with salt.  Mix well then pour over the olive oil and lime juice.  Give it all one final mix then store in the fridge until needed.

When ready to cook the shrimp, preheat the grill to medium hot.

Thread the shrimp onto the soaked bamboo skewers (I like to use 2 skewers for each as they hold the shrimp securely and makesthem easier to turn).

Grill the shrimp for 2-3 minutes per side, brushing well with the reserved marinade.

Remove from the grill once the shrimp is pink and opaque and serve at once with mango, strawberry, avocado salsa.

HGGS2

I like to put a bed of lettuce on a plate, top this with the salsa and then sit the shrimp skewers on top.

HGGS1

I served this with some tostones made from green plantains.

Shared at Paleo AIP Recipe Roundup #34

Shared at Gluten Free Fridays #99

Shared at Real Food Fridays #46

Packed Lunch – 07/09/14

Even though the kids are now on their summer break, I still have to make packed lunches – Both Hubby and I take one to work, and today, C needed one as she was performing with the Calgary Roundup Band at the Calgary Stampede.

This is what I packed:

lunchs1

Clockwise from the top left-hand corner:

  • Blueberries and macadamia nuts
  • Cucumber sticks
  • A bed of lettuce with leftover sliced roast beef
  • Radishes and baby carrots

Also included was a reusable water bottle filled with water.

Beet Kvass & Lacto-Fermented Beets

This is another recipe in my cultured/lacto-fermented foods series.

And the best bit is that this is a 2-in-1 recipe.

Not only do you get a wonderful probiotic beverage (the Beet Kvass), you also end up with some lacto-fermented beets that can be used in salads or as a condiment to provide yet more probiotics in your diet.

I love Beet Kvass – it has a slightly sweet, slightly salt, earthy flavour that is full of beet.

BK5

When you sip it, you can feel that it is doing you some good!

Beet Kvass is a cleansing tonic, that is good for many systems of the body.

Sally Fallon in Nourishing Traditions says: “This drink is valuable for its medicinal qualities and as a digestive aid. Beets are just loaded with nutrients. One 4-ounce glass, morning and night, is an excellent blood tonic, promotes regularity, aids digestion, alkalizes the blood, cleanses the liver and is a good treatment for kidney stones and other ailments.”

In addition to the cleansing nature of kvass, the finished drink is full of beneficial enzymes and probiotic bacteria as a result of the lacto-fermentation process.   As the beets ferment, the sugar and starch in the beets are converted to lactic-acid preserving the kvass and stopping it from going bad.

Regularly eating lacto-fermented vegetables, including beet kvass, will promote healthy gut flora, and greater absorption of nutrients from your food.

I add both garlic and ginger to my kvass for extra flavour and nutrition.  If you don’t like them or you cannot handle them in your diet, it will work just as well without.

This is another fairly quick ferment, taking less than a week on the counter top, but it does benefit from a week or two in the refrigerator to allow the flavours to mellow and even out.  It can be drunk straight off the counter however, but I think it is better to wait…

You do need dechlorinated water for this as chlorine will prevent the growth of the lactic-acid bacteria that ferment the beets.

The water you use can be dechlorinated in a number of ways – you can buy reverse osmosis filtered water or distilled water.  You can run your water through a household filter that will remove the chlorine.  You can leave it to stand on the counter-top for 24 hours, you can boil it for 20 minutes and then allow it to cool, or you can whir it in a blender for 5 minutes.  These last 3 methods will remove chlorine from the water but they will not remove chloramine.  Some municipalities have moved from using chlorine in their water supply to using chloramines.  These cannot be removed from the water, so it is important that you contact your water provider and check.  The city of Calgary does not use chloramines, so all of these methods work for me.

Beet Kvass and Lacto-Fermented Beets

Makes 1 quart-sized jar

BK7

  • 3-4 large beets
  • 1″ piece of root ginger
  • 2-3 cloves of garlic
  • 1 tbsp sea salt
  • dechlorinated water

Take the beets and wash them well – there is no need to peel.  Cut the beets into large chunks – I usually cut them into 8 wedges.  Slice the root ginger into thin slices – again, no need to peel.

Place the ginger and garlic in the bottom of a quart sized mason jar and add the beets.

BK4

Mix the sea salt with the water to make a brine and pour this over the beets to within 1″ of the top of the jar.

Seal and stand at room temperature for 2-7 days.  The ambient temperature will determine exactly how long the fermentation process will take.  Check the kvass each day, removing the lid to allow any gas to escape.

After a couple of days, it is also a good idea to taste a little – the kvass is ready when it is a deep red colour and there are a few small bubbles working their way to the top.  It should smell and taste earthy and salty and a bit like beets.  If your home is very warm, it could ferment in as little as 2 days, during the winter or if your house is colder, it could take up to a week.

bk3

Store the kvass in the refridgerator.  You can drink it straight away, but if you leave it for a couple of weeks, the saltiness will diminish and the flavours will keep getting better and better.

Some of the best kvass I have ever drunk was forgotten at the back of the fridge for around 8 weeks!

You can use the leftover beets to make a second batch of kvass – follow the directions above, using the beets, ginger and garlic, and adding more brine.

After the second batch of kvass, use the beets in salads or just eat them as a snack.

BK6

I love to grate the fermented beets and mix them with grated carrot and some green onion to make a fermented beet salad.

FBCS1

The Kvass can be drunk just as it is as a cleansing probiotic tonic.  It can also be added to salad dressings, soups or used as an interesting addition to a cocktail (it tastes wonderful when added to a Caesar!)

BK8

Shared at Gluten Free Fridays #98

Shared at Paleo AIP Recipe Roundtable #34

Shared at Homestead Blog Hop