Water Kefir Soda

In an attempt to increase the amount of probiotic foods in our diet, I have been making water kefir a lot lately.

Water Kefir is an effervescent, probiotic rich fermented drink that can be used to make a healthy homemade soda.    Like most other probiotic rich fermented foods, it supports gut health and systemic wellness.

WK10

It is enzyme rich and filled with amino acids, and is also rich in vitamin B12, vitamin K and biotin.

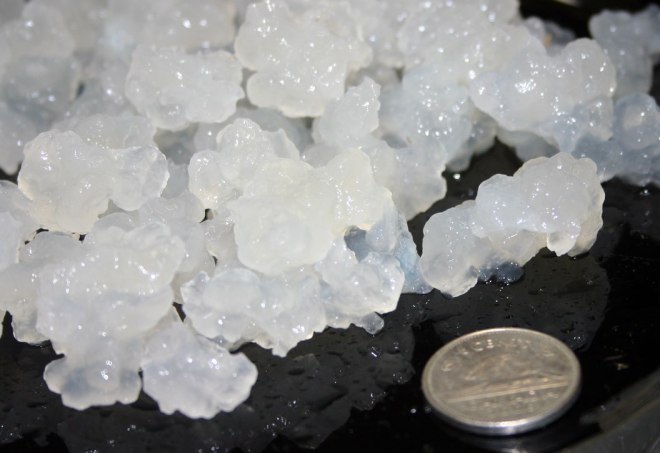
Water kefir is made using a scoby (Symbiotic culture of bacteria and yeasts) called Tibicos, although most people simply refer to them as water kefir grains.  Unlike a kombucha scoby, water kefir grains are small, translucent jelly like lumps around 5mm in size although they can grow to be much larger.

WKgrains2

WK3

You add the grains to a sugar water solution, and the bacteria and yeasts feed on the sugar turning it into a number of beneficial acids and infusing the water with probiotic microorganisims, B vitamins and food enzymes.  This process reduces the amount of sugar in the finished drink.  It does produce a small amount of alcohol as well, but in most cases, this ranges from 0.5% to 0.75% depending on how you brew it.  The longer you brew it, the more alcohol it will contain.  This post deals with the alcohol content of water kefir.

I purchased my water kefir grains in a dried form from Cultures for Health, but you may be able to find someone local who will give or sell you some.  Try searching on Craigslist or Kijiji.  You could also try asking on groups such as Wild Fermentation on Facebook.

It is very easy to make, and because you flavour it yourself with fruit or juice, the variations you can make are endless.

I like to make my water kefir using an unrefined organic cane sugar as this provides the mineral rich environment that the water kefir grains love.  I also add a pinch of sea salt (for minerals again).  In case you are thinking “But sugar is not paleo”, read this post by The Paleo Mom on using sugar as a sweetener.  As long as you do not over consume the water kefir (and really, you do not need to consume more than a single glass in a day) you really won’t be getting huge amounts of sugar, and this beverage contains far less sugar than a can of coke, and none of the harmful artificial flavourings and additives.

Honey does not make a good substitute for the sugar as it has antimicrobial propeties and can weaken or kill your water kefir grains.  Likewise, sugar-free sweeteners such as stevia cannot be used to make water kefir as they would not provide any food for the grains.

Water kefir is made in 2 stages – a primary fermentation where the grains grow in the sugar water for 24-48 hours, then a secondary fermentation where fruit, juice or herbs and spices are added to flavour the liquid.  It is during the secondary fermentation that the carbonation takes place.

wk6

Water Kefir Soda

makes 1 quart

For the primary fermentation:

  • ¼ cup water kefir grains (one packet of dehydrated grains from Cultures for Health will yield ¼ cup when rehydrated)
  • ¼ cup unrefined organic cane sugar
  • 1 pinch of unrefined sea salt
  • un-chlorinated filtered water (if you are using tap water, boil it to remove the chlorine and allow to cool)

Dissolve the sugar and sea salt in the water, and place in a 1 quart jar.  Add the water kefir grains (if using dehydrated ones, follow the instructions that come with them for re-hydrating them).

Cover the mouth of the jar with a coffee filter held in place with an elastic band and place in a room-temperature dark place for 24-48 hours.  I put mine in the pantry.

The longer you leave it, the more of the sugar that will be fermented out, but do not leave it for more than 48 hours or it will starve your grains.

After 48 hours, strain the grains through a strainer, reserving the liquid.  Some people tell you never to use metal, but I have been, and my grains are fine.  I figure the few seconds it takes me to strain out the grains and then dump them into a new container of sugar water won’t harm them or me.

WK1

Place your strained grains into a new jar of sugar water to start the process again.

The strained liquid is what you are going to use to make the water kefir.

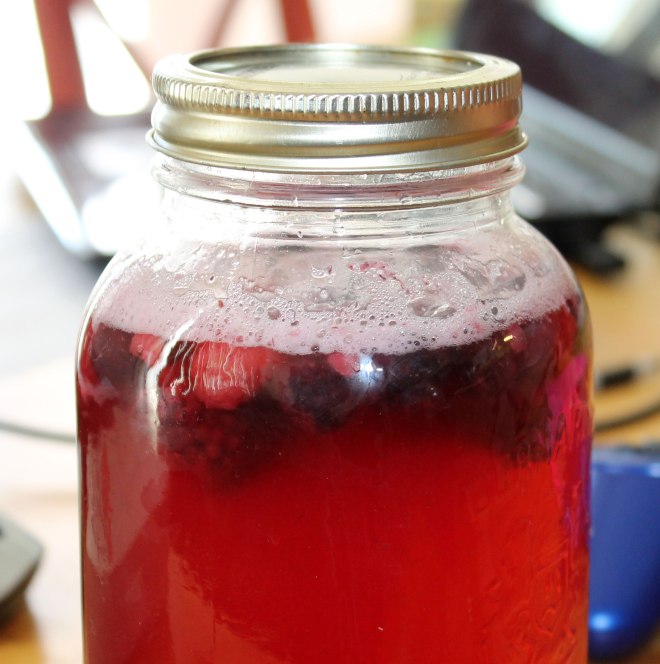
Place it in a new mason jar with whatever you decide to flavour it with.  You could use ½ cup of fruit juice, but I most often add whole fruit to the jar.  I also add herbs or spices sometimes.

WK7

These are some of my favourites:

  • 1 cup diced pineapple and a sprig of mint mint
  • a diced grapefruit (this one is WONDERFUL!)
  • a sliced lemon and a sprig of mint
  • ½ cup of frozen mixed berries
  • a 1″ piece of ginger sliced (no need to peel), ½ lemon sliced, 2-3 star anise, a cinnamon stick, a tsp cardamom seeds and a tsp vanilla extract
  • ½ cup frozen saskatoon berries and a couple of sprigs of fresh basil
  • 2 peppermint teabags (seriously, it is VERY good!)

wk8

Seal the jar with a lid and place it on the kitchen counter for 12-24 hours until the flavours have infused and the drink is starting to get bubbly.  As per the article I linked to above, you don’t want to let it get so bubbly that it fountains out of the jar.  You want it just about the fizziness of a can of coke.

WK9

Now you can strain out any solid flavouring ingredients and store it in the fridge.

I like to transfer it to a flip-top bottle like this one for storage.

BB2

Shared at Waste Not Want Not Wednesday #70

Shared at Allergy Free Wednesday #115

Shared at Wellness Wednesday

Shared at Full Plate Thursday 5-1-14

Shared at Paleo AIP Recipe Roundtable #25

Shared at Simple Meals Friday #83

Shared at Whole Food Fridays 5-2-2014

Bacon Wrapped Chicken Fingers

This is a fairly common lunchbox filler, but also makes a good evening meal.

The bacon really does help keep the chicken moist and provides crunch and a great flavour.  And lets face it, everything is better with bacon!

When packing these in a packed lunch, I like to pack a dipping sauce – ketchup, mustard, paleo ranch dressing or a honey mustard sauce are the most popular.  For an evening meal, I most often serve them hot with fries and a salad (and ketchup of course).

These are AIP, but obviously you would not use the ketchup, mustard or honey mustard sauce.  Homemade guacamole would be a good choice for an AIP dipping sauce.

Bacon Wrapped Chicken Fingers

makes aprox 18 chicken fingers

BWC1

  • 2lb chicken tenders
  • 1lb bacon (aprox 18 rashers)
  • poultry seasoning (make sure it contains no non-AIP ingredients.  The one I use contains sage, thyme, rosemary, marjoram and garlic powder)
  • Sea salt to taste

This is a very, very simple recipe.

Preheat the oven to 200°C/400°F.

Season the chicken tenders with poultry seasoning.

Season the chicken to taste with salt.  Be careful with the salt – you do not want to use too much as the bacon is salty.

Wrap each chicken tender in a bacon rasher, spiraling it down the length of the chicken.  Secure with a toothpick if necessary.

Place the wrapped chicken tenders on a rack over a baking/roasting tray.

Bake in the oven for 20-25 minutes until the chicken is cooked through and the bacon is crispy.

BWC3

Serve hot or cold.

Shared at Tuesdays With a Twist #55

Shared at Tasty Tuesday

Shared at Real Food Wednesday 4/30/2014

Shared at Paleo AIP Recipe Roundtable

Steak and Eggs With Rutabaga Hash Browns

We had steak last night for dinner, and there were pieces leftover in the fridge that had not been cooked.

And seeing  seeing that both Hubby and I are not at work today, I decided that I would cook us a late breakfast/brunch.

And that steak seemed perfect.

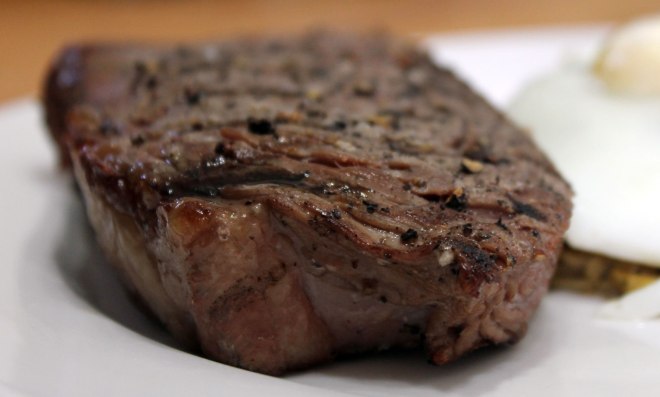
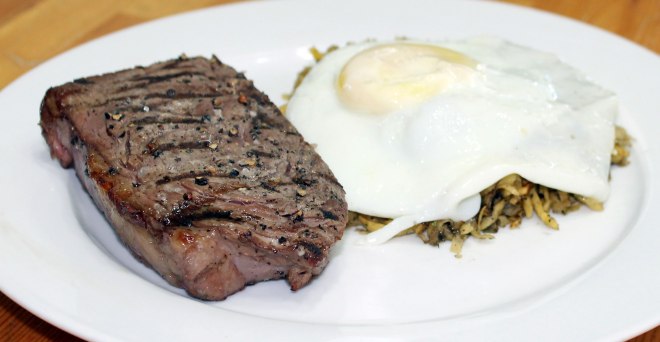
So I made us steak and eggs, and rutabaga hash browns to round it out.

Having looked at the photographs I have decided that I need to get a coloured plate – photographing something white on a white plate does not work so well!

Whole eggs are an AIP stage 2 reintroduction.  When reintroducing foods on the AIP, I recommend this guide.

Steak and Eggs With Rutabaga Hash Browns

serves 2

sae1

  • 2 8oz steaks  – preferably grassfed
  • sea salt and freshly ground black pepper
  • ½ small rutabaga – peeled and grated
  • 2 tbsp coconut oil
  • 2 eggs – preferably free-range/organic

Season the steaks generously with sea salt and freshly ground black pepper.  Grill to your liking using a BBQ/grill.  We like ours rare so we cooked them for no longer than 2 minutes per side.  If you like your steak more well done than this, you will need to cook them for longer.

Allow the steak to rest for 5-10 minutes while preparing the rutabaga and eggs.

sae3

Season the grated rutabaga with salt and pepper.  Melt 1 tbsp coconut oil in a skillet.  Add the rutabaga and toss for 5 minutes until it is starting to wilt.  Shape into 2 cakes, and press down using a fish slice.  Cook for 2-3 minutes until browned and crispy.   Turn and cook the other side in the same way.

In a separate skillet, melt the remaining coconut oil and fry the eggs however you like them – we like ours overeasy.

sae6

To serve, place one rutabaga cake on each plate and top with the egg.  Serve the steak on the side.

sae7

Shared at Natural Living Monday #72

Shared at Mostly Homemade Mondays #78

Shared at Hearth and Soul Hop

Shared at Real food Wednesday 4/30/2014

Shared at Waste Not Want Not Wednesday #70

Oven Baked Meatballs

I love meatballs!  And this is my favourite way of cooking them:

This is an AIP stage 4 reintroduction recipe as it contains tomatoes in the marinara sauce.  When reintroducing foods on the AIP, I recommend this guide.

Oven Baked Meatballs

serves 6

bm3

  • 2lb ground beef – preferably grassfed
  • 1lb ground pork – preferably pastured
  • 1 tsp fennel seeds
  • 1 tsp dried rosemary
  • 1 tsp dried thyme
  • 1 tsp dried basil
  • 1 tsp dried sage
  • 1 tbsp onion powder
  • 1 tsp garlic powder
  • 1 onion  – finely chopped
  • sea salt and freshly ground black pepper to taste
  • 2-3 cups pre-made marinara sauce

Preheat the oven to 190°C/375°F.

Place both types of ground beef in a large bowl.

Grind the fennel seeds in a pestle and mortar and add to the bowl.  Add all the dried herbs, the garlic and onion powder and the chopped onion.

Season well with sea salt and freshly ground black pepper.

Mix well.  This is easiest done with your hands.

Now roll the mixture into small balls.  I like to make them about the same size as a golf ball.

Place the meatballs on a rimmed baking sheet.

Bake the meatballs in the preheated oven for around 30 minutes until they are browned and cooked through.

Now transfer the cooked meatballs to a glass baking dish.

bm7

Ladle over 2-3 cups of marinara sauce.

Bake the meatballs in the oven for a further 20 minutes until it is all bubbly.

bm5

Serve over cauliflower rice, spaghetti squash or zoodles.

bm6

Shared at Hearth and Soul Hop

Honey-Mustard-Dill Sauce

This is a sauce that I often serve with Gravlax, but it goes equally well with any fish, and is just as good with chicken.

It is very simple to make and tastes just delicious.

Black pepper and mustard are AIP stage 1 reintroductions.  When reintroducing foods on the AIP, I recommend this guide.

Honey-Mustard-Dill Sauce

HDMS1

  • 4 tbsp Dijon mustard
  • 1½ tbsp apple cider vinegar
  • 2 tbsp honey
  • ½ cup olive oil
  • ¾ cup of dill – finely chopped
  • sea salt and ground black pepper to taste

To make this, you simply mix all the ingredients together.

This is great served with gravlax or any other fish.  It is also great served with chicken fingers or my bacon wrapped chicken.

Packed Lunch (04/25/14)

This is what I made for the packed lunch that Hubby and I took to work today:

lunch042514

Clockwise from the top left-hand corner I packed:

  • a few dried apricots and some almonds
  • a baby cucke
  • Green leaf lettuce with some leftover chicken breast from a roast chicken
  • carrot sticks

We both took an apple and I also took a mason jar of bone broth.  And we both had our reusable water bottles.

Pallets for the Garden

We are hoping to build some raised beds in our back yard this summer so that we can carry out Square Foot Gardening.

The aim is for us to grow as many vegetables as we can in the most economical way.

So in order to save some money on actually building the beds, we decided to get the timber as cheap as possible, and if at all possible for free.

So today, Hubby and I went out to pick up 2 loads of this:

pallets2

There are 30 pallets there, all full of useable timber.

pallets1

And the best bit is that they were totally free – we answered an ad on Kijiji and went and picked them up.

Now we have to take them apart, and then we can get on with making our beds.

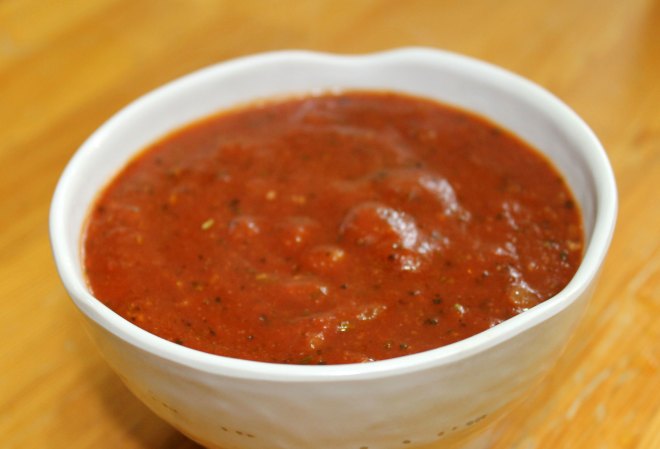
Basic Marinara Sauce

There are so many uses for a basic marinara sauce.

You can use it to cover meatballs.  You can use it to top a pizza.  You can use it on top of chicken breasts to make a chicken parm.  I use it all the time to make eggplant parm.  You can even use it to dress faux pasta noodles (I love it over zoodles!)

This is my “go to” recipe for a marinara sauce:

Because this recipe is made from tomatoes, which are a nightshade, this recipe is an AIP stage 4 reintroduction.  When reintroducing foods on the AIP, I recommend this guide.

Basic Marinara Sauce

makes aprox 3 cups

BMS1

  • 1 tbsp olive oil
  • 1 small onion – finely chopped
  • 3-4 cloves of garlic – crushed
  • 1 796ml (28floz) can of crushed tomatoes
  • 1 cup bone broth (I usually use chicken bone broth)
  • 1 tsp dried basil
  • ½ dried thyme
  • ½ dried oregano
  • 2 tsp balsamic vinegar
  • sea salt and freshly ground black pepper to taste

In a large pan, heat the olive oil over a low heat (there is no reason to avoid using olive oil for cooking – see this post and this post.  It has a fairly high smoke point, and cooking with it does not damage the nutritional value of the oil in any way.  Also it does NOT turn it into a trans fat when used for cooking.  The only thing that heating olive oil may do is affect the flavour!)

Add the onion and garlic and cook gently until the onion has softened and is starting to look translucent.  Do not allow it to burn or brown – burned onions and garlic will give your finished sauce a very bitter flavour!

Now add the can of crushed tomatoes and use the bone broth to rinse out the can.  Add the bone broth and the can-rinsings to the pan.

Now add the basil and balsamic vinegar and season to taste with sea salt and freshly ground black pepper.

Simmer gently over a low heat for 30-45 minutes until the sauce is thick and rich.

Use as needed in recipes, or cool and store.  This will keep for 1 week in the refrigerator or up to 3 months in the freezer.

Spinach and Mushroom Crustless Quiche

As I have mentioned is several other posts, crustless quiche make great lunchbox fillers.  They are also very tasty for a light evening meal or even for breakfast.

This particular one is vegetarian, but it is not vegan because it does contain some cheese for added protein.  This also means that while it is gluten free, it is not dairy free.  I tend to make this quiche on the days when I know I won’t be needing lunch as I cannot eat it.

This recipe is an AIP stage 4 reintroduction as it contains cheese.  When reintroducing foods on the AIP, I recommend this guide.

Spinach and Mushroom Crustless Quiche

serves 6

CQ2

  • 2 onions – chopped
  • 1 tbsp coconut oil or other fat of choice
  • 6oz mushrooms – sliced
  • 283g (10oz) bag of baby spinach – washed
  • 12 eggs – beaten
  • 3 tbsp coconut milk
  • salt and pepper to taste
  • 1 tsp thyme
  • ¼ tsp nutmeg
  • 4oz cheddar cheese – grated

Preheat the oven to 180°C/350°¼½¾F.

Melt the coconut oil in a large skillet and add the onions.  Cook over a medium heat, stirring often until they are tender and golden brown in colour.  Add in the sliced mushrooms and cook until tender.  Add the washed spinach, and toss until it is wilted

Transfer the contents of the skillet to a bowl and set aside.

In a separate bowl, beat the eggs with the coconut milk, salt, pepper, thyme and nutmeg.

Mix the egg mixture with the spinach mixture and transfer to a circular 9″ diameter baking tin.  I use a silicone one for ease of removal.

Sprinkle over the grated cheese taking care to spread it evenly over the surface.

Bake the quiche in the oven for 25-30 minutes until the egg is set and the cheese is starting to brown.

Cool in the tin before cutting into portions.

Serve warm or cold.

Shared at Gluten-Free Wednesdays 5-14-14

Paleo Banana Pancakes

I decided to treat the kids to pancakes for breakfast.  I have always failed spectacularly with a lot of the banana pancake recipes that I have found via a web-search, so I am not sure quite why I decided to do this…

But this time, they worked perfectly!  I didn’t even use a recipe, I just threw everything together, and it worked.  I suspect that the tapioca flour helped hold everything together, but also I think that part of the reason for the success was that I kept the pancakes small, using no more than 1 tbsp of the batter for each pancake.

These contain whole eggs and are an AIP stage 2 reintroduction.  When reintroducing foods on the AIP, I recommend this guide.

Paleo Banana Pancakes

serves 2-4

bp2

  • 2 bananas (preferably slightly under-ripe)
  • 4 eggs
  • 2 tbsp tapioca starch
  • coconut oil to cook
  • 100% pure maple syrup to serve

Put the bananas, the eggs and the tapioca starch in a blender and blend until you have a smooth batter.

Heat a little coconut oil in a skillet over a medium-high heat, then add the batter, using no more than 1 tbsp for each pancake.  You will be able to fit several of these teeny pancakes in your skillet.  The exact number depends on how big your skillet is.

Cook until the bottom is browned and the top has set.

Flip and cook for a minute or two on the other side until that is browned.

Remove from the skillet and keep warm (or serve them immediately to hungry mouths!), and repeat until all the batter is used up.

bp1

Serve drizzled with 100% pure maple syrup.

Shared at Gluten Free Friday #88

Shared at Whole Food Fridays 4-25-2014

Shared at Gluten Free Wednesday 5-7-14