Pink Deviled Eggs

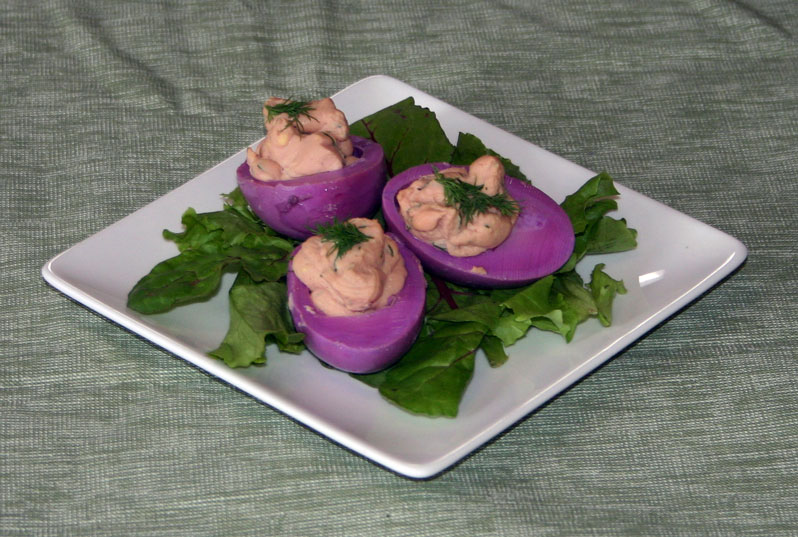
This is an unusual way to prepare eggs, but it is both delicious and very striking to look at.

I made these for a Ostara celebration that I attended.

bpe3

They would also be perfect for Easter, and would make a stunning addition to a brunch table.  I also made some yellow deviled eggs as well, but they are a separate recipe.

They also make great appetizers or snacks.  Kids love them due to the unusual colour…

The striking pink-purple colour is 100% natural, and comes from soaking the cooked and peeled eggs in leftover beet-brine or beet kvass.

BPE1

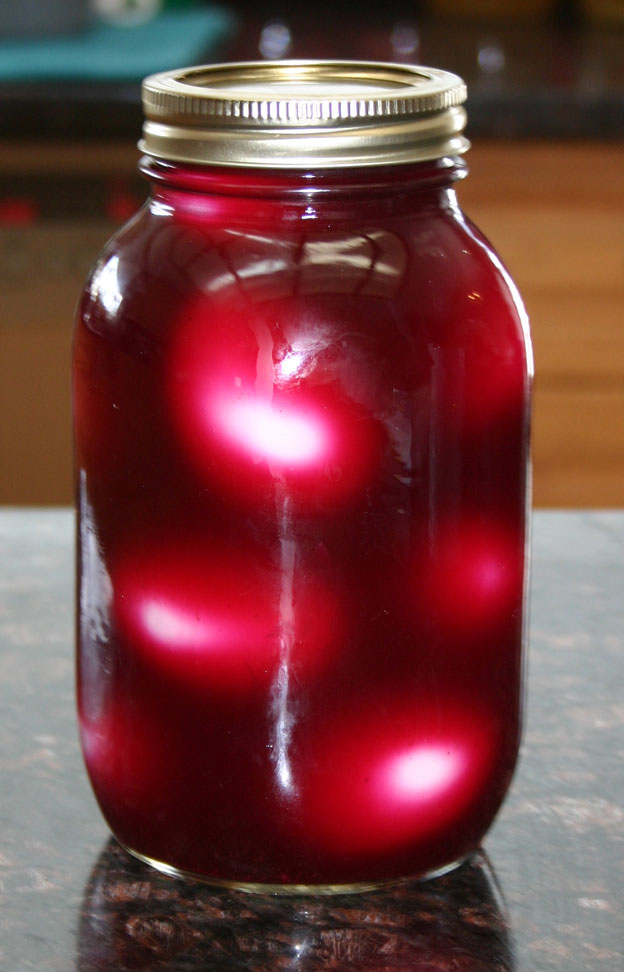
The eggs need to soak in the brine for several days  – the longer you soak them, the more the whites take on the colour – I left these in the brine for 7 days, and as you can see, the purple-pink colour penetrated all the way to the yolks.  In fact, the yolks were stained slightly pink at the edges.  I suspect that leaving them in the brine for even longer would result in pink yolks as well.

If you also need to make the beet brine or kvass, you will need to start these at least 2 weeks in advance.  The recipe for the beet brine/kvass can be found here.

While these are not 100% AIP (egg yolks are a stage 1 reintroduction, and egg whites are a stage 2 reintroduction), if you have successfully managed to reintroduce eggs, you could enjoy these beauties.  When reintroducing foods on the AIP, I recommend this guide.

Pink Deviled Eggs

makes 2 dozen halved eggs

BPE2

  • 1 dozen eggs
  • beet brine or beet kvass to cover
  • ¼ cup homemade mayonnaise
  • ¼ cup coconut milk yoghurt
  • 2 tbsp fresh dill – chopped
  • salt and black pepper to taste (black pepper is a stage 2 reintroduction – omit this if sensitive to it)
  • dill sprigs to garnish

Place the eggs in a pan and cover with cold water.  Bring to the boil, then simmer for 10 minutes.

Drain the eggs and cover in cold water.  Leave to stand until completely cold.

Remove the shells from the eggs, and place them in a large mason jar.  Cover the eggs with the beet brine/beet kvass, and put on a lid.

BPE1

Store the eggs in the fridge for between 3 and 7 days.  The longer you leave the eggs, the more colour the whites will take.

To make the deviled eggs, drain off the beet brine/kvass.

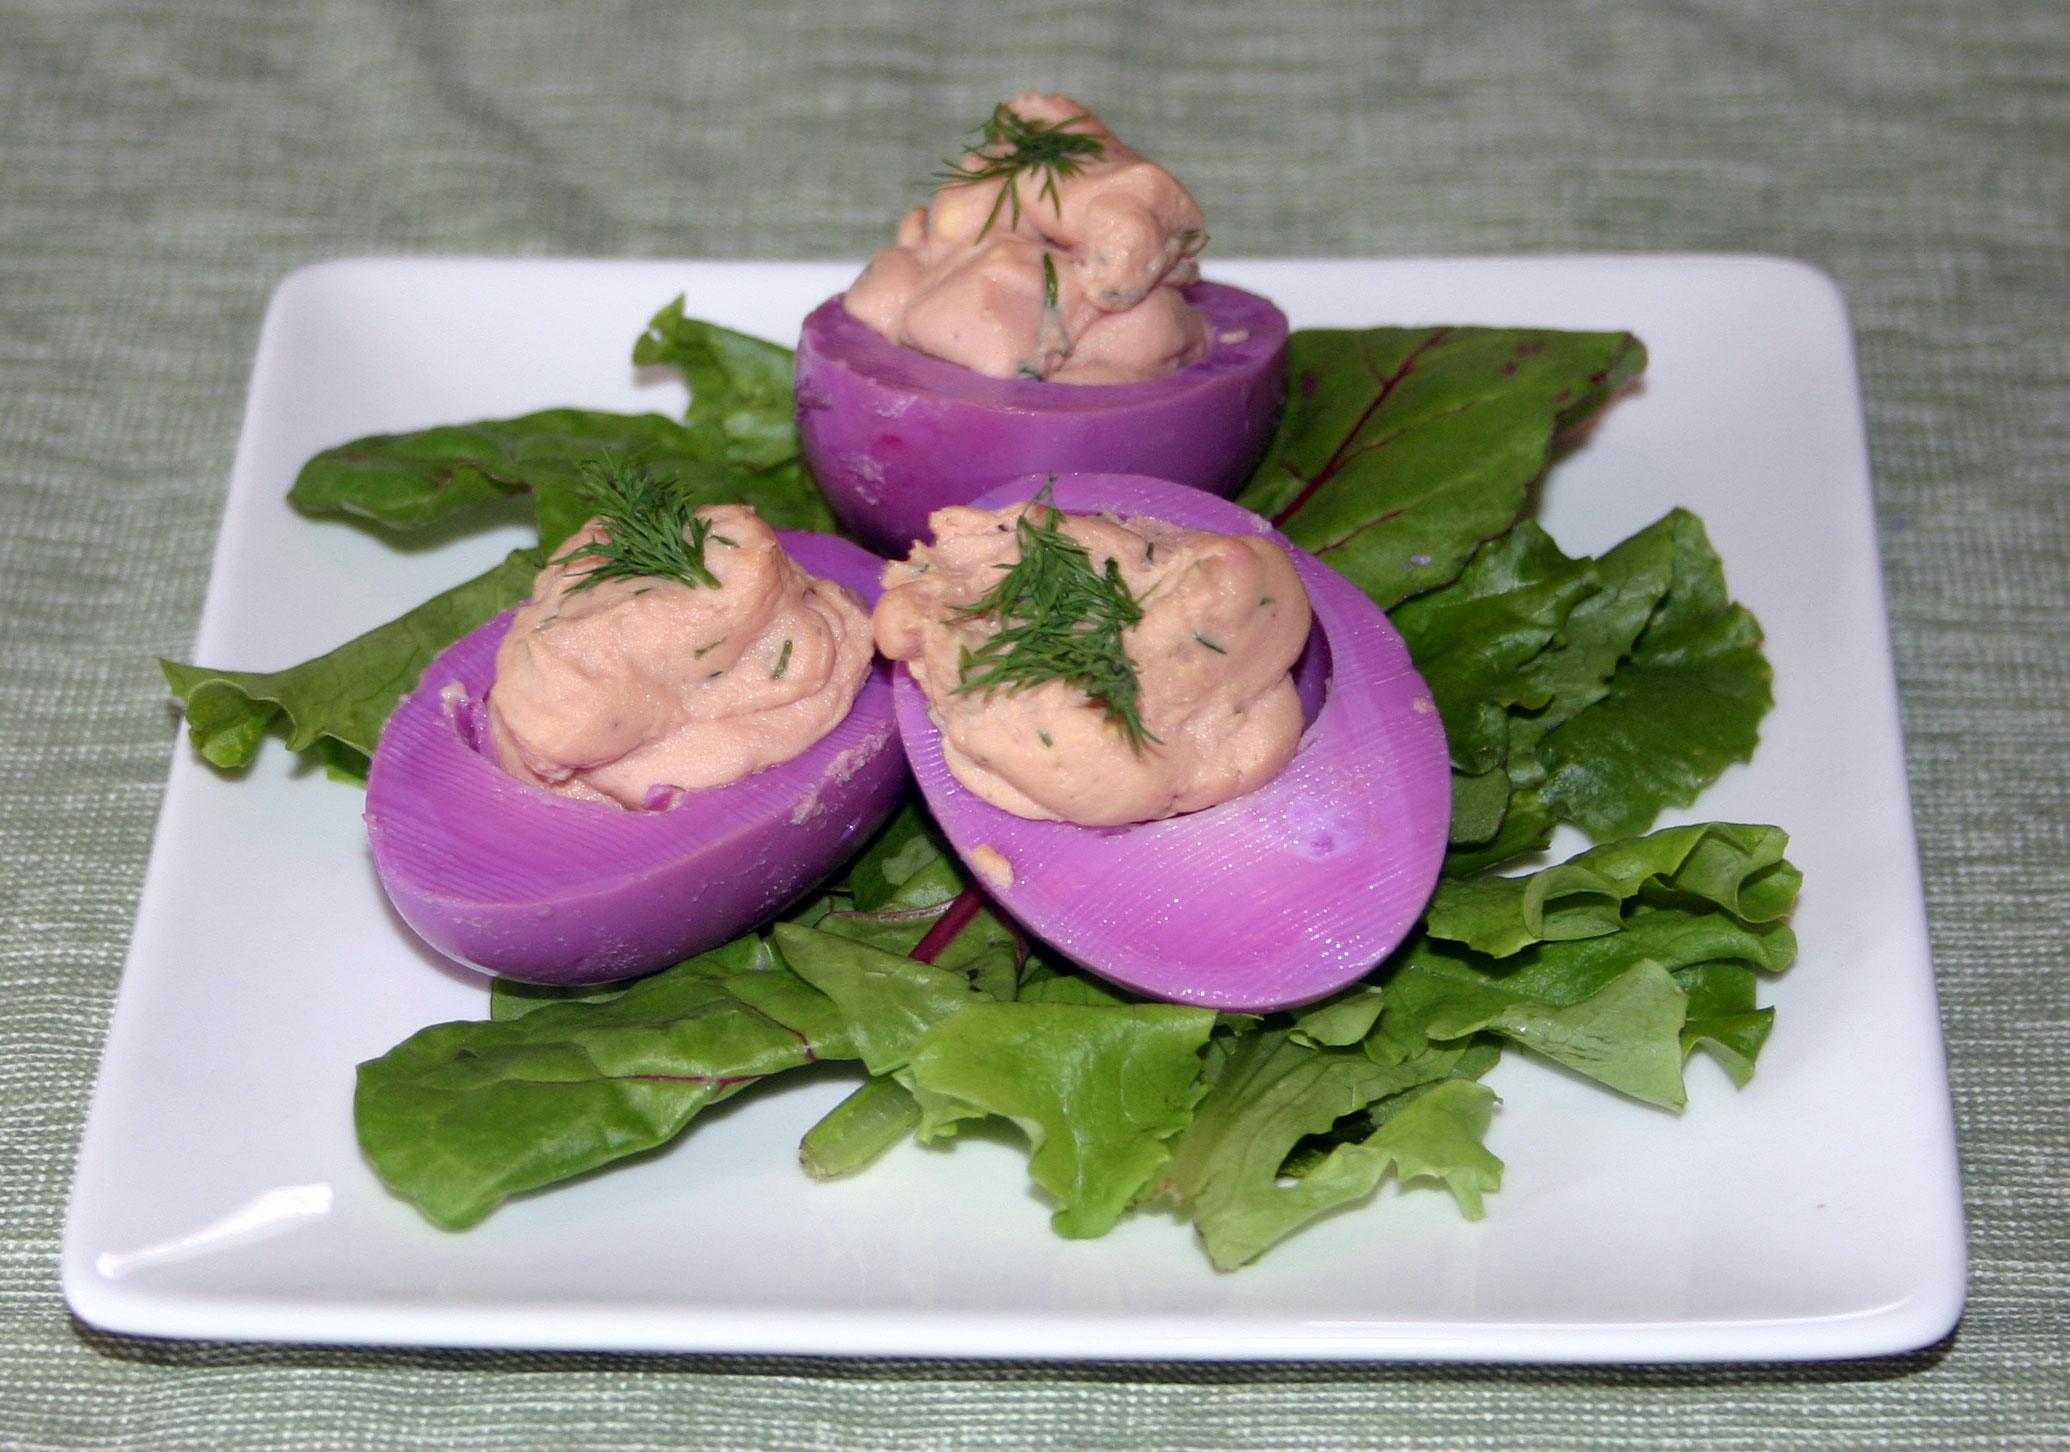
Slice each egg in half, lengthwise and scoop the yolks into a bowl.

Mash the yolks with the mayonnaise and coconut milk yoghurt until smooth.  Season with salt and black pepper, and stir in the dill.

Spoon or pipe the yolk mixture back into the whites and garnish with a small sprig of dill.

bpe4

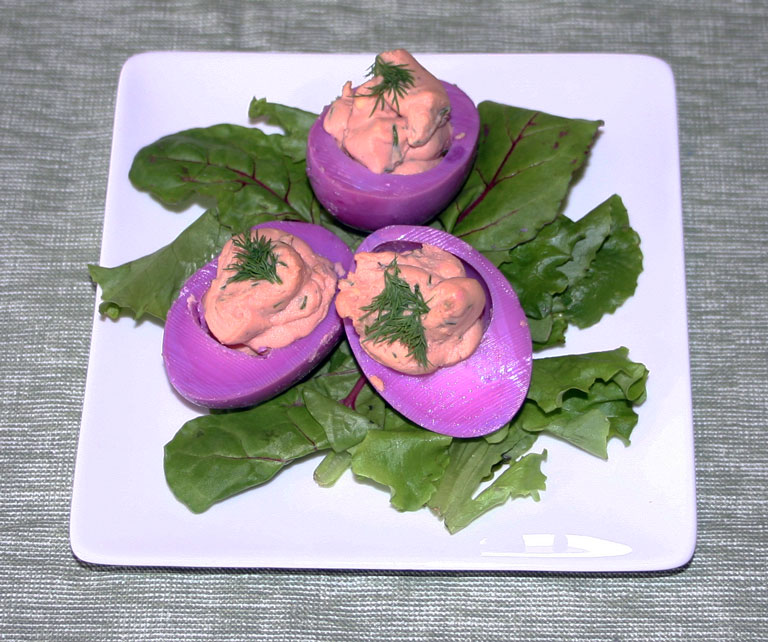
Keep in the fridge until you are ready to serve, and be prepared to explain to everyone how you achieved that wonderful colour!

Shared at Mostly Homemade Monday

Shared at Fat Tuesday

Shared at Tuesdays With a Twist

Shared at Corn Free Everyday

Shared at Handmade Tuesday

Shared at Simple Life Sunday

Shared at Show and Share

Shared at The Art of Homemaking Mondays

Shared at Wildcrafting Wednesday

Shared at Homestead Blog Hop

Shared at Full Plate Thursday

Shared at Home & Garden Thursday

Shared at All Things Thursday

Shared at Awesome Life Friday

Shared at Simply Natural Saturday

Simple Small Batch Sauerkraut

I don’t own a large fermentation crock, so I make my sauerkraut in small batches in mason jars.

It does take a bit more work to do it this way because you have to make and fill several small jars rather than just packing it into one large fermentation crock or jar.

But I have a large number of wide-mouthed mason jars, so this method works well for me.

I posted about my vegetable ferments that I made a while ago, and sauerkraut was part of this batch.

I made a batch with red cabbage and another batch with green/white cabbage.  You could use either or even mix the two.

I don’t add any spices to my kraut, but if you are not AIP and like the flavour, you could add some caraway or fennel seeds to provide a slight aniseed flavour.

Sauerkraut is very good for you – it has been shown that a small amount of sauerkraut will provide you with far more healthy probiotic bacteria than even some of the very high quality probiotic supplements.

This makes it a very valued addition to any diet as far as I am concerned.

But in addition to it’s probiotic content, sauerkraut is a good source of vitamins A and C, and has all the health benefits of the other cruciferous vegetables.

It is also very tasty – tangy and slightly salty.

Simple Small Batch Sauerkraut

makes 1 quart sized mason jar

kraut1

  • ½ head of cabbage (you could double up the recipe and use the entire head if you prefer).  Either red cabbage or white, or a mixture of the two – it really does not matter.
  • 2 tbsp sea salt

Take your cabbage and remove the core and some of the outside leaves.  Reserve one or two leaves.

Now shred the cabbage finely – I like to do this in my food processor to save time, but you could use a knife.

Place the shredded cabbage in a large bowl and sprinkle the salt evenly over the surface.

Now you need to pound the heck out of the cabbage – I use the end of my rolling pin, but you could use a meat pounder or even your fists.  What you need to do is to break down some of the structure of the cabbage and make it release it’s liquid as this forms the brine that will preserve your kraut.

Pounding the cabbage can take upwards of 10 minutes, and you want it to be really juicy when you squeeze it.

After this, transfer the cabbage to a wide mouthed mason jar, packing it down well with your fists.

If you have pounded it enough, you should see the brine starting to rise up over the surface to cover the cabbage.  If not enough brine rises up, no worries, just mix up a little more brine (2 tbsp salt in 1 quart of water) and pour that over the surface.

Now take the reserved cabbage leaves and lay them on the surface of the cabbage, pushing them underneath the brine.  These will stop lots of little bits of cabbage from rising to the surface, which will help prevent mold forming.

After this, I like to weight the cabbage leaves down – I use the very small jelly-sized mason jars as they fit perfectly inside a wide-mouthed mason jar.  I fill them up with a little brine to help hold them down and prevent them from floating.

And finally, screw the lid on the mason jar.

Leave your sauerkraut to ferment for 2-3 weeks, opening the jar to release any gas every day.  I like to taste it towards the end of the fermentation period at this point as well.

The sauerkraut is ready when it tastes good to you.  In cold weather it may take longer to ferment than it will in the summer.

If you don’t think it is ready, reseal and leave it for a few more days.  Some people like to ferment their kraut for several weeks (6-8), but I prefer it “younger”.

Once you think it is ready, transfer it to the fridge as this will slow down the fermentation process.  Now it will keep for months.

If you make sure that your cabbage is well submerged under the brine, you should have very few problems with spoilage or mold formation – but in the unlikely event that it does mold, throw the whole lot out.  Mold produces toxins that can spread rapidly throughout the entire jar of sauerkraut, and you cannot just scrape it off the surface.

When I make red cabbage sauerkraut, it looks like this:

RK1

And the green cabbage sauerkraut looks like this:

GK1

Because this is a live culture, I don’t really recommend that you cook your sauerkraut – it will be tasty if cooked, but it won’t contain any of the probiotic bacteria as they are killed by high temperatures.

I most often eat my sauerkraut raw – either with sausage patties for breakfast:

AIPbfast1

Or with other meats/fish/eggs (this is pulled pork)

AIPbfast3

I also sometimes add it to coleslaw to make a lacto-fermented slaw.