Turmeric-Avocado Deviled Eggs

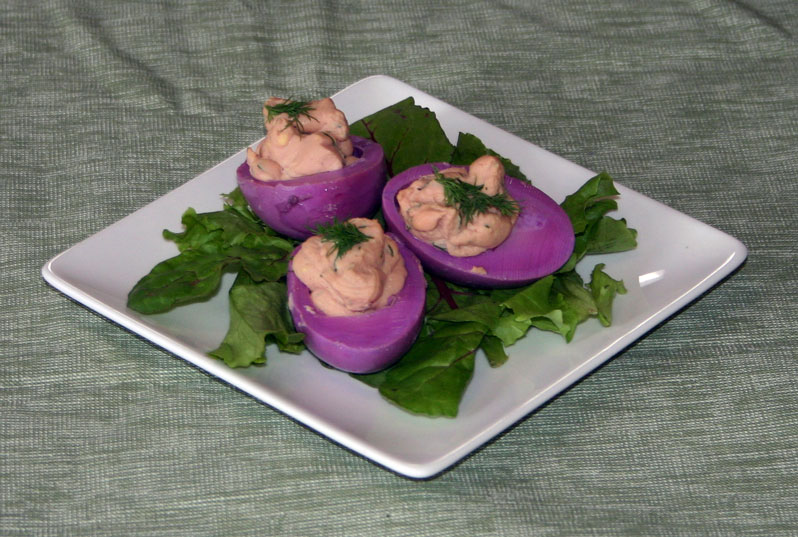
This is the second batch of deviled eggs that I made for the Ostara Potluck I attended.

ye2
The first batch was the Pink Deviled Eggs I wrote about a few days ago.

Unlike the pink eggs, which used leftover beet brine, I made a fermented turmeric brine especially for these eggs.  They will need to be started at least 2 weeks in advance of when you want to serve them in order for you to have time to ferment the turmeric brine.

But the results are worth it!

Turmeric adds the yellow colour to the outside of the eggs, and is also a powerful antioxidant and anti-inflamatory.

The avocado not only provides the green creamyness to the yolk filling, it also provides some heart-healthy monounsaturated fats, a ton of nutrients and yet more anti-inflammatory properties.

These are a stunning contribution to a potluck, but also make great snacks and would look wonderful on an Easter buffet table.  They would also be good for breakfast or in packed lunches.

You could also just eat the turmeric pickled eggs whole without going to the trouble of cutting and filling them with the avocado mixture.

Whole eggs/egg whites are an AIP stage 2 reintroduction, so if you are following the AIP plan, you will need to wait until you have successfully reintroduced egg yolks and egg whites before eating these.  When reintroducing foods on the AIP, I recommend this guide.

Turmeric Avocado Deviled Eggs

Makes 24 halved eggs

YE4

To make the turmeric brine:

  • 2 TBSP pink Himalayan salt
  • 1 small carrot – sliced – peel if not organic
  • 2″fresh root ginger – sliced thinly
  • 2″ fresh turmeric root – sliced thinly
  • 4-5 slices fresh horseradish root
  • 3 cloves garlic – peeled
  • 3 bay leaves
  • 2 sprigs fresh rosemary
  • 2 sprigs fresh thyme
  • 1 cabbage leaf (to weigh down the veggies to ensure they all stay underneath the brine)

To make the eggs

  • 1 dozen eggs – preferably free-range/pastured/soy-free

To make the filling

  • 1 large ripe avocado – peeled and diced
  • sea salt to taste
  • 1 tbsp fresh parsley – chopped
  • 1 tbsp fresh basil – chopped
  • 1 tbsp fresh chives – chopped
  • 1 tbsp fresh thyme – chopped
  • 1 clove garlic
  • 2 tbsp lemon juice
  • 2 tbsp extra virgin olive oil

The first thing that needs to be done is that the brine needs to be made and fermented.  This needs to be started at least 2 weeks before you want to serve the eggs.

Take all the brine ingredients, except for the cabbage, and put them in a quart mason jar.  Add filtered water to cover and mix well to dissolve the salt.  Tuck the cabbage leaf on top of the veggies to hold them down under the brine.  If necessary weigh this down with a small jar or shot-glass filled with brine.

YE1

Cover and leave to stand at room temperature for at least 7 days.  It may get fizzy and bubbly as the naturally occurring cultures start to ferment the sugars in the veggies and herbs.  This is normal.  Open the lid every now and again to release the gas.

Once the brine is fermented to your liking, strain out all the solids, reserving the fermented brine.

Take the dozen eggs, and place them in a pan with cold water.  Bring to the boil, reduce the heat and simmer for 10 minutes.

Drain and place in cold water.

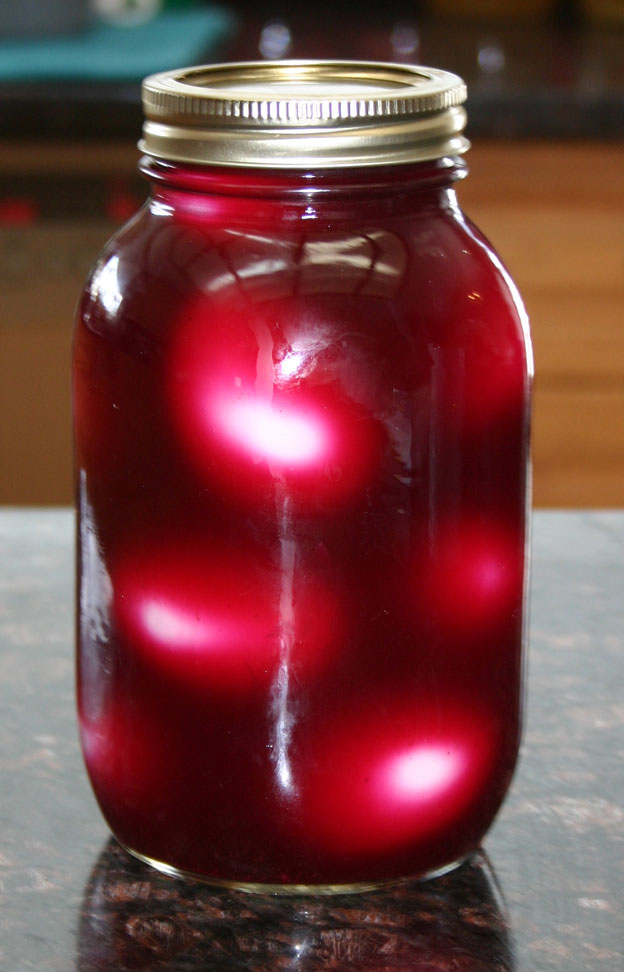
Once the eggs have cooled enough to handle, peel off the shells and pack the eggs in a large mason jar.

Carefully pour over the brine to cover the eggs.

Place the eggs in the fridge and leave to “pickle” for 5-7 days.

To make the deviled eggs…

Drain the eggs from the brine.

Cut each egg in half lengthwise and carefully scoop out the yolk.

Mash the yolks with the avocado.

Place the herbs, garlic, lemon juice and the olive oil in a blender or food processor and puree to a paste.

Add the herb puree to the egg yolks and avocado and mix well.

Season to taste with sea salt.

ye3

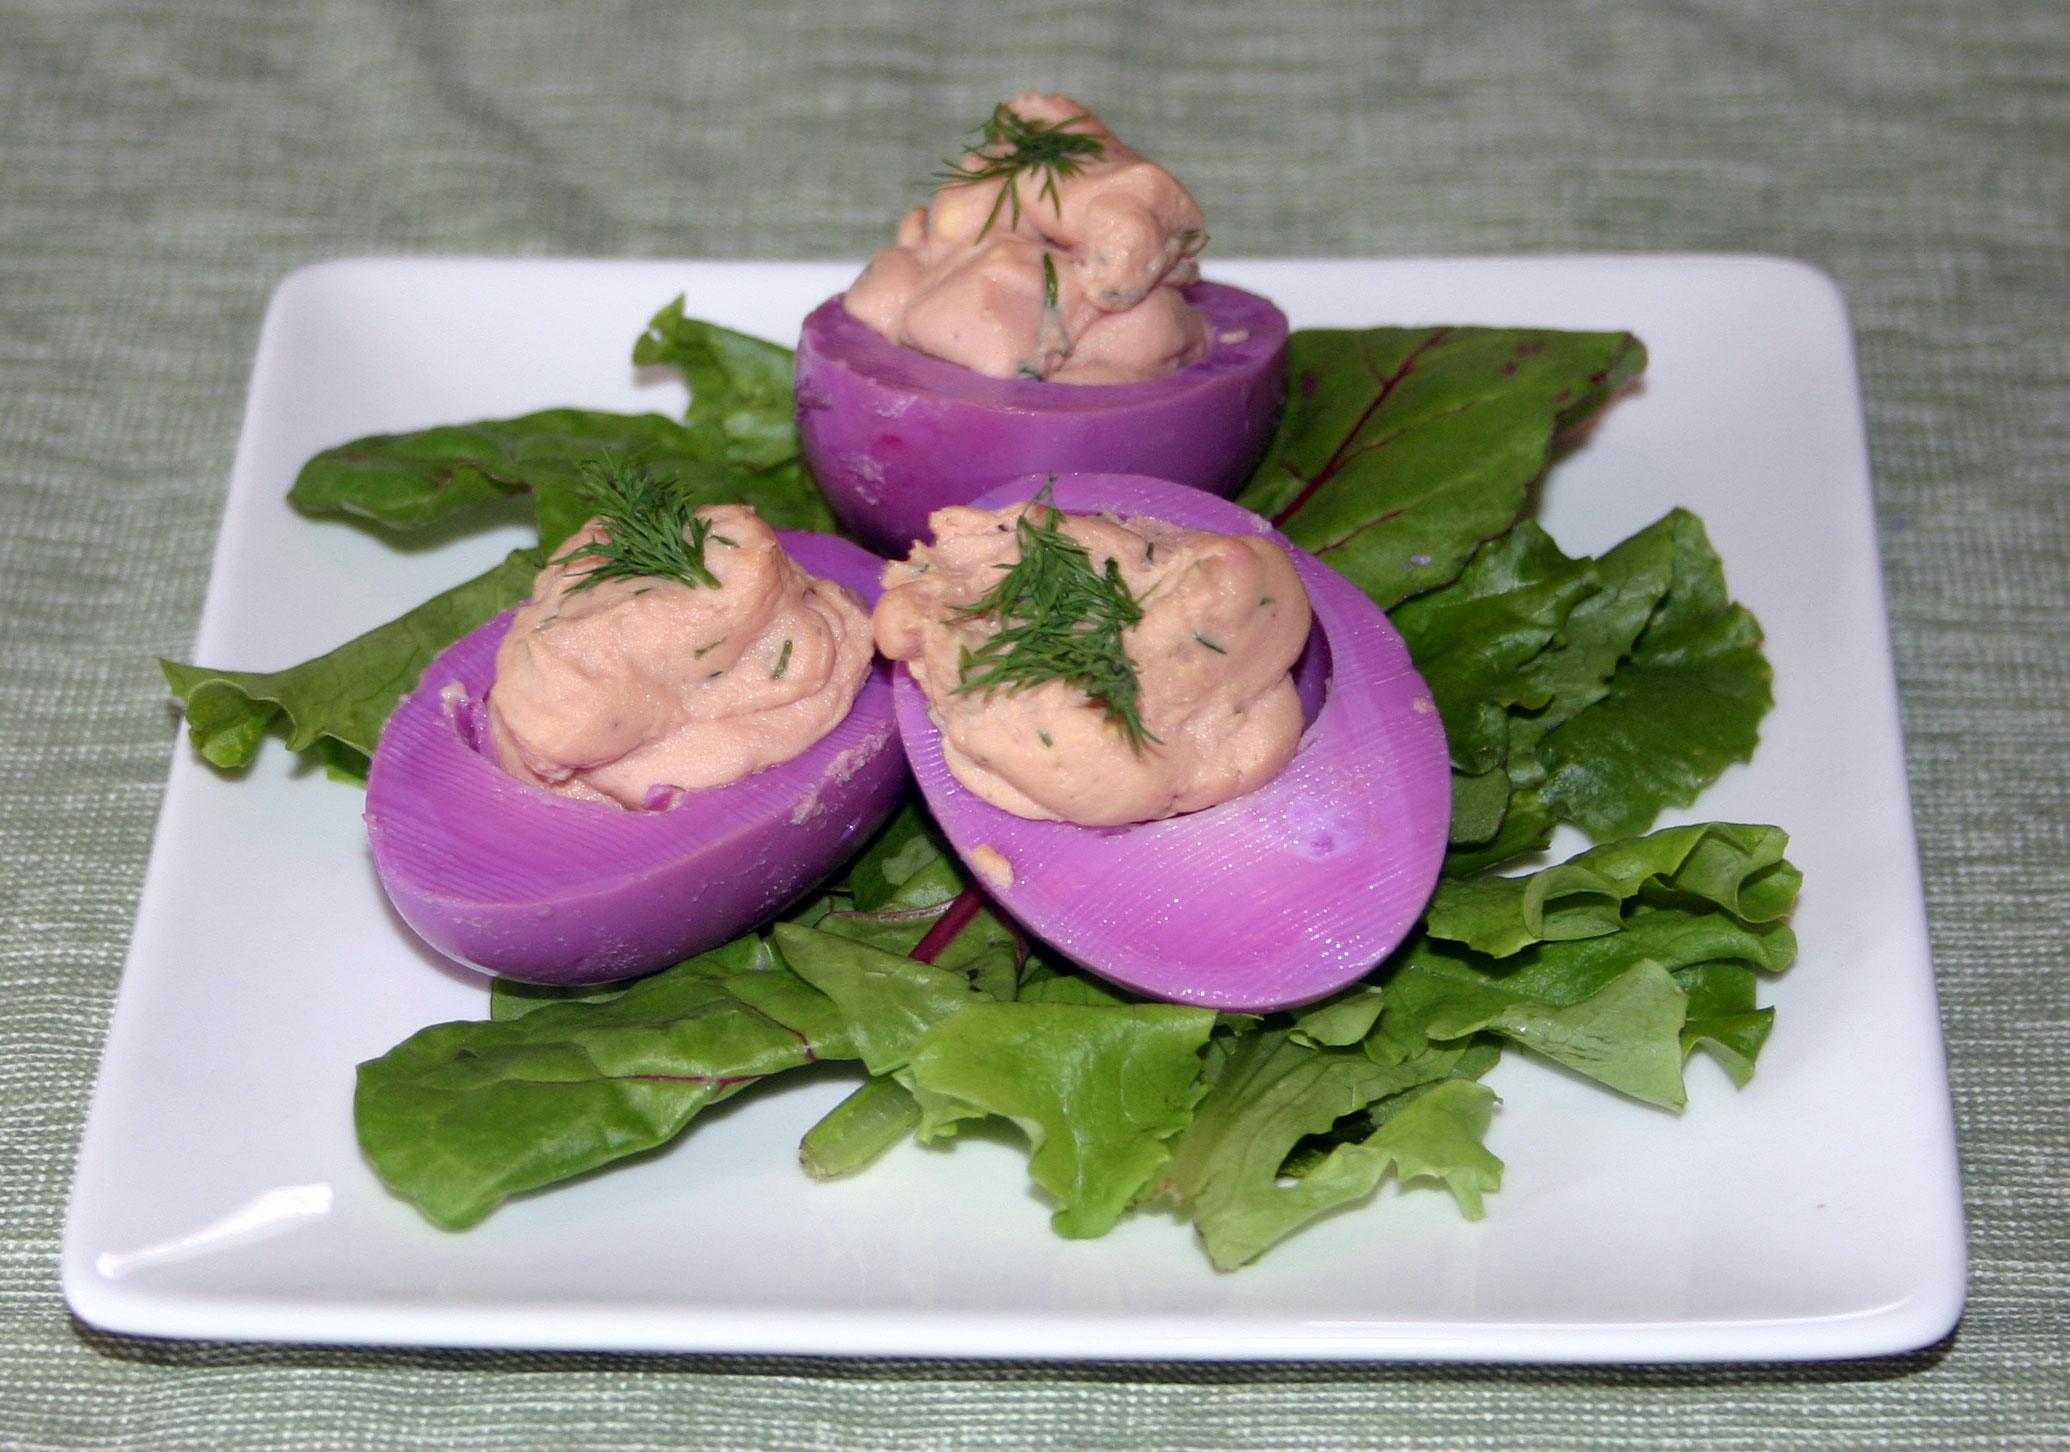
Carefully spoon or pipe the green mixture back into the egg whites and arrange on a serving platter.

Shared At Full PlateThursday

Shared at Home & Garden Thursday

Shared at All Things Thursday

Shared at Pure Blog Love

Shared at Natural Family Friday

Shared at What to do Weekends

Shared at Simply Natural Saturday

Pink Deviled Eggs

This is an unusual way to prepare eggs, but it is both delicious and very striking to look at.

I made these for a Ostara celebration that I attended.

bpe3

They would also be perfect for Easter, and would make a stunning addition to a brunch table.  I also made some yellow deviled eggs as well, but they are a separate recipe.

They also make great appetizers or snacks.  Kids love them due to the unusual colour…

The striking pink-purple colour is 100% natural, and comes from soaking the cooked and peeled eggs in leftover beet-brine or beet kvass.

BPE1

The eggs need to soak in the brine for several days  – the longer you soak them, the more the whites take on the colour – I left these in the brine for 7 days, and as you can see, the purple-pink colour penetrated all the way to the yolks.  In fact, the yolks were stained slightly pink at the edges.  I suspect that leaving them in the brine for even longer would result in pink yolks as well.

If you also need to make the beet brine or kvass, you will need to start these at least 2 weeks in advance.  The recipe for the beet brine/kvass can be found here.

While these are not 100% AIP (egg yolks are a stage 1 reintroduction, and egg whites are a stage 2 reintroduction), if you have successfully managed to reintroduce eggs, you could enjoy these beauties.  When reintroducing foods on the AIP, I recommend this guide.

Pink Deviled Eggs

makes 2 dozen halved eggs

BPE2

  • 1 dozen eggs
  • beet brine or beet kvass to cover
  • ¼ cup homemade mayonnaise
  • ¼ cup coconut milk yoghurt
  • 2 tbsp fresh dill – chopped
  • salt and black pepper to taste (black pepper is a stage 2 reintroduction – omit this if sensitive to it)
  • dill sprigs to garnish

Place the eggs in a pan and cover with cold water.  Bring to the boil, then simmer for 10 minutes.

Drain the eggs and cover in cold water.  Leave to stand until completely cold.

Remove the shells from the eggs, and place them in a large mason jar.  Cover the eggs with the beet brine/beet kvass, and put on a lid.

BPE1

Store the eggs in the fridge for between 3 and 7 days.  The longer you leave the eggs, the more colour the whites will take.

To make the deviled eggs, drain off the beet brine/kvass.

Slice each egg in half, lengthwise and scoop the yolks into a bowl.

Mash the yolks with the mayonnaise and coconut milk yoghurt until smooth.  Season with salt and black pepper, and stir in the dill.

Spoon or pipe the yolk mixture back into the whites and garnish with a small sprig of dill.

bpe4

Keep in the fridge until you are ready to serve, and be prepared to explain to everyone how you achieved that wonderful colour!

Shared at Mostly Homemade Monday

Shared at Fat Tuesday

Shared at Tuesdays With a Twist

Shared at Corn Free Everyday

Shared at Handmade Tuesday

Shared at Simple Life Sunday

Shared at Show and Share

Shared at The Art of Homemaking Mondays

Shared at Wildcrafting Wednesday

Shared at Homestead Blog Hop

Shared at Full Plate Thursday

Shared at Home & Garden Thursday

Shared at All Things Thursday

Shared at Awesome Life Friday

Shared at Simply Natural Saturday

Two Appetizer Recipes – AIP/Paleo

I went to a potluck last night…

Normally, I hate potlucks with a passion – usually there is very little that I can eat, and there is also always the risk that the few things that I can eat have been cross-contaminated simply by people not realizing that dropping crumbs or grated cheese or whatever all over other dishes (or even worse, using the spoon from one dish to serve themselves from another) means that there will be people who either cannot eat the food, or who may react badly.

For this particular potluck, I decided that I was going to make 2 dishes that I could eat – both appetizers…

And I made sure that they were placed right at the back of the table where there would be no accidental cross contamination from other foods – in fact, the only other foods around my dishes were some salad and some cut-up fruit

Both of these dishes make wonderful appetizers, but are also great to pack in lunch-boxes (ensure that they contents are kept cold), or for snacks…  and of course they are wonderful to bring to a potluck.

I really could have made more than I did – both went very fast…  my dishes were the only ones  that were empty at the end of the night!

Both of these recipes are 100% AIP as long as the bacon that is used is also AIP (be careful – some cures use “spices” that could contain nightshades).  If possible, try to use bacon that comes from pastured pork, and I like to avoid the ones that contain added (chemical) nitrates as I prefer more natural cures that contain salt, sugar and celery juice (which does contain nitrates, but in a more natural form).  I prefer to use thin-cut bacon for these recipes as it does not take so long to crisp up.

The first recipe I made was Bacon Wrapped Prunes, that I stuffed with a home-made chicken liver pate.

BWP2

If you choose to buy a pate instead of making your own, read the ingredients carefully to be sure that it does not contain any non-AIP ingredients, or those that you do not tolerate well.  Most bought pate’s will contain dairy and non-AIP spices.  Of course if you are not AIP, or you tolerate the ingredients well, then that is not a problem…

The prunes, as I discovered made for a VERY rich mouthful when combined with the pate and the bacon…  one or two are enough for most people.  But they are so delicious with the salty bacon combining with the sweetness of the prunes and the rich creaminess of the pate.

Pate Stuffed Bacon Wrapped Prunes

Makes 20-25 individual “bites”

BWP3

  • 6 TBSP Chicken Liver Pate – preferably homemade
  • 375g (aprox. 13oz) pack of bacon (preferably made from pastured pork)
  • 20-30 prunes
  • wooden cocktail sticks

Preheat the oven to 350°F (175°C).  Line a shallow-rimmed baking sheet with parchment paper (this makes for an easier clean-up).

Cut each strip of bacon into 3, crosswise across the strip, and lie them out on a cutting board.

Take your prunes, and stuff each one with ¼tsp chicken liver pate.  This can get messy fast!  Just try to keep your hands as clean as you can.

Lie the stuffed prunes at one end of each strip of bacon, then roll the bacon around the stuffed prunes, securing the end with a cocktail stick.

Lie the prunes on the prepared baking sheet with the free end at the bottom (it helps to stop them unrolling while they cook.

Bake in the preheated oven for 30 minutes until the bacon is crispy, turning at the 15 minute mark.

Remove to a wire rack to allow any fat to drain off.

These are good served hot or cold…  I served them cold at the pot-luck.

The second appetizer that I made was Bacon Wrapped Shrimp.

BWS2

These are really easy to make, and taste delicious.  They were the first thing to disappear at the potluck!

Bacon Wrapped Shrimp

Makes 25-30 individual “bites”

BWS1

  • 349g (aprox 12oz) bag of peeled (tail on) raw shrimp (thawed if frozen).  I used 31-40 count shrimp
  • 375g (aprox 13oz) pack bacon (preferably from pastured pork)

Preheat the oven to 350°F (175°C).  Line a shallow-rimmed baking sheet with parchment paper (this makes for an easier cleanup).

Cut each slice of bacon into half lengthwise, and then half again crosswise to give 4 long thin strips of bacon.

Take a piece of bacon, and starting at the head-end, wrap it around the shrimp, ending at the tail.

Place the wrapped shrimp, end-side down, on the prepared baking sheet.

Repeat for the rest of the shrimp and the bacon.

Bake the shrimp for 10 minutes in the oven.  Remove and drain off any liquid that has accumulated.

Turn the oven to broil (grill if you are in the UK), and cook the shrimp to crisp the bacon on both sides (this took around 5 minutes per side).

Place the crisped shrimp on a wire rack to drain off any extra fat.

Serve hot or cold (I served these cold at the pot-luck).

Make lots!  They go fast….  But in the unlikely event that there are leftovers, store them in the fridge to eat as snacks.

Shared at Paleo AIP Recipe Roundtable #65

Shared at Simply Natural Saturdays

Shared at Awesome Life Friday

Shared at What to do Weekends

Refreshing Watermelon Salad with Mint and Crispy Bacon

I bought a watermelon the other day – the first I have bought this year.

See here for how to select the perfect watermelon.

I knew that I did not want to just eat it as a snack/fruit – where is the fun in that…  I wanted to make something with it.

Besides, if the kids had just devoured it as fruit there would have been nothing for me to blog about!

This was the dish that I came up with to use it.

ws2

This salad is a really delicious side-dish (I paired it with oven-baked sweet potato fries and some cold roasted chicken and it was wonderful!), but it also would make a refreshing summer appetizer.

Don’t forget to save the watermelon rinds to make lacto-fermented watermelon rind pickles.

This recipe is Elimination Stage AIP if you leave out the toasted cashews – you won’t miss them, honest!   Just add a little more bacon… Cashews are a stage 3 reintroduction.  When reintroducing foods on the AIP, I recommend this guide.

Watermelon Salad with Mint and Crispy Bacon

serves 4-6

ws1

  • 4 oz bacon rashers (Try to find some from pastured pigs, preferably in a sugar-free cure)
  • 3lb watermelon (about ¼ of a large watermelon)
  • 6 radishes
  • 4 green onions
  • 1 ripe avocado
  • ¼ cucumber
  • mint leaves from 4-5 stems of mint
  • ½ cup cashews – toasted (optional – leave out if strict AIP or you have not yet managed to reintroduce them)
  • juice and zest of 1 lime
  • 2-3 tbsp avocado oil
  • sea salt to taste

The first thing you need to do is to cook the bacon until it is crispy.  I like to do this in the oven.  Once the bacon is cooked, cool it and then tear it into small pieces.

Toast the cashews – I often do this in the oven while cooking the bacon.  Watch them like a hawk – they go from toasty brown and just right to burned in seconds!

Prepare all the veggies and the watermelon.

You need to slice the watermelon into ¼ inch thick triangles – I like to cut the quarter of watermelon in half length-wise, remove the rind and then slice as it gives a good sized piece.

Slice the radishes thinly and chop the green onions.  Halve the cucumber and slice thinly.

Tear the mint leaves into small pieces.

Next you are going to zest the lime and squeeze out as much juice as possible.

Now to assemble your salad.

Place the watermelon slices in a large bowl, then add the radish, green onion, avocado, mint and lime zest.  Toss well with your hands.

Squeeze the lime juice  in to a small jar and add the avocado oil.  Season to taste with salt.  Seal the jar and shake well to mix.

Pour the dressing that you have just made over the salad, and toss well with your hands.

Divide among the serving plates, then sprinkle the bacon and toasted cashews (if using) over.

ws4

Serve at once.

Shared at Full Plate Thursday 5-15-14

Shared at Pennywise Platter

Shared at Thrifty Thursday Week 60

Shared at Gluten Free Friday #91

Shared at Paleo AIP Roundtable #28

Chicken Liver Pate

I love eating liver, which is a good thing because it is so good for you.  And not only that, it is cheap to buy.  If you are struggling to make ends meet while eating paleo, definitely consider adding more organ meats to your diet.  Liver, and especially chicken livers are really economical.  I do recommend that you use pastured and/or organically reared chicken liver when possible.

Some people express concern about the possiblity of toxins in liver, and think that it is not a good idea to eat it because it is a detox organ.  While this is true that the liver does remove toxins from the body, it simply breaks them down so that they can be excreted by other organs.  The liver does not store any of these toxins and in a healthy animal is perfectly safe to eat.

Liver is one of the most nutrient dense foods you can buy.   It is a good source of Thiamin, Zinc, Copper and Manganese, and a very good source of Protein, Vitamin A, Vitamin C, Riboflavin, Niacin, Vitamin B6, Folate, Vitamin B12, Pantothenic Acid, Iron, Phosphorus and Selenium.  While liver is high in cholesterol, it has been shown that dietary cholesterol has very little bearing on blood cholesterol (1, 2, 3), and not only that, you actually NEED cholesterol to make a lot of the steroid hormones that your body relies on.  Your brain also relies on cholesterol to function  There have been studies that have shown that cholesterol is vital for memory.  And if you don’t eat enough of it your body will simply make more.

One of my favourite ways to eat liver, especially in the case of chicken livers, is to make a pate.

Smooth, creamy and rich, this barely tastes like liver.  And making it into a pate, paste or spread removes most of the “ick” factor that people have when faced with a hunk of liver.  Instead of that hunk of what is obviously an internal organ, you have this rich, creamy spread.  This is a good way to get kids to eat liver…  my girls love dipping veggies in the creamy meatiness.

I know what you are thinking though….  Pate should be served on toast.  And toast is not Paleo or AIP-friendly.

If you ate bread (even paleo bread), you could make toast and spread a generous amount of this pate onto it.  But seriously, it is just as good with celery sticks, baby carrots and cucumber slices.

CLP2

I will often spread it into the hollow center of a celery stick and make a savory version of “ants on a log”.  YUM!

This makes a great appetizer or snack, but it could also be a quick lunch.  And I have been known to eat it for breakfast as well!  In this snack that I prepared for B, the radish slices take the place of crackers.

PR1

And if you don’t have chicken livers, you could use any other liver you can get your hands on.  Calves liver makes a delicious pate, but even beef or pigs liver would work.  The flavour would not be so delicate, but it would be very nutritious, and would still taste good.

Chicken Liver Pate

CLP3

  • 1½lb chicken livers (or any other liver you care to use), trimmed
  • 1 shallot – chopped finely
  • 2 cloves garlic – crushed
  • 1 tsp dried sage
  • 1 tsp dried rosemary
  • 1 tsp dried thyme
  • 1 bay leaf
  • ⅓ cup bone broth
  • Sea salt to taste
  • pinch of ground cloves
  • 3 tbsp coconut cream (the thick layer from the top of a can of coconut milk)
  • ½ cup of good quality cooking fat (you can use anything that works with your diet – lard, tallow, coconut oil, bacon drippings, even ghee or butter as long as you are not sensitive to it)

Melt 2 tbsp of the cooking fat in a skillet and add the shallot and garlic.  Cook over a low heat until softened.  Add the sage, rosemary, thyme and bayleaf and continue cooking for about 10 minutes.

Meanwhile trim your liver and if large pieces, cut into chunks.

Add the liver to the pan and cook, stirring until it is browned on the outside but still pink in the middle.  Add the bone broth and bring to the boil.  Simmer for 5 minutes, then remove the bay leaf.

Transfer the contents of the skillet to a food processor or blender.  Add the coconut milk and remaining ingredients, including the leftover cooking fat.

Pulse until everything is smooth, creamy and evenly blended.

Pour into a serving dish and refrigerate until cold.

pate1

To serve, scoop out the amount required, and serve.

CLP4

If you want to be able to turn the finished pate out and slice it, you will need to line a loaf tin with parchment paper before pouring in the pate.

This will keep for at least a week in the fridge.

Paleo Chicken Fingers

This recipe makes a great lunch, is good as an appetizer and could even be used as a dinner recipe.  They also make a great snack.   And kids LOVE them!

I served these for lunch today…  along with a side of my Thai style almond sate sauce for dipping.

Paleo Chicken Fingers

serves 6

chixstrip1

  • 1½lb (680g) chicken tenders or chicken breast cut into strips
  • 1½ cups almond flour
  • 1½ cups shredded unsweetened coconut
  • 2 eggs – beaten
  • 1 tsp paprika
  • 1 tsp onion powder
  • ½ tsp garlic powder
  • salt and pepper to taste
  • coconut oil to fry

If using chicken breasts, cut them into strips.  Season the chicken well with salt and freshly ground blackpepper, paprika, onion and garlic powder.

Whisk the egg in a small bowl.  In a separate bowl mix the almond and coconut flour together.

Take each piece of seasoned chicken and dip it in the egg mix using one hand.  Remove from the egg and place in the bowl of almond and coconut flour.  Using your other hand coat the chicken in the “breading” mix.  Lay the coated chicken on a baking sheet or plate.

Repeat the above with the remaining chicken strips…

By keeping one hand for the egg (wet) and one hand for the dry (flour mixture) you can ensure that you don’t end up in a sticky mess.

Once all the chicken is “breaded”, melt a small amount of coconut oil in a heavy based pan over a medium-high heat.  Add the chicken strips.

Fry the chicken in the coconut oil for 3 minutes each side until the “breading” is golden brown and the chicken is cooked through.

You may need to cook these in batches to avoid overcrowding your pan.  For me, it took 3 separate batches to cook all of these.  Keep the first ones you cook warm while cooking the remainder.

Serve with a dipping sauce – I recommend either Paleo Ketchup or my Sate dipping sauce.

chixstrip2

These can be served at once (hot), or they can be chilled in the fridge and served cold for a packed lunch.

lunch12-19-13


Creamy Spinach Dip

This wonderful dip is 100% paleo despite the creaminess.  It is also dairy and gluten-free, raw and vegan to boot.  And it tastes incredibly delicious!

This is what I served the other day in the packed lunches…  I love serving dips in the kids lunches because research has shown that it is a good way of getting your kids to eat more veggies…  all I can say is that having seen what they bring back from school, it WORKS!  They will eat far more veggies (and everything else too) on the days I serve a dip…

spindip4

And with this dip, not only are they dipping and eating the veggies, there are veggies IN the dip as well….

It is great in packed lunches because it will not spoil if kept at room temperature for a few hours (the only issue is the presence of the nuts as some schools ban them), but it would also make a great appetizer or snack…  heck, I suspect it would be fab piled on top of a burger as well!

This recipe contains nuts and tahini, both of which are AIP stage 2 reintroductions.  When reintroducing foods on the AIP, I recommend this guide.

Creamy Spinach Dip

serves 6-8

spindip1

  • 1 cup raw cashews
  • 1 cup blanched almonds
  • 4 cloves garlic
  • 2 tbsp nutritional yeast
  • 2 green onions – chopped
  • 3 cups baby spinach leaves
  • 1 cup coconut milk
  • ¼ cup tahini
  • ½ tsp sea salt
  • ¼ tsp freshly ground black pepper
  • ¼ tsp nutmeg

Put the cashews and almonds in a bowl and cover with cold water.  Leave to soak for several hours.  This not only deactivates some of the anti-nutrients in the nuts, but it also is what makes the dip creamy… the nuts will absorb the water and plump up.  Don’t stint on the soaking time!  Having said that, you don’t want to go mad – you don’t want those nuts starting to sprout or go bad on you…  3-4 hours is plenty.

Drain the nuts and put in a food processor.  Dump in all the rest of the ingredients and process until thick and creamy.  If it is too thick, add a little water (you could reserve some of the nut-soaking water for this).

Transfer to a serving dish and chill until needed.

spindip2

This is great served with all kinds of veggies, veggie chips or homemade crackers.

Buffalo Chicken Mini Frittata

These little babies are what I served as the main protein ingredient in the packed lunch today.

buffchic2

They have all the flavours of buffalo chicken wings but are far easier to eat (no bones for starters).  They are also a great way to use up leftover chicken.

Aside from being a great lunch dish, these could easily be used for breakfast or dinner, and they make both a great snack or appetizer.

These frittata’s contain blue cheese, so are primal rather than paleo.

They also contain sriracha sauce (ie chilli) so are an AIP stage 4 reintroduction.  When reintroducing foods on the AIP, I recommend this guide.

Buffalo Chicken Mini Frittata

makes 10

buffchic1

  • 225g (8oz) leftover cooked chicken
  • 6 eggs
  • 125g (4.5oz) blue cheese (I used Danish Blue – use whatever blue cheese you like.  If you don’t  eat cheese, you could leave it out and replace it with some nutritional yeast to give a cheesy taste)
  • 4 green onions – chopped
  • 1 tsp sriracha sauce (or to taste) – you can also use any hot sauce you prefer.
  • 1/2 tsp salt
  • 1/2 tsp black pepper
  • 1/2 tsp paprika
  • 1/2 tsp cayenne pepper

Preheat the oven to 190°C/375°F.

Place the cooked chicken in a food processor and pulse to chop.  You don’t want it to be too fine, but you also don’t want huge chunks of chicken.

In a bowl, mix the eggs, green onions, blue cheese, sriracha, salt, pepper and spices.  Add the chicken and mix well.

Spoon into a silicone muffin pan, filling the cups to 3/4 full.

Bake in the preheated oven for 30 minutes until cooked, firm and slighlty golden-brown on top.

Turn out of the muffin pan and allow to cool.

buffchic3

Serve warm or cold.

Cauliflower Hummus

This is another mild tasting dip that most kids love…  and dipping veggies into a dip is a great way to encourage kids to eat more veg.

Because you have to cook the cauliflower and then allow it to cool, this dip is a bit more time-consuming than my zucchini hummus, but the taste and the texture is worth it.  It really does have the taste and texture of regular hummus!

And while the zucchini hummus is great in the summer and early autumn when zucchini are cheap and plentiful, this version of hummus is particularly suited to the colder months when cauliflower is in season.

Don’t just save this for the lunchbox though – it makes a great appetizer as well, and is a healthy snack too.

This recipe contains tahini (sesame seed paste) which is an AIP stage 2 reintroduction.  When reintroducing foods on the AIP, I recommend this guide.

Cauliflower Hummus

serves 4-6

caulihummus

  • 1/2 head of cauliflower, broken in to florets, steamed until tender and allowed to cool (you should have 3-4 cups)
  • 3 tbsp olive oil
  • 2 cloves garlic – crushed
  • 1/4 – 1/2 cup tahini or to taste
  • 4 tbsp lemon juice
  • 1 tsp ground cumin
  • salt and black pepper to taste

This is another simple, simple recipe…  all you do is pile everything in the food processor and whizz until it is smooth and creamy.  Taste and adjust the seasoning as you like.

Serve as a dip with fresh veggies…  nommy!

Curry Spiced Nuts

These slightly spicy toasted nuts are delicious.  They are great as a snack, as a nibble with a drink, as an appetizer or even as part of a lunch box (make sure your child’s school allows nuts first – mine do as my kids are mostly older, and they expect kids with allergies to be able to police them themselves).

curryspicenuts3

They are very easy to make, taking only a few minutes.  If you don’t like curry flavourings, change the spices to ones you do like.

Because of the way the flavourings are added, these are easiest if made in a non-stick skillet – it makes for an easier cleanup.  They will still work in any skillet, although I think I would steer clear of cast-iron.

This recipe contains nightshade spices which are a stage 4 reintroduction.  When reintroducing foods on the AIP, I recommend this guide.

Curry Spiced Nuts

Makes 2 cups

curryspicenuts1

  • 2 cups mixed nuts (I used a mixture of walnuts, filberts, almonds, pecans and raw cashews)
  • 3 tbsp coconut aminos
  • 1/2 tsp cayenne pepper
  • 1/2 tsp curry powder
  • 1 tsp garam masala

Place the nuts in a heavy-based dry skillet over a medium high heat and toast until brown.  Toss and stir them often to ensure that they do not burn.

While this is happening, mix the spices with the soy in a small bowl.

Once the nuts are toasted, pour the soy/spice mixture into the hot pan and toss around until all the soy has evaporated.

Immediately tip the nuts out into a bowl and allow to cool.

curryspicenuts2