Paleo Kedgeree – a Wonderful Brunch Dish

I make kedgeree for brunch fairly often on the weekends.

Actually, I also make it for breakfast, lunch or dinner!  It is very versatile, very quick and very good for you.

So what is Kedgeree?

According to Wikipedia, kedgeree is a dish that consists of cooked, flaked fish, most often smoked haddock or cod, along with boiled rice, herbs, hard-boiled eggs, curry powder, butter and cream.

And from About.com,   kedgeree is a traditional British breakfast dish made from curried rice, smoked fish, boiled eggs, parsley and lemon juice.

Kedgeree is a traditional British breakfast dish that originated from Indian cooking.  It originated in a rice and lentil/bean dish called Khichri.  During the British Raj occupation of the Indian subcontinent, fish and eggs were added to this simple, peasant dish, and then it was served for breakfast.

The dish was brought back to the U.K. by the returning British colonials, and was instituted as a popular breakfast dish during the Victorian Era.

Part of it’s success was that Anglo-Indian cuisine was insanely popular and fashionable. But another draw was that it could make a good use of leftovers.  Leftover cooked rice and fish could easily be re-purposed into a tasty, nutritious breakfast or brunch dish.  And this meant that it became very popular with the frugal middle-classes.

This dish can be eaten both hot and cold (which might make it a good packed lunch option?), and it can be made with fish other than the traditional smoked haddock or cod.  Actually, I most often make it with canned tuna, salmon, kippers or sardines due to the fact that it is hard to find smoked haddock or cod in Western Canada!

This kedgeree recipe would not be considered traditional because I use canned kippers rather than the traditional smoked haddock or cod, but it was still very, very good.  And kippers are a smoked fish so they taste similar to smoked haddock or cod.  But they are also an oily fish, so they are richer in omega 3 fatty acids.

This is the brand of kippers (smoked herrings) I use:


CH2

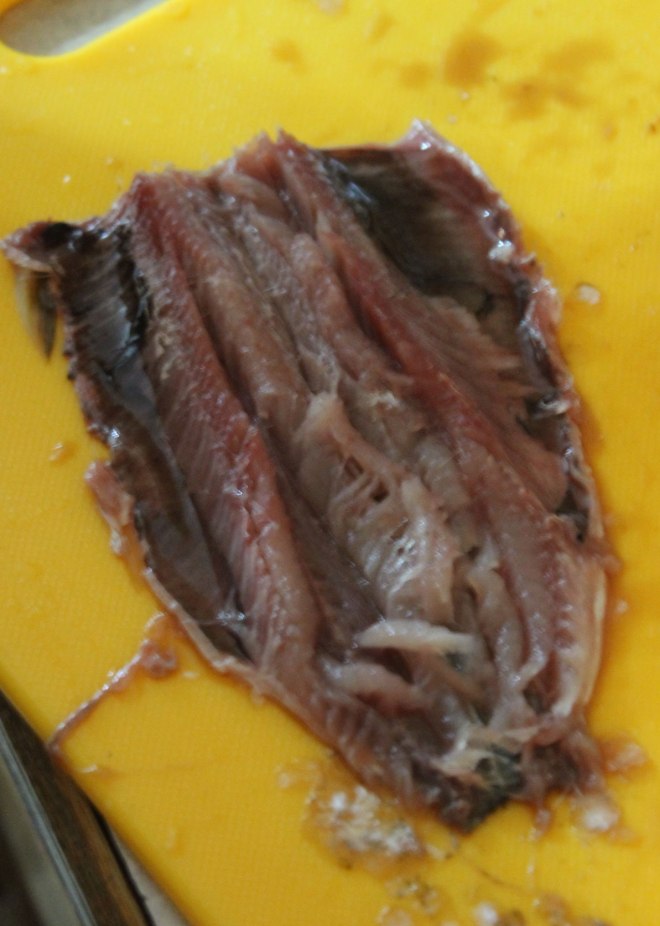
This is what the fillets look like inside:

CH1

Even though this fish is not authentic, I feel that the fact that herring is an oily fish, rich in omega-3 fatty acids makes it a beneficial addition.  And really, it DOES taste good!  If you can access smoked haddock or cod, feel free to use them in place of the canned kippers.  It is also insanely good with hot-smoked salmon.  You could also substitute any canned fish that you feel like using.  I have made delicious kedgerees using canned tuna, salmon or sardines.  The latter suggestion makes this a very cost effective dish (I can buy a can of sardines for less than $1… and the can of herrings I pictured above costs around $1.25).

Read the labels on your cans to check that they are in olive oil or water – many cans of fish are packaged in corn, soy or canola oil.  The brand I used for this recipe is packaged in water.

This recipe is loosely based on several recipes -Kedgeree on p 130 of the Loaves and Fishes Miracle Cookbook by Rosemary Stark (now out of print), Kedgeree on p 39 of the Complete Farmhouse Kitchen Cookbook (published by Yorkshire TV – now out of print), and Kedgeree Risotto from Feast, food that celebrates life by Nigella Lawson (p 155).

It is paleo, but is not strict AIP due to the fact that it contains some seed spices and eggs.  If you have not successfully reintroduced these ingredients, you could still make this dish by leaving them out.  It won’t quite be kedgeree, but it will still taste good.

The seed spices and egg make this an AIP stage 2 reintroduction recipe.  When reintroducing foods on the AIP, I recommend this guide.

Try it and let me know what you think!

Paleo Kedgeree

Serves 4-6

kedg2

  • 1 large head of cauliflower
  • 3-4 cans of Golden Smoked Seafood Snacks (or other canned fish – you may not need 3-4 cans if the fish you use comes in larger cans  than I used. When I make this with canned tuna or salmon I typically use only 2 cans)
  • 1 onion – chopped
  • 1 small bunch fresh parsley – chopped
  • 6 eggs (omit if strict AIP)
  • 3-4 tbsp coconut oil
  • ½ tsp ground cumin (omit if strict AIP)
  • ½ tsp ground coriander (omit if strict AIP)
  • ½ tsp turmeric
  • ¼ cup of coconut milk
  • zest and juice of 1 lemon
  • sea salt and freshly ground black pepper to taste (omit the pepper if strict AIP)

The first thing you need to do is to rice your cauliflower by pulsing it in a food processor until it resembles grains of rice.  If you do not own a food processor, you could grate it using a box grater, but this is very messy.

Put the eggs in a pan of boiling water and cook for 10 minutes until hard-boiled.  Crack the shells and place in a bowl of cold water.  This makes them easier to shell.  Once the eggs are cool enough to handle, remove the shells.  Chop the eggs into large chunks.

Melt the coconut oil in a large skillet and add the onion.  Saute over a medium heat until it is tender and golden brown.  Now add the cauliflower rice, the cumin, coriander and turmeric and season to taste with salt and pepper.  Toss well until all the spices are evenly distributed.  Cook for 4-5 minutes, tossing occasionally until the cauliflower is tender.

Drizzle over the coconut milk.

Open the cans of fish and drain any liquid into the pan.  Break the fillets into bite-sized chunks and add them to the pan along with the parsley and chopped eggs.

Toss everything together until heated through.

Taste and adjust seasonings.

Just before serving, scatter with the lemon zest and squeeze the lemon juice over.

kedg2

Serve at once.

The leftovers of this dish are very good cold, and it will store in the fridge for a couple of days.

Shared at Waste Not Want Not Wednesday

How to prepare herrings and sardines

Oily fish is very good for you, there is no getting away from that.  Rich in heart and brain-healthy omega3 fatty acids, they can also be a cheap source of protein.

I can buy enough herrings to feed my family for just $5.99.  It would cost me 3 times that amount to buy salmon fillets

The only downside is that the fish need cleaning and preparing, and that can be a little daunting if you don’t know how to do it.

This is how I prepare these small fish.  I will warn you now, this is a very picture-dense post as Hubby was taking pictures as I was actually gutting and preparing the fish.

This exact same method can be used for any of the smaller oily fish – I prepare sardines, sprats, pilchard, herring and mackerel this way amongst others.  Even small trout can be prepared this way and it is much easier than the traditional method of filleting.  But in this post I am using herring.

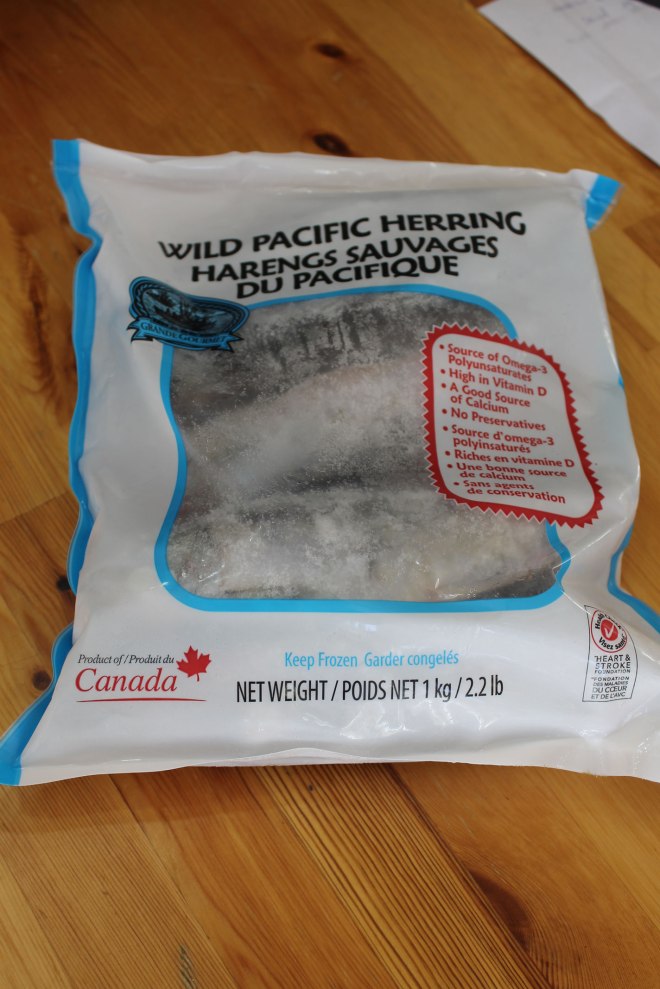
The fish were frozen when I bought them – living in land-locked Alberta, it is very hard to buy unfrozen fresh sea-fish.  And these small oily fish go bad very quickly, so it is best for me to buy them frozen.   A 1kg (2.2lb) bag costs me $5.99, and usually contains around 12 fish…  2 per person, which makes for a very satisfying meal.

herr32

So I thawed the bag of fish out by leaving it in the refrigerator overnight (never thaw fish on the counter-top at room temperature!).  If you need to do a fast thaw, you can submerge the bag into cold running water, but don’t use warm/hot water either.  I also do not recommend that you attempt to thaw fish in the microwave – it tends to cook them as it is thawing them.

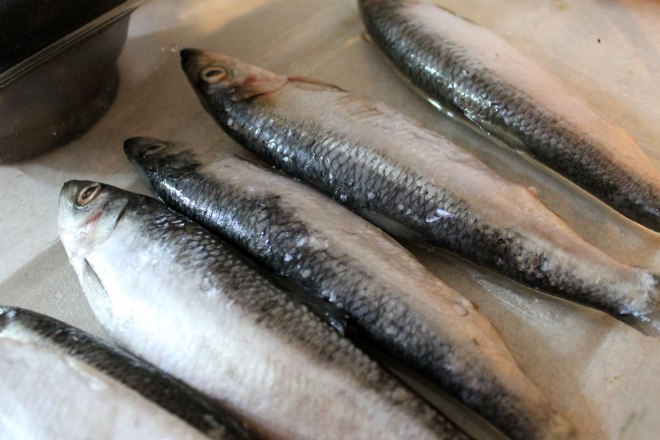
Once they are fully defrosted, take them out of the bag, discarding any liquid that is in the bag (there is nearly always some!).

herr7

Obviously, if you are using fresh fish, there is no need to go through the above 2 steps, you can jump right in to cleaning them.

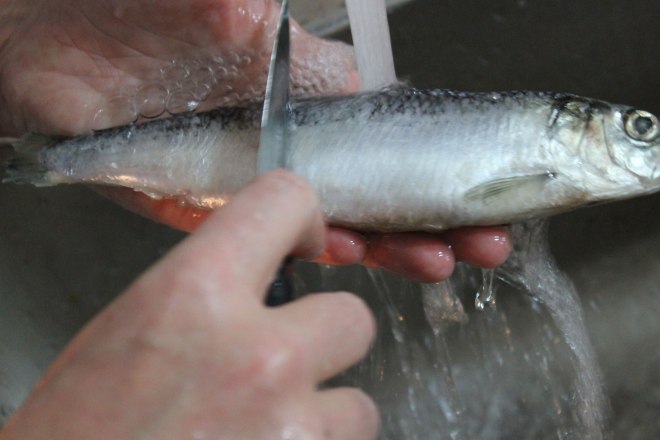
The first step is to descale them.  To do this, I use the back of a paring knife under a running tap (the non-sharp edge).  I just run the knife from tail to head (Against the grain of the scales) while the water is flowing over the fish.  Not all fish need descaling.  Herring almost always do, but mackerel don’t.

herr25

Make sure you get all the scales off – scales are not pleasant to eat!

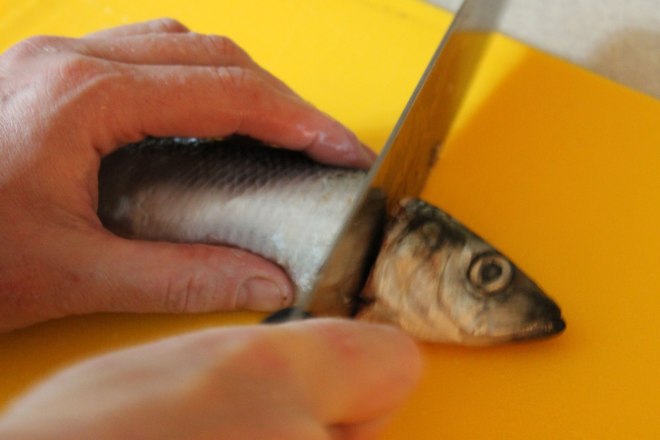
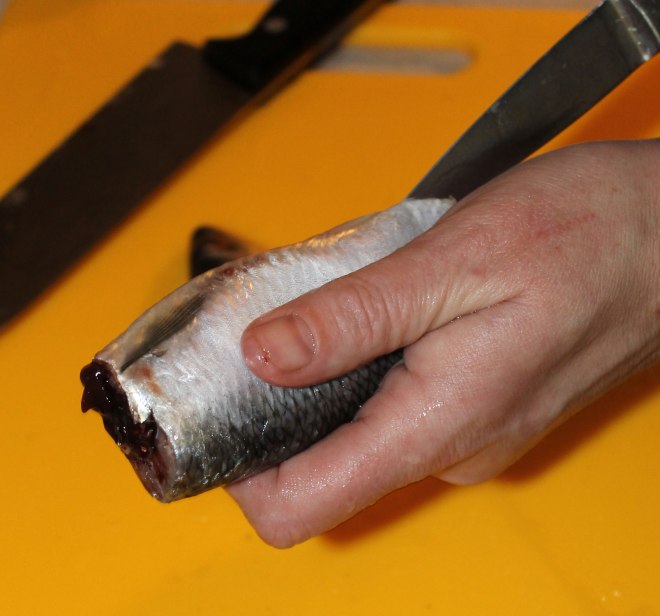
Next you need to cut the heads and tails off.  Some people like to do this after gutting the fish, I prefer to do it before as most often, a lot of the guts will come out along with the head.  Simply cut with a knife right behind the gills as close as you can because you don’t want to waste any of the flesh.

herr22

At the tail end, you simply cut close to the tail….  not so much flesh down that end to waste!  I like to use a french cooks knife for cutting heads and tails off, but I use a paring knife to actually gut the fish.

herr31

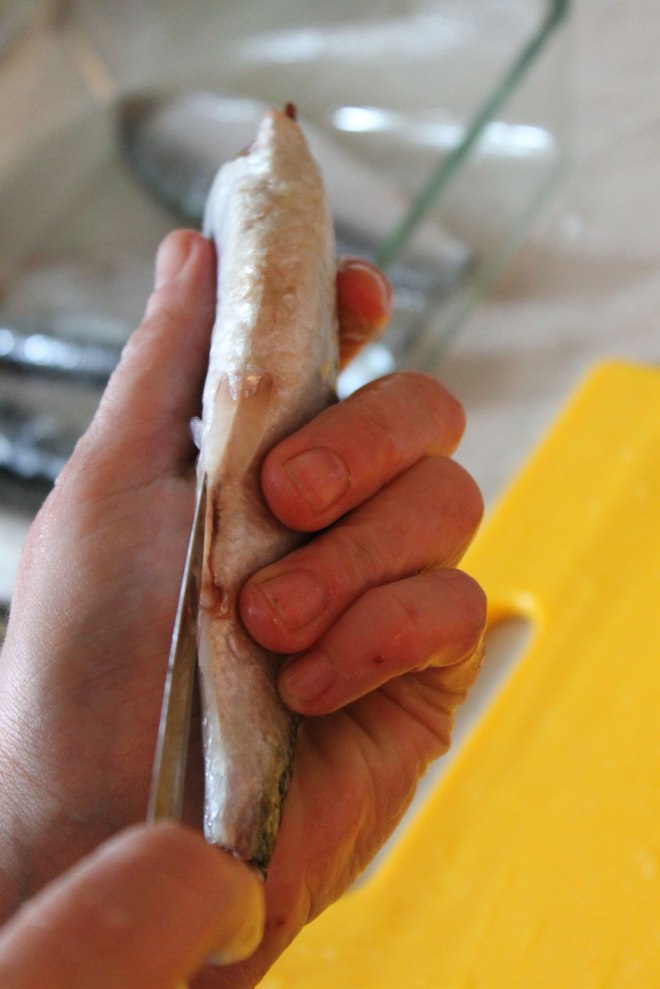
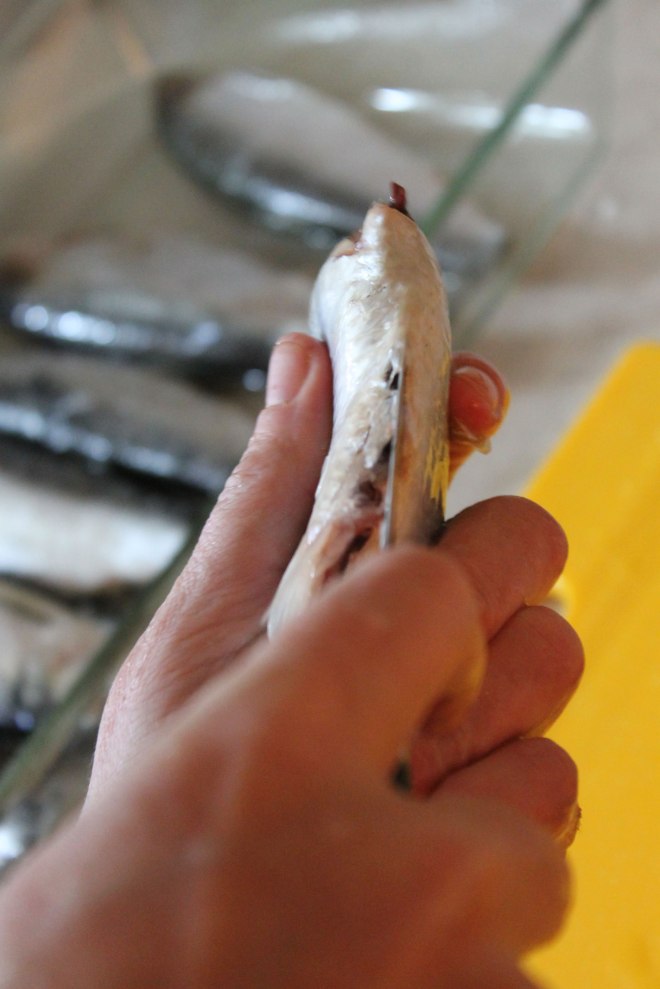
To remove the guts and open up the belly, you simply insert the point of your paring knife into the small opening on the fish’s belly and then run the knife up the underside of the fish towards the head end:

herr21

All the way up to where you cut the head off:

herr20

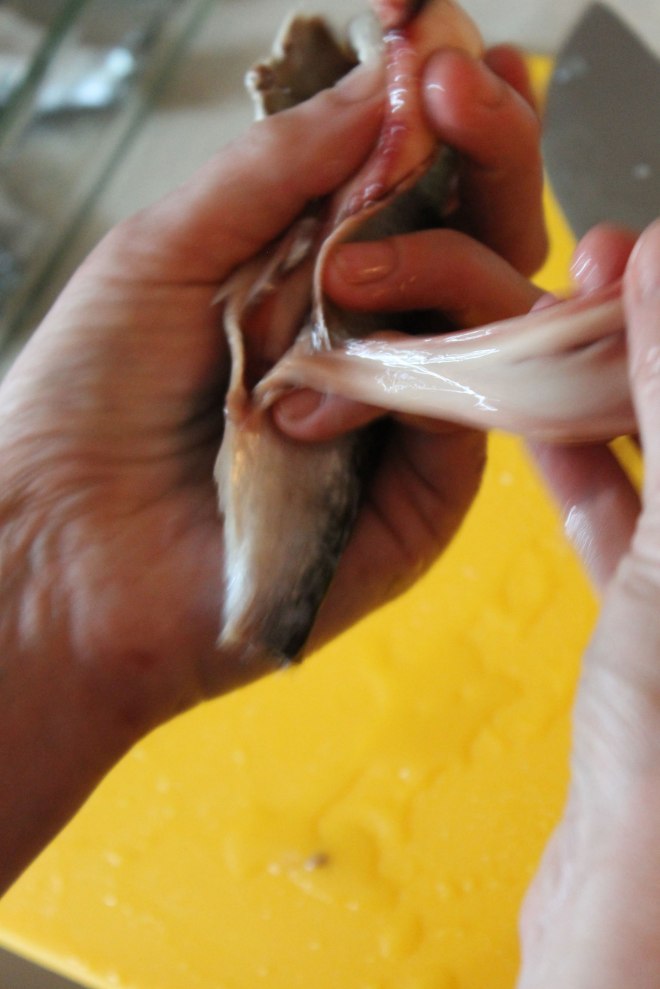
At this point you can remove the innards of the fish:

herr17

If you find any long creamy coloured sacs that look like what I am removing in the above photograph, these are the soft-roes (more properly called Milt) that are found in male fish.

herr5

Put them to one side as they are delicious when fried in a little bacon fat.

You might also find some hard roes if you have female fish (sadly all of mine were male).  Female herring tend to be larger than the males.

Hard roes look like this:

herringroe

These are the true fish roes and are again contained in long sacs.  But unlike the soft roes, they have a grainy texture as they contain the fish-eggs.  In herring, they are an orangy-red colour.  The colour can vary depending on what species of fish you are cleaning however.  Like the soft-roes, you should also set these aside as they are not only delicious, they are very good for you.

I most often find roes in herring…. but sometimes you find them in other fish as well…  no matter what species of fish you are using, the roes are all edible and should not be wasted.  If you are going to get roes in your fish it really depends on the season in which they were caught.  With frozen fish this can be a bit hit or miss as you can never be sure how long the fish has been frozen for.  But with really fresh (never frozen) fish, you will only find the soft and hard roes during the times when they are spawning.

Rinse the roe under cold running water but be gentle with them – they are very delicate!

The remaining guts should be thrown away (although I did feed a fish-head and some of the guts to my raw-food fed cat!  He enjoyed them immensely.  I tried giving the dog a fish head and he just got confused and licked it a little then wagged his tail to show willing….  It goes to show that cats are smarter than dogs!  They know when food is good for them….

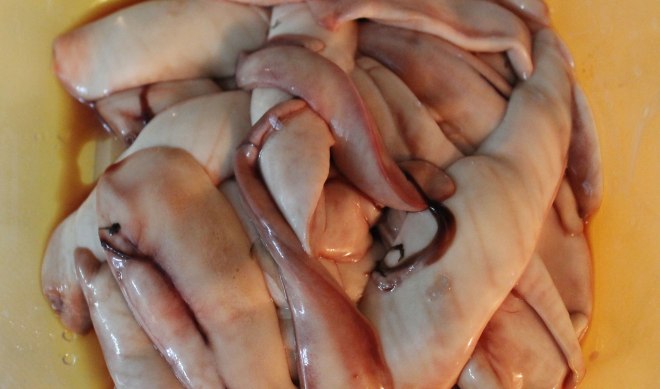
By the time your fish has been gutted, you should end up with something that looks like this:

herr16

Now it is back to the sink to wash out the innards.  Make sure you rub inside well as there is a dark film lining the internal cavity.  Using a little salt on your fingers can help remove this.  Also make sure you scrape down towards the backbone to remove the blood-line (the main arteries in the fish) as these can taste bitter.  The running water will wash all this away.

herr27

If you are wanting to serve your fish whole, that is all you need to do (Actually, you don’t even need to remove the head in this case…..  I do because I am not fond of my food looking at me when it is on the plate!).  In this case, you will simply move on to how you have decided to cook your fish…..

But in the case of the meal I was making, I wanted boneless  (or as nearly boneless as I can) split fish fillets.

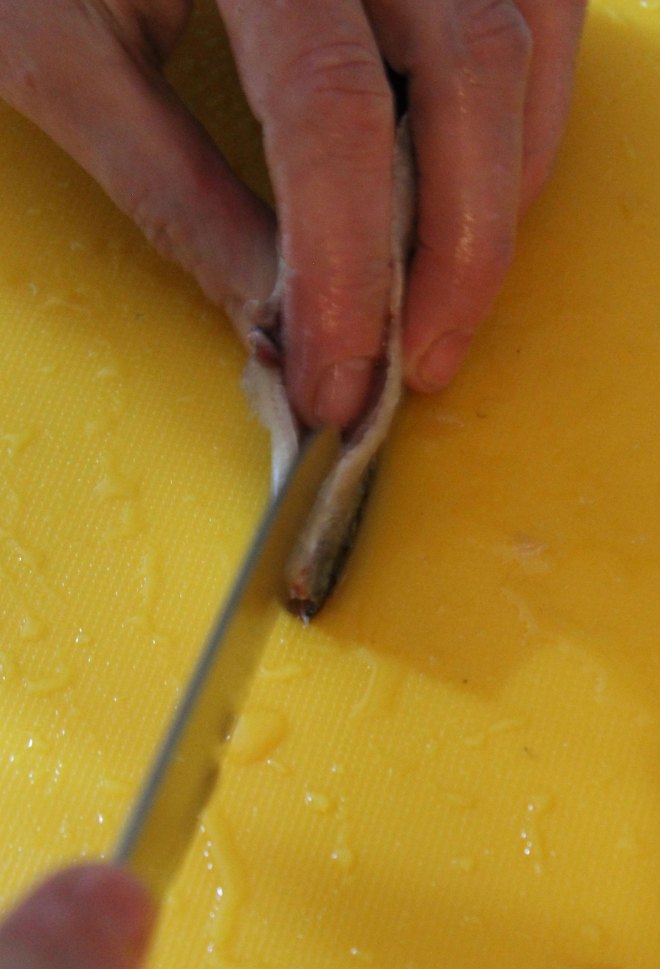
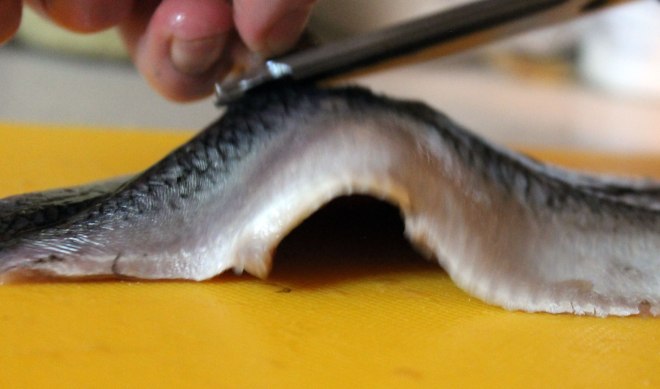
So I took my fish and I used my paring knife to slit it down from the open cavity towards the tail, cutting right down to the backbone:

herr15

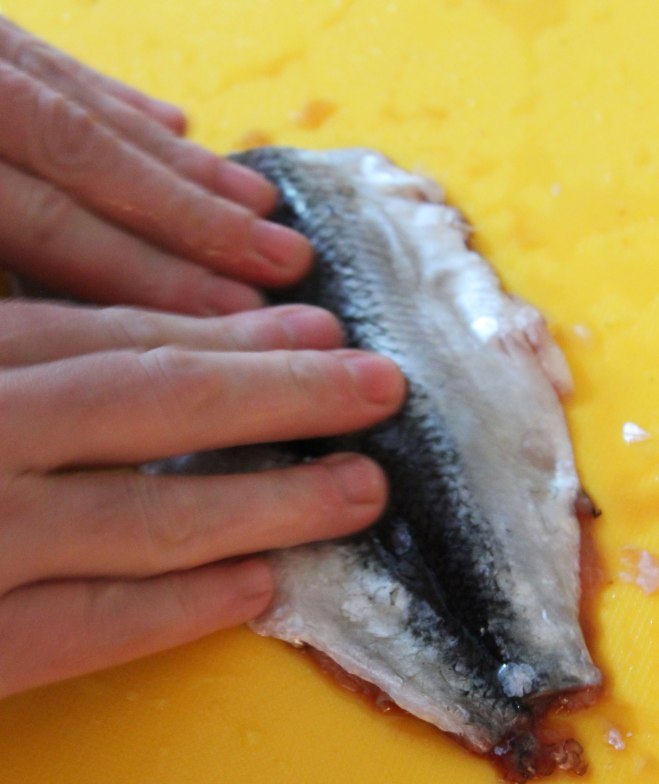
Then I inverted the fish so that it was belly-down on the cutting board and it’s stomach flaps were spread out.  Press down hard along the backbone of your fish, squashing it flat:

herr13

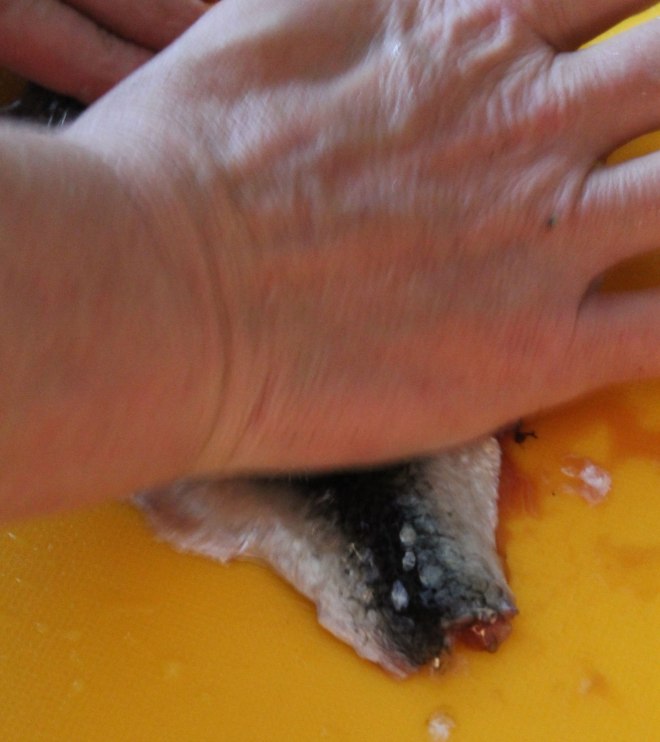
You might need to use the heel of your hand to do this:

herr14

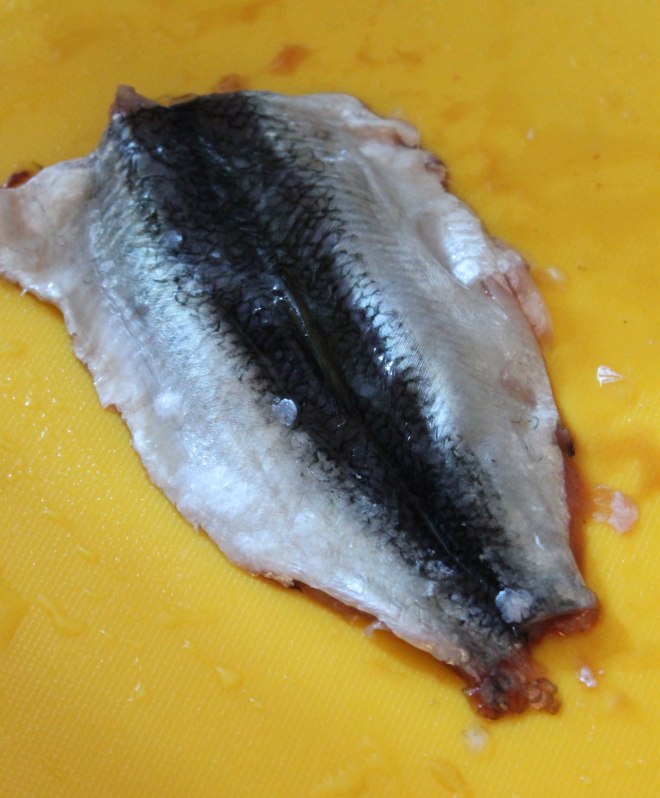
The flatter you get your fish, the easier it will be to remove the backbone:  Get it as flat as you can! Do you see those scales on the cutting board?  I obviously didn’t de-scale this fish well enough!

herr12

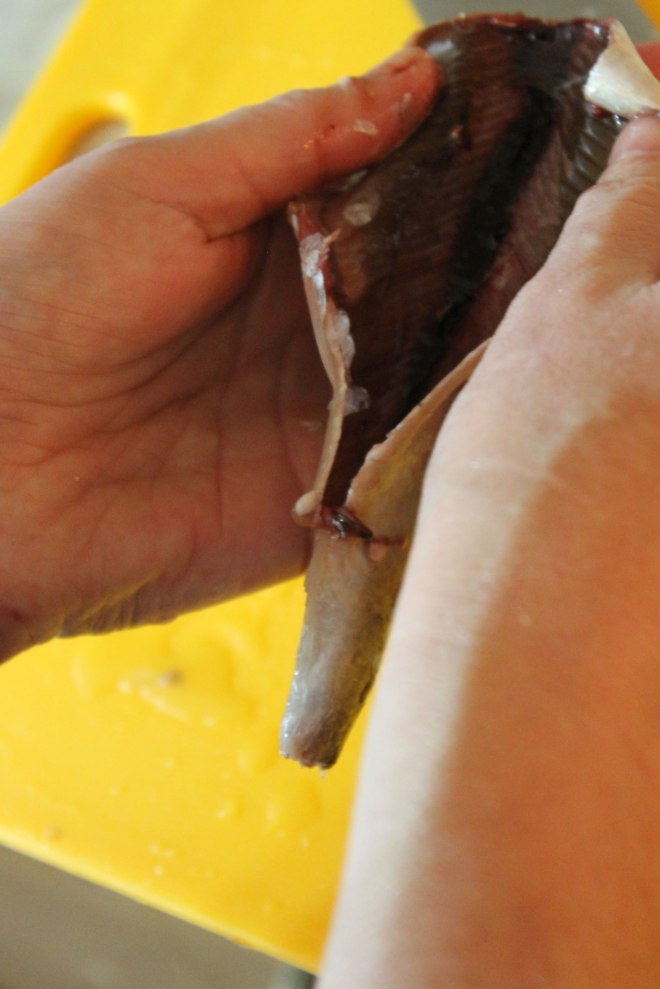
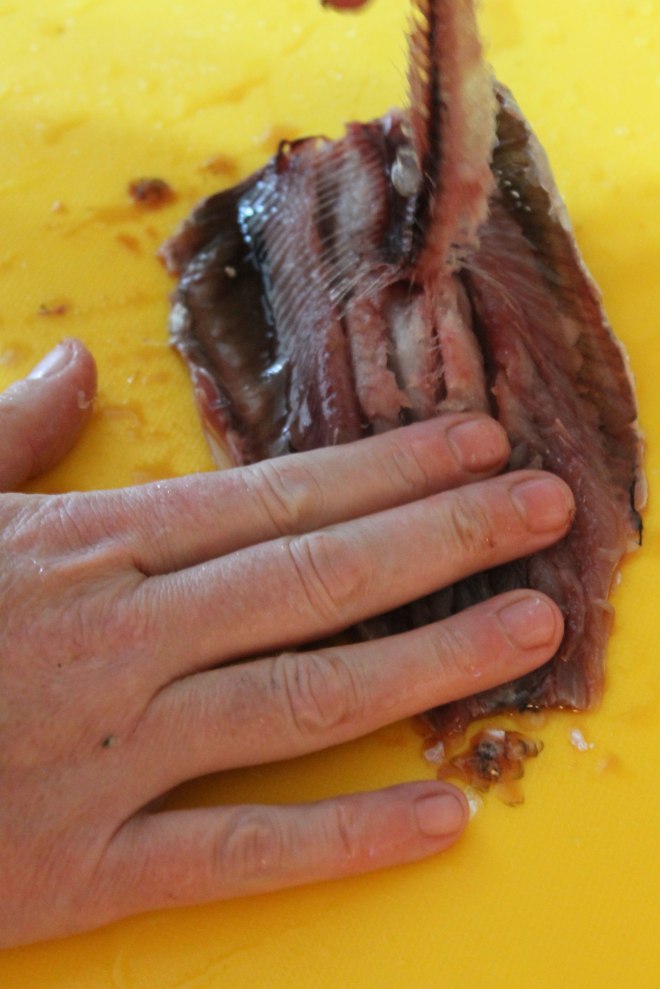
Now turn the fish over so the open side is uppermost.  Take hold of the tail end of the backbone and peel it out…  most of the ribs should come away with it.

herr11

If it does not come away easily, you didn’t squash the fish enough, so turn it back over and squish it some more!

What you will end up with is something that looks a bit like this:

herr26

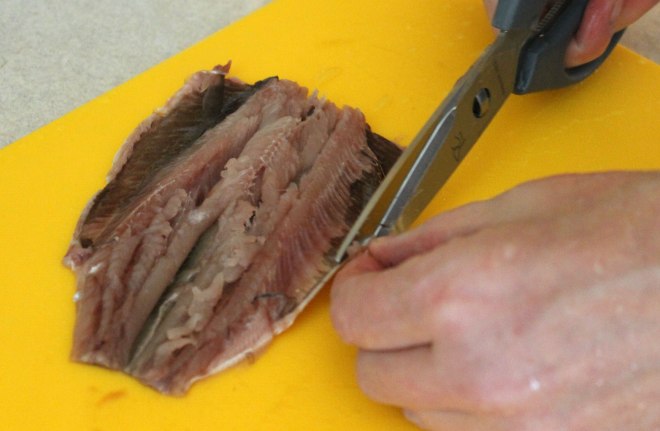
Now you just need to trim off any fins.  A pair of scissors is easiest for this.

herr6

On herring, there are usually 2 sets left after you cut off the head – one set along the edges of the belly which I am removing in the picture above, and one set along the back, which I am removing in the picture below:

herr1

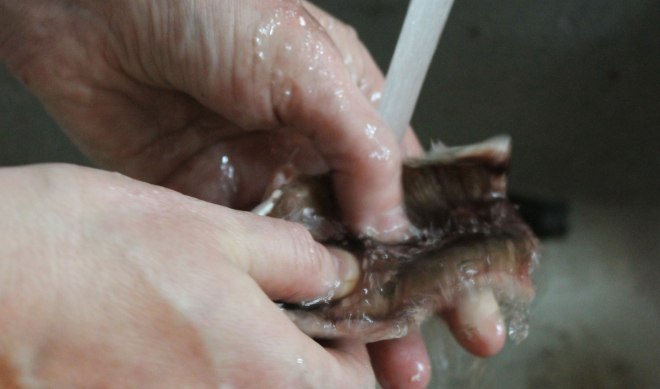
Give the entire fish a quick wash to make sure that there are no stray scales hanging around, and you are done!

If your fish is small, just leave it with the 2 halves attached, but if it is on the larger side, you can divide it into 2 fillets…  your choice….

Congratulations!  you have just prepared your first whole fish…..

Now cook and eat and enjoy!

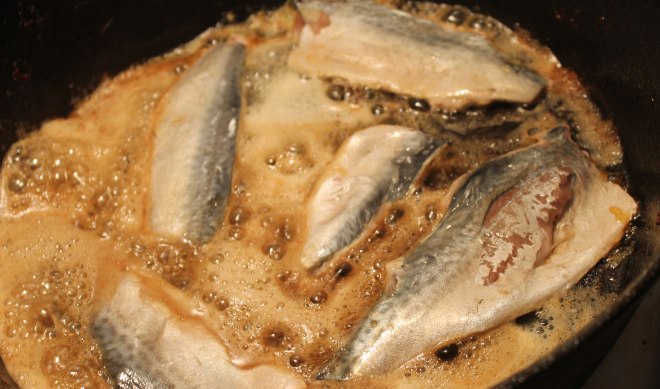
I like my fish cooked very simply.  Most often I just fry them in a little coconut oil:

mack9

The fish in the picture above are actually mackerel.  I didn’t think to take a picture of the herring that I was cooking.

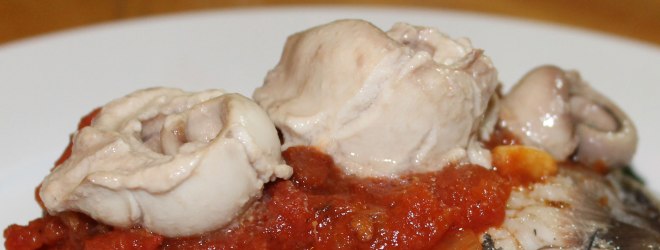
As far as the roe goes, soft roes (milt) I just briefly pan-fry in a little coconut oil.  They will curl up into a cute spiral shape and have a very creamy texture.  I serve these on top of the fish:

herr33

You could also save them and mix them into your scrambled eggs at breakfast.  That would be delicious!  But I am just not that organized.  I have considered blending them into a sauce as well…  I bet that would work well!

As far as the hard roes (or true roe) goes, I remove the membrane that surrounds the sac, and I just use them in anything that I would normally use fish eggs for (sushi, sashimi, stirred into scrambled egg).  I don’t tend to cook these, they are better raw so that you can appreciate that little “pop” and burst of fishy salty goodness as you bite into them.

I hope this post will give you the confidence to start gutting and prepping whole fish as it is really very easy if a little time-consuming.

And if your hands smell “fishy” afterwards, there is a really simple tip for getting rid of that….  just wash your hands in your stainless-steel sink and rub the surface of your hands all over the metal…  I don’t know why it works, but it does!   Sadly this will not work if you have a non-stainless-steel sink….

Goat Meat Curry

I love goat meat – part of it I think stems from when I used to keep goats…

My parents had a sheep farm, and growing up around animals meant that I wanted some of my own…  When I was about 15 years old I plucked up the courage to bid on a couple of female goat kids at the Hawes Farmers Auction Mart, and I won!  I paid for those 2 tiny goat kids with my allowance (we called it pocket money back then in the UK) and I raised them up to full grown nanny goats.

Then I found someone with a billy goat and got them pregnant….   My original 2 nannies gave birth to a couple of kids each – all nannies, and I started milking the mama goats – not too much, I didn’t want to deprive the kids – but just enough to provide some milk for us to use.

And from that point my goat obsession took over…

I realized that I needed a billy goat of my own if I was to be serious about breeding and keeping goats…

Enter Gruff – my pedigree Angora Billygoat… (yes it is sad…  I owned a billy-goat called Gruff!)  he was gorgeous and expensive,  but stank to high heaven.  But his offspring more than paid for the expense of purchasing him!

By the time I was in my last year of secondary school (ie high school for the US readers), at 18 years of age, I had 15 nanny goats, one billy goat (Gruff) and I was hand-milking 8-9 goats twice a day – once before school, once after (each milking session took around 2-3 hours in total).  I was supplying several local businesses (including my parents bed and breakfast guesthouse) with fresh goats milk.  I also sold the female offspring for premium prices as they were half-breed angoras, great for milking and for producing angora wool (mohair)….  and of course I sold some of Gruff’s mohair…  Some I also used myself.  I still have a Gruff-scarf that I made – mohair that I harvested from my own goat, spun by myself on my spinning wheel, dyed by myself (in shades of blue and pink) and then I knitted it into a very long scarf….  I even showed him at various agricultural shows….  never won anything, but it was an experience!  I was also charging stud fees for Gruff to mate other peoples female goats.

Of course keeping goats and breeding them means that you have to deal with the tricky issue of what to do with the unwanted male offspring…  there is a ready market for female kids – you can sell them at the auction mart, much like I bought my originals…  but male kids?  they are not wanted to the same degree…  yes Gruff’s offspring were valuable – they were half-breed angora…  but the males were not really worth the money of raising them and selling them was hit or miss.  Unwanted female kids could be sold easily however.  Normally, goat breeders kill the unwanted males at birth…  I didn’t want to do that.

What we used to do with the males was raise them up to adulthood (I used to foster them on to another goat who was also raising another male kid – a female goat can easily raise 2), slaughter them and put the meat in the freezer…  originally, the idea was that it would provide food for the stock dogs (being sheep farmers, my parents always had 3-4 well-trained border collie sheep-dogs).  But then we discovered that goat meat was pretty darn tasty if a little tough…  and from that point the dogs did not get a look in!

My one regret is that I have virtually no photographs from that period – it was before the days of digital cameras and cell-phones….

Anyhow, the aim of that long, long story is to explain my love of eating goat meat…

And the nice thing about goat meat is that it is almost always grass-fed.  Sure it may have a little grain finishing at the end, but goats don’t do well in CAFO type situations.  And the meat is very nutritious.

While it is very high in cholesterol, we know that dietary cholesterol is not implicated in raising blood cholesterol and it has been shown to not be linked to an increase in cardiovascular disease.  (1, 2, 3).  And in fact we actually need some cholesterol as it is used to make steroid hormones including testosterone, estrogen and progesterone.  And if we don’t eat enough in our diet, our livers will simply make more.

It is rich in protein, and relatively lean.  And is an excellent source of iron, B vitamins (mostly Riboflavin (Vitamin B2) Niacin (Vitamin B3),  and Vitamin B12), and is also a good source of phosphorus, copper, selenium and zinc.

So you can imagine why I was thrilled to find goat for sale at Basha foods at a really good price!

goatstew16

That price was for 3lb of goat meat…. the big question was, what was I going to do with it?

Goat Curry!  Going to university in Leeds led me to a love of curry, goat in particular (goat meat is cheap – and goat curry from a curry house was well within a students budget!)..

It was the obvious thing to make with my find from Basha Foods…

This recipe is an AIP stage 4 reintroduction because it contains chilli which is a nightshade.  When reintroducing foods on the AIP, I recommend this guide.

Goat Curry 

serves 6

goatstew5

3lb goat meat – cut into 1-2″ cubes (some of my goat was on the bone, some was just the meat)

2 tsp ground turmeric

sea salt and freshly ground black pepper

1 onion – peeled and chopped

1 bulb of garlic, divided into cloves (roughly 10 cloves), peeled and chopped

a 1″ cube of fresh ginger root – peeled and chopped

2 tbsp fennel seed

1 tbsp cumin seed

2 tbsp coconut oil

2 tsp hot chilli powder

1 tsp ground cinnamon

1 red chilli – chopped (I used a fiery hot habanero chilli for this!  Use a milder one if you don’t like the heat)

1 pint (2 cups) water

170g block of creamed coconut

1 lemon – juiced

Place the goat meat in a bowl and add turmeric, salt and pepper.

goatstew13

Mix well so that all the pieces of meat are coated in the spices and then sit it in the fridge for an hour or two to allow the meat to marinate.

Place the fennel and cumin seeds in a dry skillet and toast – they will smell much more aromatic once this is done. Do not allow them to burn.

goatstew14

Grind the toasted seeds to a coarse powder in a pestle and mortar

goatstew12

Place the onion, garlic, and ginger in a food processor and blend to a coarse puree.

goatstew15

Heat the oil in a large, heavy pan, and when hot add the onion/garlic/ginger paste.  Cook for 2-3 minutes before adding the toasted ground seeds, chilli powder and cinnamon.  Toss around and allow to cook for 2-3 minutes.  Then add the goat meat.

goatstew11

Toss that in the spice mixture, allowing it to cook slowly for 5-10 minutes.

Now you add the water.

Grate the creamed coconut and add that too.

This is the brand of creamed coconut I use:

coconutcream2

It is just pure coconut with no additives at all.  What it looks like when you open it is a large white block:

goatstew8

But by grating it, you can help it disolve in the liquid faster.

So grate that coconut and add it to your curry.

goatstew7

Next you need to deseed and chop your chilli.

I mentioned earlier that I used a really fiery hot habanero chilli for this curry because I was so disappointed with the heat of my last curry, the Pork Vindaloo.

habaneropepper2

Seeing that this was such a hot chilli, I made sure I wore a pair of vinyl gloves while chopping it.  Even then, some of the heat seemed to seep through the gloves because my fingers were still hot and spicy when I licked them!  I did wash them well afterwards, honest!

habaneropepper1

Toss that spicy baby into the curry and give it all a good stir.

Now you are going to let it simmer for 1 1/2 to 2 hours, stirring occasionally to prevent it from sticking on the bottom of the pan.  By the time it is done, the goat meat should be tender.

Add the lemon juice, stir well and serve with cauliflower “rice”

goatstew6

I used a cauliflower rice that I tossed with some spinach for this meal…

goatstew4

It was spicy, but not overly so…  just enough heat to give a pleasant tingle in your mouth.  And the flavour of fennel, cumin and cinnamon worked really well with it.

This is very definitely one I will be making again!