Beet Kvass & Lacto-Fermented Beets

This is another recipe in my cultured/lacto-fermented foods series.

And the best bit is that this is a 2-in-1 recipe.

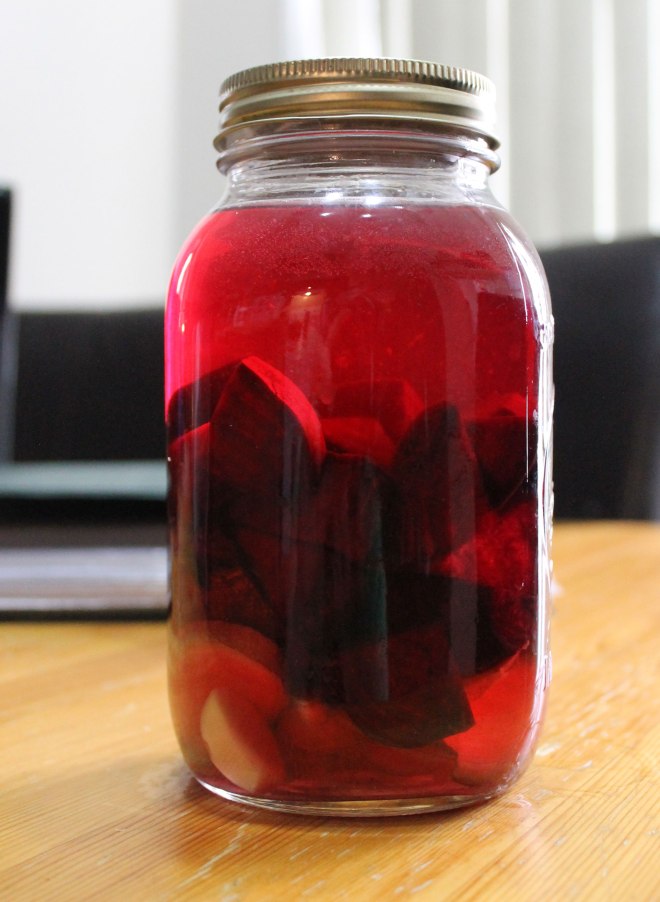
Not only do you get a wonderful probiotic beverage (the Beet Kvass), you also end up with some lacto-fermented beets that can be used in salads or as a condiment to provide yet more probiotics in your diet.

I love Beet Kvass – it has a slightly sweet, slightly salt, earthy flavour that is full of beet.

BK5

When you sip it, you can feel that it is doing you some good!

Beet Kvass is a cleansing tonic, that is good for many systems of the body.

Sally Fallon in Nourishing Traditions says: “This drink is valuable for its medicinal qualities and as a digestive aid. Beets are just loaded with nutrients. One 4-ounce glass, morning and night, is an excellent blood tonic, promotes regularity, aids digestion, alkalizes the blood, cleanses the liver and is a good treatment for kidney stones and other ailments.”

In addition to the cleansing nature of kvass, the finished drink is full of beneficial enzymes and probiotic bacteria as a result of the lacto-fermentation process.   As the beets ferment, the sugar and starch in the beets are converted to lactic-acid preserving the kvass and stopping it from going bad.

Regularly eating lacto-fermented vegetables, including beet kvass, will promote healthy gut flora, and greater absorption of nutrients from your food.

I add both garlic and ginger to my kvass for extra flavour and nutrition.  If you don’t like them or you cannot handle them in your diet, it will work just as well without.

This is another fairly quick ferment, taking less than a week on the counter top, but it does benefit from a week or two in the refrigerator to allow the flavours to mellow and even out.  It can be drunk straight off the counter however, but I think it is better to wait…

You do need dechlorinated water for this as chlorine will prevent the growth of the lactic-acid bacteria that ferment the beets.

The water you use can be dechlorinated in a number of ways – you can buy reverse osmosis filtered water or distilled water.  You can run your water through a household filter that will remove the chlorine.  You can leave it to stand on the counter-top for 24 hours, you can boil it for 20 minutes and then allow it to cool, or you can whir it in a blender for 5 minutes.  These last 3 methods will remove chlorine from the water but they will not remove chloramine.  Some municipalities have moved from using chlorine in their water supply to using chloramines.  These cannot be removed from the water, so it is important that you contact your water provider and check.  The city of Calgary does not use chloramines, so all of these methods work for me.

Beet Kvass and Lacto-Fermented Beets

Makes 1 quart-sized jar

BK7

  • 3-4 large beets
  • 1″ piece of root ginger
  • 2-3 cloves of garlic
  • 1 tbsp sea salt
  • dechlorinated water

Take the beets and wash them well – there is no need to peel.  Cut the beets into large chunks – I usually cut them into 8 wedges.  Slice the root ginger into thin slices – again, no need to peel.

Place the ginger and garlic in the bottom of a quart sized mason jar and add the beets.

BK4

Mix the sea salt with the water to make a brine and pour this over the beets to within 1″ of the top of the jar.

Seal and stand at room temperature for 2-7 days.  The ambient temperature will determine exactly how long the fermentation process will take.  Check the kvass each day, removing the lid to allow any gas to escape.

After a couple of days, it is also a good idea to taste a little – the kvass is ready when it is a deep red colour and there are a few small bubbles working their way to the top.  It should smell and taste earthy and salty and a bit like beets.  If your home is very warm, it could ferment in as little as 2 days, during the winter or if your house is colder, it could take up to a week.

bk3

Store the kvass in the refridgerator.  You can drink it straight away, but if you leave it for a couple of weeks, the saltiness will diminish and the flavours will keep getting better and better.

Some of the best kvass I have ever drunk was forgotten at the back of the fridge for around 8 weeks!

You can use the leftover beets to make a second batch of kvass – follow the directions above, using the beets, ginger and garlic, and adding more brine.

After the second batch of kvass, use the beets in salads or just eat them as a snack.

BK6

I love to grate the fermented beets and mix them with grated carrot and some green onion to make a fermented beet salad.

FBCS1

The Kvass can be drunk just as it is as a cleansing probiotic tonic.  It can also be added to salad dressings, soups or used as an interesting addition to a cocktail (it tastes wonderful when added to a Caesar!)

BK8

Shared at Gluten Free Fridays #98

Shared at Paleo AIP Recipe Roundtable #34

Shared at Homestead Blog Hop

How To Make Kombucha And Grow Your Own Scoby

Kombucha is a fantastic beverage. Naturally fermented, it contains large amounts of gut-friendly microbes (bacteria and yeasts).  In essence, it is a slightly effervescent drink made from fermented, sweetened tea.

While you can purchase kombucha from health food stores, this can work out as a very expensive option, especially if there are large amounts of people in your family.

For example, to purchase a 500ml bottle of GT’s Original Organic Raw Kombucha from Community Natural Foods in Calgary costs $3.87. Even if I were to share one bottle between 2 people, that would still mean buying 3 bottles at a cost of $11.61 to supply my family of 6. And if I were to do that every day, it would run to a cost of $81.27 a week!  $4226.04 a year!  Just for a healthy drink. I don’t know about you, but I can think of plenty of other things that I could spend that money on,

But Kombucha is very easy to make. All you need is some tea (black or green, your choice), a fermentable sweetener, you could use pasteurized honey (Raw honey is not recommended as it has an antimicrobial action that can affect the growth of your scoby),  coconut sugar, raw cane sugar or even regular sugar as the sweetener  See this post by the Paleo Mom about using sugar. And the final thing you need is a Kombucha Scoby, which contains all the bacteria and yeast cultures that will ferment your drink and be so good for your gut-health.  Scoby stands for Symbiotic Culture of Bacteria and Yeasts….  Essentially, a scoby looks a little bit like a lump of jelly.

kombucha6

You could use a scoby saved from your previous batch of Kombucha, but if this is your first time making this drink you will need to obtain one from somewhere.

You could consider buying one over the internet from sites such as Cultures for Health or KombuchaKamp.

Occasionally I have seen people offering scobys on Freecycle, and I have also seen them offered for sale on Kijiji.   You could also try craigslist.  But it is also possible to grow your own Scoby from a bottle of raw Kombucha.

Growing a scoby is as simple as picking up a bottle of raw kombucha, tipping half of it into a mason jar and adding the tea and fermentable sweetener of your choice. Make sure that the Kombucha is raw. If it does not specifically state “RAW” on the label, it may have been pasteurized which will have killed all those active cultures that will ferment your beverage and grow your Scoby.

I grew the scoby pictured above from a bottle of GT’s original unpasteruized (raw) kombucha.

GTkomb.

I used 2 green tea-bags that I brewed in 1 cup of boiling water and added 2 tbsp of sugar.  I covered this with a cloth held in place with an elastic band and left it on the kitchen counter until it was almost cold.  Then I poured in my kombucha (I used half a bottle and drank the rest).

Then I covered the mouth of the jar with a cloth to keep out any beasties and bugs, and I then stashed it in a cool, dark place to ferment. I kept mine in the pantry.

After a week or two, you will notice a jelly like mass in the liquid in the jar.

kombucha3

This is your new Scoby. Once the scoby is about 1/4 inch thick and more white than clear it is ready to use.

kombucha2

Carefully lift it out of the liquid and place it in a clean jar with a small amount of the Kombucha you have just fermented – just enough to keep it moist.

When you come to make a new batch of Kombucha, you take your Scoby and add it to a jar with some tea and fermentable sugars (I use 2 green teabags and 2 tbsp of unrefined organic cane sugar to a quart jar filled ¾ full of boiled water that is then allowed to cool to room temperature) , cover it and leave it to ferment.

Don’t worry if your scoby floats, sinks like a stone or even lies sideways in the liquid – I have had scobies do all of these, although mine mostly float (they seem to have some trapped airbubbles in them).  No matter what they do, they all ferment the sugars in the tea to kombucha pefectly well.

This time it won’t take as long. After about 7-14 days, you will notice a few bubbles in your mixture and there will be 2 scobies in the jar – the original one and a new “baby”.

Carefully lift these out and store them in some of the Kombucha. The remaining liquid can either be drunk as it is, or it can be sealed in a spring clip glass bottle for a few days. If you do this, it will become slightly fizzy.

You can also flavour it using fruits or fruit juice in a secondary fermentation.  This is more likely to make it develop fizz, and will add extra flavour.

To carry out a secondary fermentation, I transfer the brewed kombucha to a clean mason jar and I then add some fruit or fruit juice.

VBB3

Favourites of mine are:

  • mixed frozen berries
  • sliced citrus fruits (lemon, lime, orange, grapefruit – either individualy or as a mixture)
  • pineapple and mint
  • individual berries (saskatoon berries taste wonderful!)
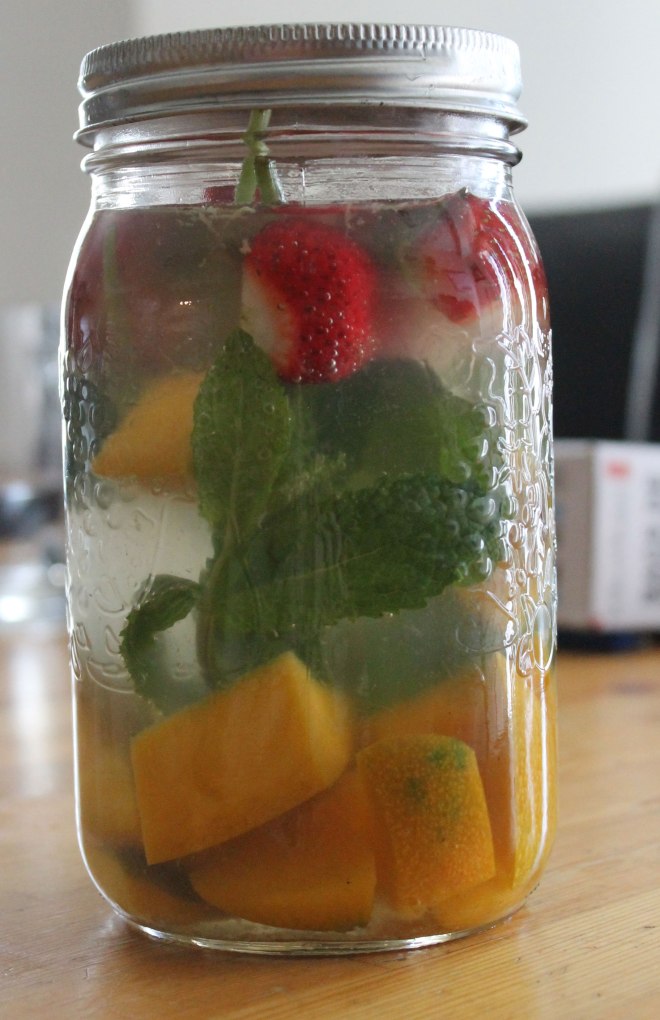
  • stawberries, mango and mint

SMMWK1

Try all of these or come up with your own combinations.

After carrying out a secondary fermentation in the mason jar at room temperature for 24-48 hours, you should strain your flavoured kombucha off the fruit (you may notice a substantial increase in the fizziness).  At this point I like to store it in a fliptop bottle in the fridge, but you could use any bottle that has a good seal or even another mason jar.

This is the kind of bottles I like to use – the one on the left is a flip-top one, the one on the right is an old GT’s kombucha bottle.

SWK3

Store your ready made Kombucha in the fridge and drink it within a week or two.

VBB2

At this point, you can now make 2 batches of Kombucha, resulting in 4 scobies. And they will keep doubling up in this fashion.

The scobies can be stored in the liquid in the fridge for a few weeks. But if you notice an unpleasant smell, your Scoby may have died, so throw it out and start again. If you keep a constant batch of Kombucha on the go you shouldn’t run into this problem most of the time, although I have had the odd batch where one Scoby has died for no apparent reason.

When you have more scobies than you can cope with, you could consider offering them on Freecycle, so that others can benefit from this healthy, delicious drink.

But an alternative use that I came across the other day is to dry the scobies out to use as dog-treats….that way your pooch can also benefit from some gut-friendly bacteria.

BK2

Happy fermenting……

Shared at Real Food Wednesday 7/2/2014

Shared at Allergy Free Wednesday

Shared at Thrifty Thursday

Shared at Pennywise Platter Thursday 73

Lacto-Fermented Gingered Carrots

Lacto-fermented vegetables add not only gut-healthy prebiotic bacteria, but also the vitamin-rich vegetables.  And they provide attractive colour, a salty-sour tangy taste and an appetizing crunch to meals. I like to include some kind of lacto-fermented food in every meal I serve.

These ginger-flavoured carrots are one of our favourites.  The have a great crunch, a pleasant saltiness that is tempered with some acidic sharpness, and a subtle ginger flavour. I like to pack these in lunch boxes, to serve them as a snack with a dip or to chop them up and include them in salads.

To gain the most benefits from the gut-friendly bacteria, you really do need to serve these raw and cold.  Think of them as crunchy, salty, sour carrot sticks.

You can obtain the un-chlorinated water in a number of ways – you could run your water through a water filter that will remove chlorine.  You could leave the water on the counter-top for a day or two (but be aware that a number of municipalities are now using chloramines in the place of chlorine to sterilize their water – chloramines will not dissipate over time, unlike chlorine.  Call your water provider to ask if they use them).   You could whirl your water in a blender for a minute or two do “de-gas” it (this does not work for chloramines), you could boil it for 10 minutes (again does not work for chloramines).  You could use bottled, reverse-osmosis filtered water.   Or you could do what I do, and not worry too much about it….  I have never had a fermentation fail due to using tap water!

Don’t be afraid of the salt – the carrots really do not absorb all that much of it – they just have a pleasant salty-sour taste from the salt-solution they were cultured in that remains on the outside.  If salt is an issue for you, please do not try to reduce it (it is there to prevent the growth of harmful bacteria), simply rinse the brine off the carrot sticks before eating them.  You may reduce some of the beneficial bacteria by doing this, but most will remain.

I recommend that you use organic carrots to make these – carrots can absorb toxins from fertilizer use that they store in their skin.  If you have to use regular, grocery-store carrots peel them first as that will remove most of the toxins.

Lacto-Fermented Gingered Carrots

makes 1 quart mason jar

gc1

  • 1lb organic carrots (4-5 medium carrots)
  • 1″ piece of fresh root ginger – thinly sliced into rounds (no need to peel)
  • 1 tbsp sea salt
  • filtered/de-chlorinated water as needed

Wash your carrots well and remove the ends.  Peel if using non-organic carrots.

Cut the carrots into sticks.

Place the ginger and salt in the base of the jar then pack the carrot sticks in tightly.  I like to hold the jar on it’s side and slide the sticks in one by one, filling in any gaps so that all the carrot sticks stand vertically.  You want them so tightly packed that nothing can float to the surface.  Use an extra carrot if necessary.

Pour the water over the carrots so that they are all covered by at least ¼” of water.  The water level should be less than 1″ from the top of the jar. Seal with a lid.  Give a quick shake (gently – you do not want to dislodge any of those carrots!) to dissolve the salt.

Check once a day, loosening the lid to allow any carbon-dioxide build-up to escape. After 3-7 days store in the refrigerator. The best way to judge whether these are ready is to taste one.  If it tastes good to you – pleasantly sour-salty, it is ready.  If not, allow it to ferment for a few more days.

The carrots will continue fermenting in the refridgerator but it will be much slower.  Eat the carrots within a week or two and they should stay crunchy.

If all the carrots are fully submerged in the brine you should not get any mold growth.  But in the unlikely event that you do (most often caused by a stray carrot or piece of ginger floating to the surface) discard the entire jar. Mold most often looks fuzzy and can be white or colored (blue, yellow, green).

Shared at Paleo AIP Roundtable #28

Lacto-Fermented Food

In my drive to feed our family more probiotic rich food, I spent the afternoon making a range of foods and pickles.

pickles3

So far, I have made:

  • 1 quart jar of sauerkraut using white cabbage
  • 1 quart jar of sauerkraut using a red cabbage
  • 1 quart jar of lacto-fermented salsa
  • 1 quart jar of ginger carrots
  • 1 quart jar of  lacto-fermented beets/beet kvass
  • 1 quart jar of ginger-garlic radishes
  • 1 quart jar of kimchee
  • 1 small jar of honey-fermented garlic
  • 1 quart jar and 2 pint jars of pickled watermelon rinds
  • 2 quart jars of lacto-fermented lemonade.

Not bad for an afternoon’s work!

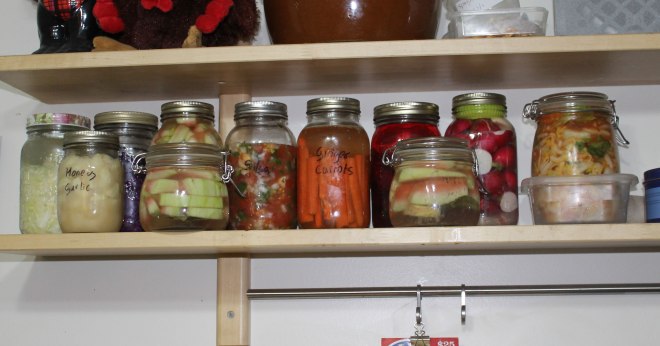
And this is what it all looks like lined up on my fermentation shelf:

pickles4

The lemonade is not shown in this pic as it is located on the bookshelf below the water kefir:

fl1

And then I have my usual 3 jars of water kefir and 4 jars of kombucha that I maintain…

Lots and lots of fermented goodies!

Lacto-fermented Cucumber Relish

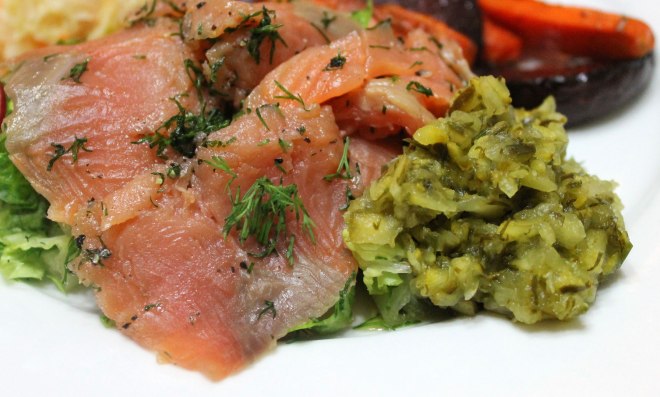
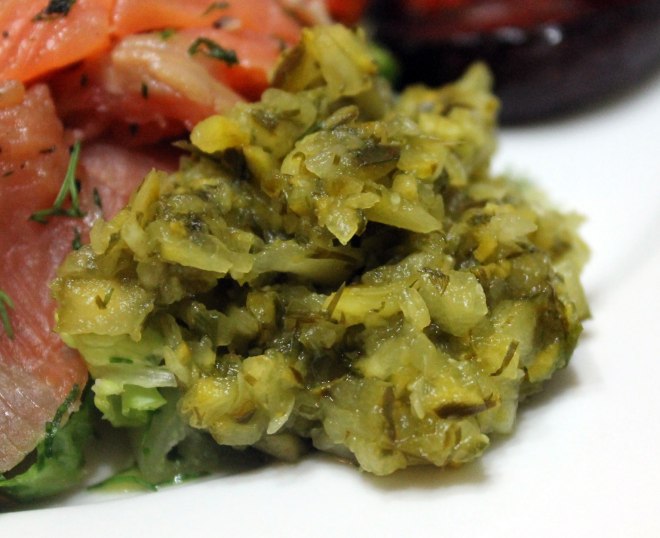
This is the relish that I served with the Gravlax that I posted about earlier.

LR3

It is very simple to make, and contains lots of gut-friendly probiotics.  It has a pleasant tangy, slightly sour flavour rather than the sharp vinegar flavour that a lot of conventional, vinegar containing relishes have.

Unlike a lot of lacto-fermented relish recipes that you will find, this one does not contain whey or any other starter culture.  (most add whey as a starter to get the fermentation going quicker).  While this means that this recipe may take a little longer to ferment, whey is not paleo, and is an allergen to a lot of people.

This recipe is not only paleo, it is also AIP friendly.

It is very good with gravlax, but is equally good with any other fish.  And it would be perfect paired with hot-dogs, sausages or burgers, or anything else that you want a tangy relish along side.

Lacto-Fermented Cucumber Relish

makes 1 pint-size mason jar full

LR1

  • 2 large cucumbers
  • 2 tbsp fresh dill
  • 1 tbsp sea salt

Wash the cucumbers under running water but do not scrub them.

Chop the cucumber finely – the easiest way to do this is to use a food processor.

Chop the dill and mix it into the cucumbers along with the salt.

Pack the mixture into the mason jar, pressing down firmly to extract as much liquid as possible.  You want to make sure that the liquid covers all of the cucumber to avoid mold forming.  If there is not enough liquid, add a little filtered water until it just comes just above the level of the cucumber.

Cover the jar tightly with a lid, and leave in a warm place for 2-5 days, releasing the lid slightly once each day to allow any gasses to escape.

Start tasting the relish after the second day.  It is ready when it tastes tangy and good to you.

Store the finished relish in the fridge.  It will keep several weeks (if it lasts that long!), and will gradually get more sour over time.  Refrigeration will slow down the fermentation process but will not stop it completely.

LR2

Shared at Allergy Free Wednesday #114

Shared at Paleo AIP Recipe Roundtable #24

Shared at Full Plate Thursday 4-24-14

Shared at Real Food Friday #35

Shared at Whole Food Fridays 4-25-2014

Shared at Natural Living Mondays #72

Shared at Mostly HomemadeMondays # 78

Shared at Fight Back Friday May 2nd


Lacto-Fermented Watermelon Rind Pickles

At this time of year watermelon are cheap..   heck they are often offered free as part of a “buy this value of groceries and you get a free watermelon” deal at the grocery store I shop at (The Superstore in Coventry Hills Calgary).

Because they are so cheap, and my kids love them, we do eat a fair amount of watermelon (B calls them “Water-lemon” btw….).

Once you have eaten all the yummy watermelon flesh you are left with a big pile of rinds and it is such a pity to toss it in the garbage.

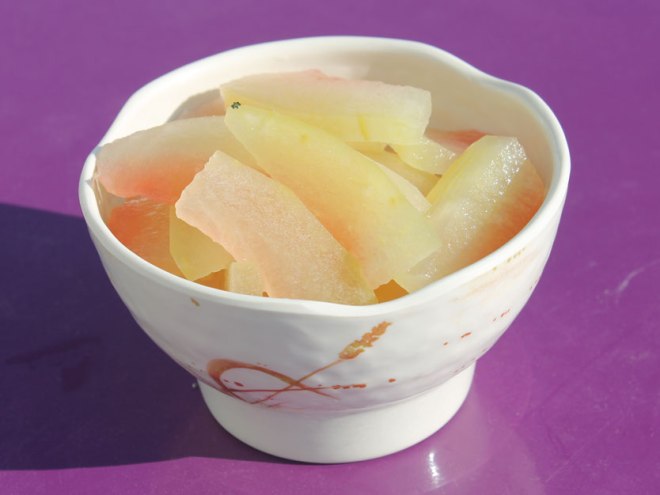
So what I do is turn them into lacto-fermented watermelon pickles…

I found the recipe on the internet originally and tweaked it to lacto-ferment it and make it less sweet.

This was the recipe I originally used to use, which as you can see is not paleo at all.  And it is not as healthy as traditional lacto-fermented recipes.  I wanted an easy way of getting some “gut friendly” bacteria into our diets.

So this is what I came up with…..

Lacto-fermented Watermelon Rind Pickles

makes lots!

watermelonpickle1

Ingredients

Watermelon rind (try to leave some of the pink flesh on the rind when cutting out the watermelon – it looks pretty)

Sea salt (I use a greyish coloured unrefined salt)

Filtered water (the chlorine in tap water will prevent the the bacteria in the culture you will be adding from fermenting the rinds).

whole spices (optional) – I usually use a mix of cinnamon sticks and cloves.  Sometimes I will also add bayleaves to the jar as well).  And occasionally I will add some ginger or garlic.

And this is what you do…

Peel the green rind from the outside, leaving only the white part of the rind.  This is easiest done with a potato peeler.  Cut the rinds into narrow strips.

Make a brine by dissolving the salt in water – about 2 tbsp to a liter of water seems to be about right.

Mix the strips of watermelon rind with the spices and pack them quite tightly into wide mouthed mason jars.  leave about an inch of headroom and then pour over the brine to cover.  Place a lid from a narrow mouthed mason jar on top (they fit quite nicely) and that will help hold the pickles under the brine.  Seal the jar loosely so that any gas that is produced can escape and leave them on the kitchen counter for about 3 days.

By this time they should be producing a few bubbles.

Transfer the jars to the fridge and eat…

They will last quite a few months but will get softer as time passes.

Shared at Full Plate Thursday 5-15-14

Shared at Thrifty Thursday Week 60